Common Content for Data Integration
- Common Content for Data Integration 10.5.1
- All Products

Port
| Description
|
|---|---|
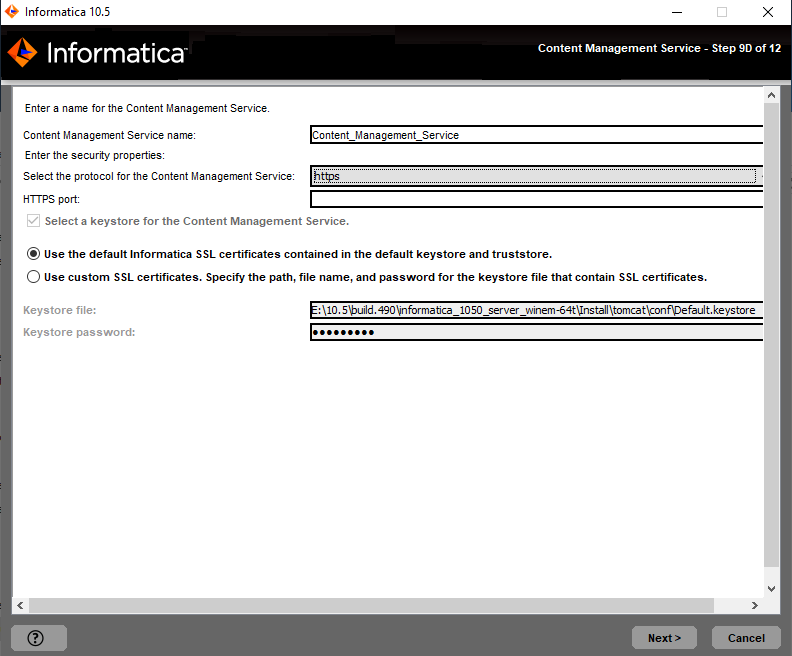
Content Management Service name
| Name of the Content Management Service to create in the Informatica domain.
|
HTTP Protocol
| Type of connection to the Content Management Service. Select one of the following options:
|
HTTP Port
| Port number to use for the Content Management Service. Default is 8105.
|
Option
| Description
|
|---|---|
Use the default Informatica SSL certificate files
| Use the default SSL certificates provided by Informatica.
If you do not provide an SSL certificate, Informatica uses the same default private key for all Informatica installations. If you use the default Informatica keystore files, the security of your domain could be compromised. To ensure a high level of security for the domain, select the option to specify the location of the SSL certificate files.
|
Enter the location of the SSL certificate files
| Use the SSL certificates that you provide. You must specify the location of the keystore files.
|
Property
| Description
|
|---|---|
Keystore file
| Required. Path and file name for the keystore file that contains the private keys and SSL certificates for the database.
|
Keystore password
| Required. Password for the keystore file for the secure database.
|

Property
| Description
|
|---|---|
Database type
| Database for the reference data warehouse. Select one of the following databases.
|
Database user ID
| User account for the reference data warehouse database.
|
User password
| Password for the database user account.
|
Property
| Description
|
|---|---|
Tablespace
| Name of the tablespace in which to create the tables. Specify a tablespace that meets the pageSize requirement of 32768 bytes.
In a single partition database, if this option is not selected, the installer creates the tables in the default tablespace.
In a multipartition database, select this option and specify the name of the tablespace that resides in the catalog partition of the database.
|
Property
| Description
|
|---|---|
Schema name
| Name of the schema that will contain the repository tables. If not selected, the installer creates the tables in the default schema.
|
Trusted connection
| Indicates whether to connect to Microsoft SQL Server through a trusted connection. Trusted authentication uses the security credentials of the current user to make the connection to Microsoft SQL Server. If not selected, the installer uses Microsoft SQL Server authentication.
|
Property
| Description
|
|---|---|
Database address
| Host name and port number for the database in the format
<host name>:<port number> .
|
Database service name
| Service or database name:
|
JDBC parameters
| Optional parameters to include in the database connection string. Use the parameters to optimize database operations for the database. Verify that the parameter string is valid. The installer does not validate the parameter string before it adds the string to the JDBC URL. If not selected, the installer creates the JDBC URL string without additional parameters.
|
