Create Hierarchy Builder transformations to transform source relational database data to XML data. Create a transformation for each type of outbound message that you want to map.
Add a
Hierarchy Builder
transformation to the mapping canvas and connect the last transformation that you created for the relevant message type to the
Hierarchy Builder
transformation, that is, the
Source
,
Filler
, or
Expression
transformation that you created for the message type for which you are adding the
Hierarchy Builder
transformation.
In the
Properties
panel select the
Output Settings
tab and then click
Select
.
The
Select Schema
dialog box shows.
Select the schema of the message type to add to the outbound flow and then click
OK
.
Click the
Field Mapping
tab and, in the
Relational Fields
area, define the relationships between the tables. Assign the following keys to the source tables:
For each table, define the primary key.
For the table that contains the source details, define a foreign key that points to the master source table.
If your schema contains a single master table and a single source details table, the
Hierarchy Builder
transformation creates a file for each master table row. In this case, perform the following tasks to create all table rows into one hierarchy and add the hierarchy to the transformation:
Add a new source table to the transformation, and assign it a primary key.
In the master source table, for every table row, assign a foreign key that points to the primary key of the new source table.
Map the new source table from the
Relational Fields
area to the following element in the
Hierarchy Fields
area:
EDI X12 messages:
interchanges
element.
EDIFACT messages:
interchange
element.
Configure field mappings for the master table:
Map the master table from the
Relational Fields
area to the following element in the
Hierarchy Fields
area:
EDI X12 master table:
Interchange
element.
EDIFACT master table:
Loop_UNG
element.
See
PO
in the sample field mappings below.
Map the EDI data fields of the table from the
Relational Fields
area to the required EDI segments in the
Hierarchy Fields
area.
Configure field mappings for the details table:
Map the table from the
Relational Fields
area to the relevant loop in the
Hierarchy Fields
table.
Map the EDI data fields of the table from the
Relational Fields
area to the required EDI segments in the
Hierarchy Fields
area.
For details, see the "Hierarchy Builder Transformation" section of the
Data Integration Transformation Guide
.
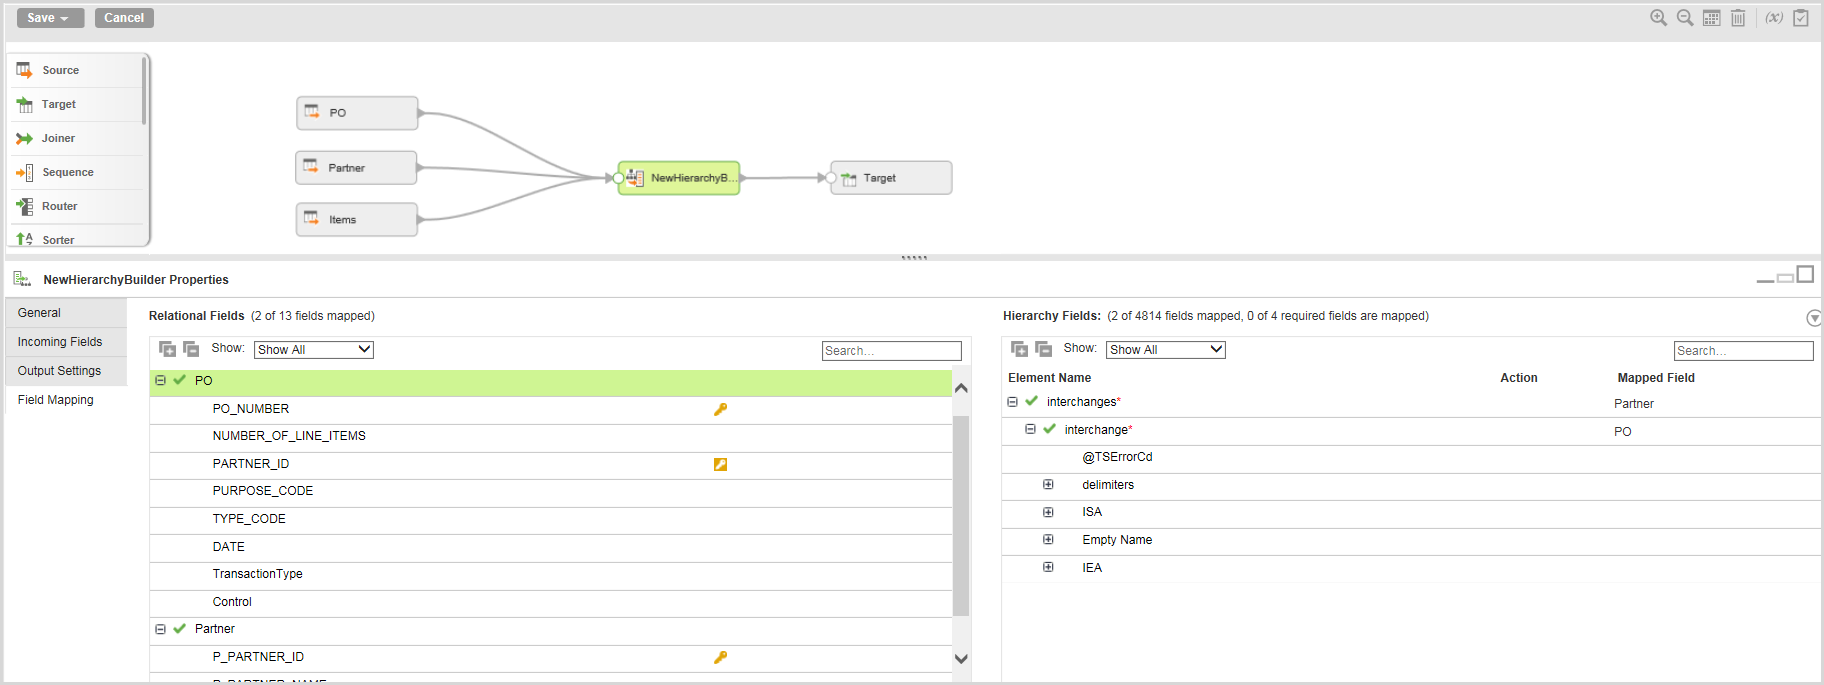
The following image shows sample field mappings for EDI X12 messages: