Table of Contents

Search

  1. Preface
  2. Introduction to Portal Configuration Tool
  3. Getting Started with the Portal
  4. Creating a Portal
  5. Adding Pages to Portal
  6. Managing a Portal
  7. Localizing a Portal
  8. Deploying a Sample Portal

Portal Configuration Tool Guide

Portal Configuration Tool Guide

Configuring a Wizard Component

Configuring a Wizard Component

Use the wizard component to create a series of steps containing fields. You can associate a business process with the wizard that dictates the possible actions that a portal user can perform on the wizard. For example, you can associate a business process that requires the portal user to fill in the fields, provide comments, and then submit the filled in information for a review process.
  1. Add a wizard component to a section of a custom page.
    The wizard component is added to the page.
  2. Click
    Settings
    .
  3. On the
    General
    tab, configure the following settings for the page:
    Field Name
    Description
    Title
    Display title of the wizard. For example, Registration Form.
    Dimension Style
    Height of the wizard panel.
    Use one of the following options:
    • Fit to Content. Adjusts the height automatically based on the content.
    • Custom. Sets the height based on the value you specify.
    Height
    Size of the wizard in pixel.
  4. On the
    Component
    tab, configure the following settings:
    Field Name
    Description
    Associated Task
    Name of the task that you want to associate with the wizard. The portal user can perform the actions associated with the task. For example, AVOSBeDraftState.
    Default Action
    Default action to display on the wizard. For example, Submit.
    Logout Actions
    Comma-separated list of actions to log out a portal user after the user performs one of the specified actions.
    Business Entity View
    Business entity view for the wizard.
    Overview step
    Indicates whether you want to have an overview page for the wizard. Select this option to include an overview page.
    Show Comments
    Indicates whether you want to include the comment option in the wizard. You can configure the task associated with the wizard to make the comments mandatory.
  5. To add a step, click
    Add a step
    .
    A step is added.
  6. Enter a title for the step.
  7. Enter a name for the section.
    If you want to hide the section name, select
    Hide header
    .
  8. From the list of available fields, select a field that you want to add to the section, and then click
    Add
    .
    Repeat the step to add more fields. If you want to add all the fields, click
    Add All
    .
    To know more information about how to configure field properties, see the Configuring Field Properties topic.
  9. To add more steps, repeat steps 5 through step 8.
  10. After you add all the required steps, click
    Save
    .
    The wizard is created.
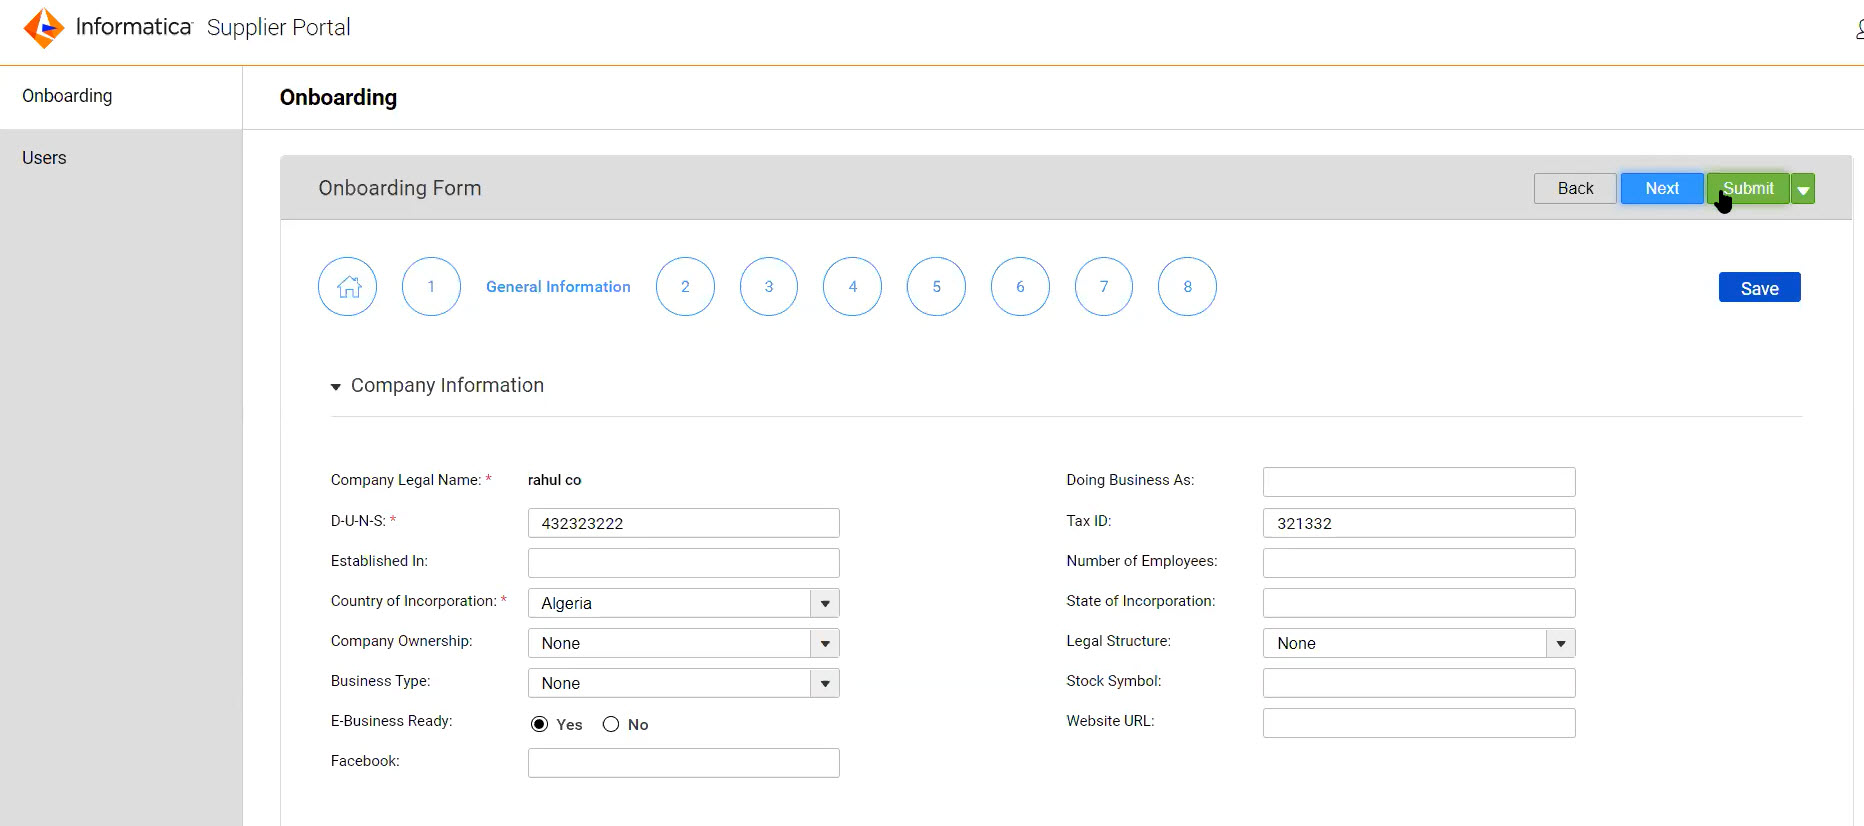
    The following image shows a sample of a wizard in a portal: The wizard contains steps with fields that you configure.

0 COMMENTS

We’d like to hear from you!