Getting Started

Getting Started

Part 10: Creating a Form to Run the Process

Part 10: Creating a Form to Run the Process

To start at the beginning of the tutorial, see Introduction to Process Developer Tutorial .
If you have followed all tutorial parts so far, you have deployed a BPEL process to Process Server.
After deploying the process to the Process Server, you must deploy the partner services, and then you can run the process by sending in a credit information request and getting back a response from the risk assessment or loan approval service.
After completing Part 10 of the tutorial, you will be able to:
  • View the Process Console in a workspace browser.
  • Deploy the Risk Assessment and Loan Approval services.
  • Create and deploy a process request form and Central Configuration file for Process Central.
  • Sign in to Process Central and send a request to the process and receive a reply.
Step 1: Open a Browser to View the Process Console
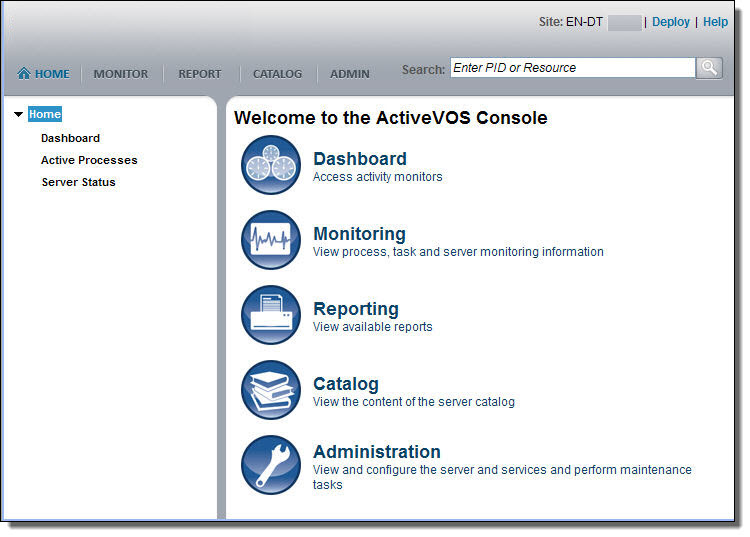
You can view deployment details for your processes in the Process Console.
  1. On the Process Developer menu bar, select the Process Console icon.
  2. The Process Console opens, using a URL of
    http://localhost:8080/activevos
    .
    Process Console
  3. On the menu, select Admin.
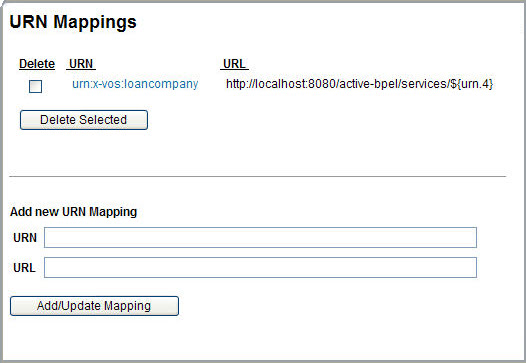
  4. Select URN Mappings. Notice that a URN to URL mapping is defined. This mapping is for the address of the Loan Approval and Risk Assessment services. (This URN mapping exists only in the embedded server in Process Developer. If you are deploying to a different server, such as JBoss, you will not see any pre-existing URN mappings. You must add them.)
    URN mappings
Normally you will add your own URN mappings. However, for the convenience of the tutorial, the partner role URNs were mapped to a URL for you.
Note:
Be sure that the host port 8080 in the URL is correct. If you selected a different port during installation of Process Developer, select the URN to open the URL for editing. Update the URL so that the host port matches your server host port.
Step 2: Deploy the Risk Assessment and Loan Approval Services
The Loan Approval and Risk Assessment services have been created as BPEL processes for the convenience of this tutorial, and they have already been packaged in a BPR file. You must deploy these services. Then, when you execute the tutorial process, one or both of these services will also execute. They will be invoked at the URL defined in the URN mapping.
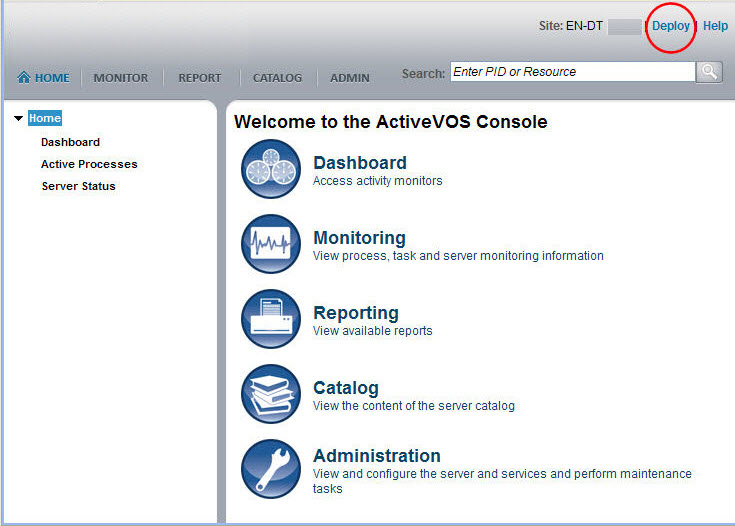
  1. In the Process Console, select Deploy as shown.
    Process Console with Deploy button call out
  2. In the Deploy dialog, browse to the following location:
    [Process Developer installation folder]\ Process Developer\workspace\Tutorial\ Partner_Services\riskAssessment.bpr
  3. Deploy this BPR, and select Deploy another resource and select the
    loanApproval.bpr
    .
You can view the deployed processes. Do this in the Process Console by selecting
Catalog
, and then
Process Definitions
. You will see the listing for the tutorial, risk assessment, and loan approval processes.
Step 3: Create a Process Request Form
You will now use Process Central to send a request to the process to start it. Process Central is a client application that contains forms, as well as other work items, such as tasks and reports.
  1. Select File > New > Process Request Form.
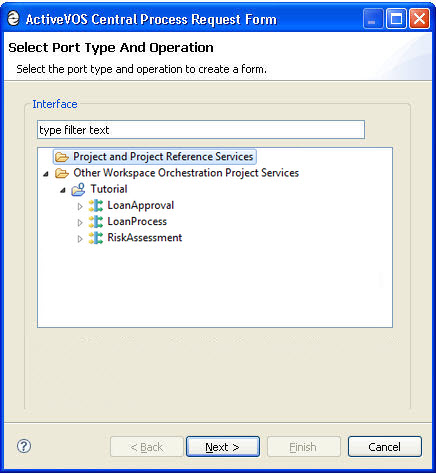
  2. In the wizard, select the request operation, which is the operation for the starting receive activity.
    Process Central Process Request Form
  3. Select Next and name the file
    tutorialRequest.html
    . Notice that the file will be added to a new folder called
    request
    . (This name is not related to the request operation. It is a generic name for all process requests that you may create for a project.)
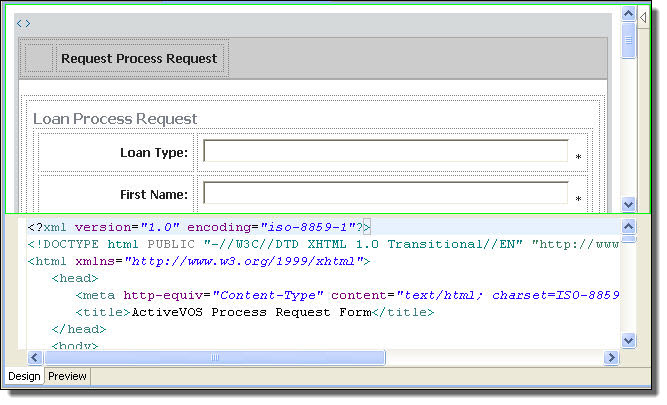
  4. Select Finish. Your process request form opens in the Web Page Editor, as shown.
    Web Page Editor
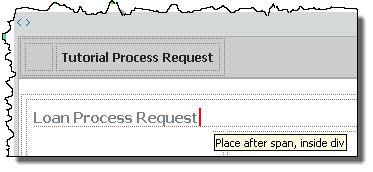
  5. Select the first occurrence of Request from the form title,
    Request Process Request
    and change it to
    Tutorial
    so that the title is
    Tutorial Process Request
    .
  6. Notice that the input message is in a table, and the title of the table is Loan Process Request. This title is based on the schema element of the message. We will change it to provide instructions for testing different paths in the process.
  7. Open the HTML Palette, and drop a table beside the input message header, as shown:
    Web Page Editor
  8. In code view, add the following HTML code between the
    <table></table>
    tags:
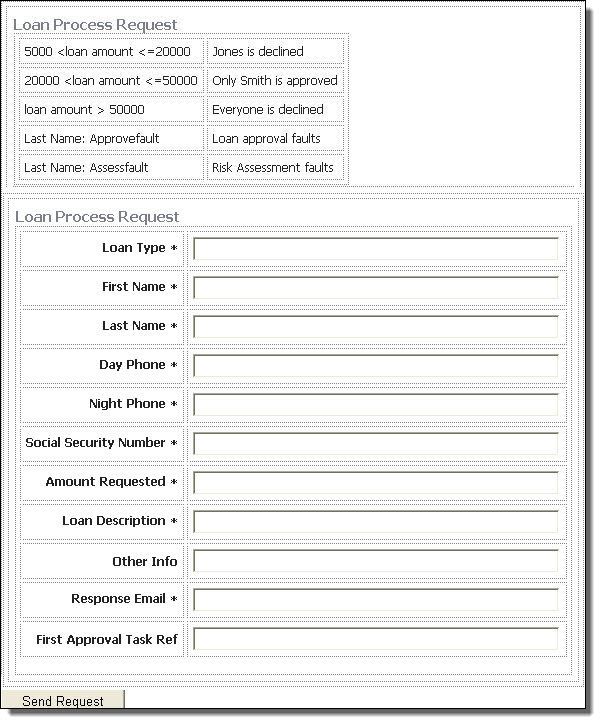
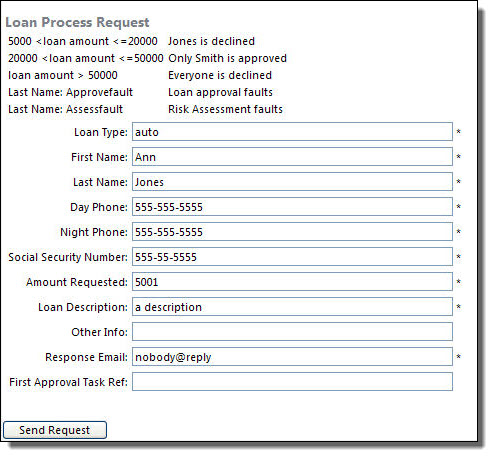
    <tr><td>5000 &lt;loan amount &lt;=20000</td> <td>Jones is declined</td></tr> <tr><td>20000 &lt;loan amount &lt;=50000</td> <td>Only Smith is approved</td></tr> <tr><td>loan amount &gt; 50000</td> <td>Everyone is declined</td></tr> <tr><td>Last Name: Approvefault</td> <td>Loan approval faults</td></tr> <tr><td>Last Name: Assessfault</td> <td>Risk Assessment faults</td></tr>
  9. In code view, your HTML code should be:
    Web Page Editor
  10. Your form should look like the following example:
    Web Page Editor Detail
  11. Save and close your form.
Step 4: Create a Central Configuration File
To deploy your form to Process Central, you must create a configuration file that contains deployment information about the form. The purpose of the configuration file is similar to that of a Process Deployment Descriptor.
  1. Select File > New > Central Configuration.
  2. Select the
    deploy
    folder for the location.
  3. Name the file
    tutorialRequest
    . The
    avcconfig
    extension is automatically added.
  4. Select
    Finish
    , and the file opens in an XML Editor.
  5. Select the Source tab to view the file.
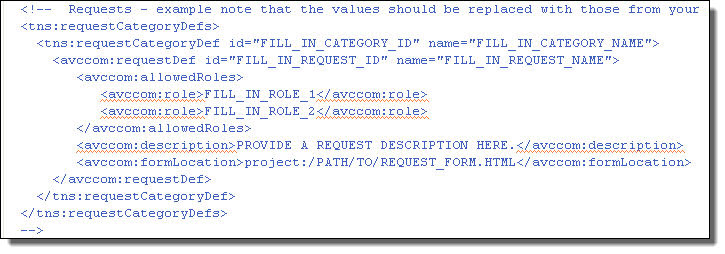
  6. Scroll down to the Requests section as shown.
    invoke request operation
  7. You need to uncomment the XML in this section. Add an HTML end comment tag (
    -->
    ) at the end of the Requests line, the top line shown in the illustration above.
  8. Remove the end comment tag at the end of the Requests section.
  9. Remove the
    <avccom:allowedRoles>
    section. There are four lines of code to remove.
    If you make a mistake, close the form, delete it from the deploy folder, and create a new form.
  10. Fill in the placeholder values exactly as shown. Note that the values are case-sensitive:
    <tns:requestCategoryDefs> <tns:requestCategoryDef id="education_category" name="Tutorial and Samples"> <avccom:requestDef id="tutorial_request" name="Tutorial Request Form"> <avccom:description> Submit loan approval request (basic tutorial). </avccom:description> <avccom:formLocation> project:/Tutorial/form/request/tutorialRequest.html </avccom:formLocation> </avccom:requestDef> </tns:requestCategoryDef> </tns:requestCategoryDefs>
  11. Save the file. Your completed file should look like this:
    SOAP response
Step 5: Re-deploy Your BPR Contribution
Now that we have a request form and a configuration file describing how to display it in Process Central, you can deploy the BPR contribution, because the Tutorial project was updated with new files. Each time you update your project, redeploy the entire project to keep your files together as a contribution unit.
  1. In the Project Explorer, select
    File > Export > Contribution-Business Process Archive
    .
  2. Do not change any values on the first page of the wizard.
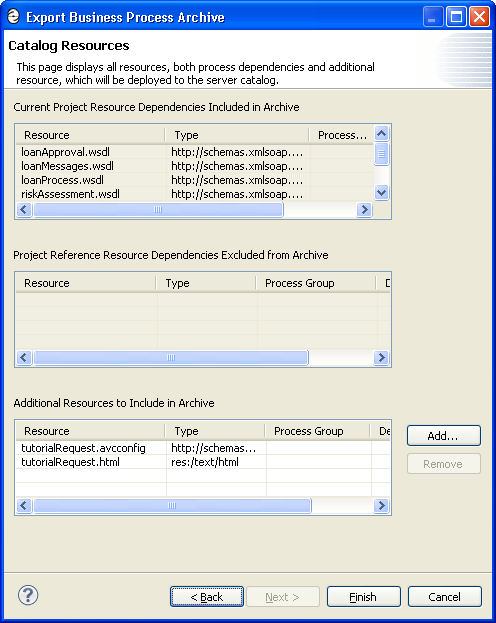
  3. Select
    Next
    . Notice that two new resources were added to the contribution:
    SOAP response
  4. Select Finish to deploy
    tutorial.bpr
    . On the server, you now have two contributions. The older one (version 1) is offline and the new one (version 2) is online.
Step 6: Open Process Central and Submit a Request
Process Central is a great place to test the different paths of your process.
  1. Ensure that the server is running and that you have deployed your BPR for your project.
  2. You can open Process Central from the Process Developer toolbar to view an embedded browser. To open a larger, stand-alone window, select the Open Web Browser button from the toolbar.
  3. In the Address bar, type in the following URL:
    http://localhost:8080/activevos-central
  4. In the Sign On screen, sign on with the following user name and password:
    Username: manager
    Password: manager
  5. In the navigation area underneath Home select Forms.
  6. Select the
    Tutorial and Samples
    folder. This is the folder you created in the
    tutorialRequest.avcconfig
    file.
  7. Click on the Tutorial Request Form in the work area. You will see the Tutorial Process Request form you created.
  8. Submit a request as follows:
    • In the Last Name field, type in
      Jones
      (case-sensitive)
    • In the Amount Requested field, type in an amount between 5000 and 20000
    • Fill in the other fields as desired
  9. Your form should look like the following:
    SOAP response
  10. Scroll to the bottom of the form, and select Send Request.
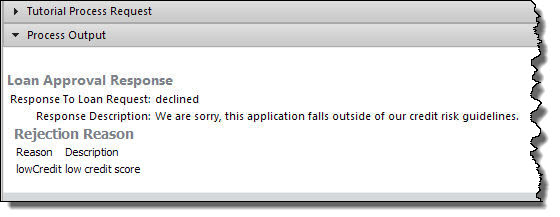
  11. The response from the loan approval process is displayed:
    SOAP response
Step 7: View a Completed Process
  1. In the Process Console, go back to the Service Definition page, and select Home from the menu, and then select Active Processes. Notice that two processes completed.
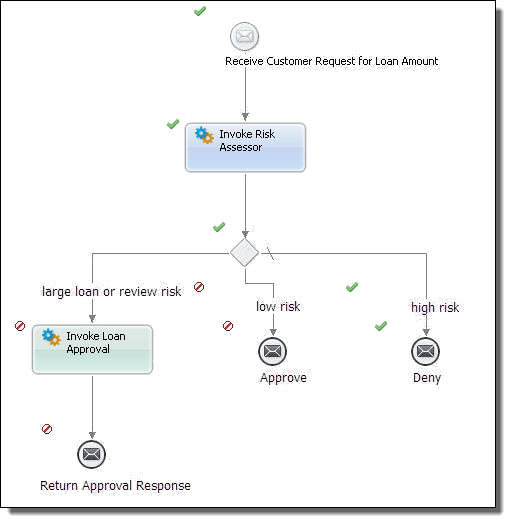
  2. On the Active Processes page, select the tutorial process. You can see the actual results returned from the risk assessment service. Because Jones is a credit risk, the loan was denied.
    active process
For more details about the two services, and to debug your running or completed process from within Process Developer, go to Tutorial Part 11: Debugging Your Process Remotely .

0 COMMENTS

We’d like to hear from you!