Getting Started

Getting Started

Part 11: Debugging Your Process Remotely

Part 11: Debugging Your Process Remotely

To start at the beginning of the tutorial, see Introduction to Process Developer Tutorial .
If you have followed all tutorial parts so far, you have deployed and run a BPEL process on the Process Server.
Before starting this part of the tutorial, we recommend that you complete Tutorial Part 10: Creating a Form to Run the Process .
In the Project Explorer view of Process Developer, you should have the following files:
  • tutorial.bpel
    that you created in Part 4
  • tutorial.bpr
    that you created in Part 9
After completing Part 11 of the tutorial, you will be able to:
  • Add a breakpoint to
    tutorial.bpel
    .
  • Create a configuration file for launching a remote debugging session.
  • Start a remote debugging session.
  • Step through your process and inspect variables.
Step 1: Add a Breakpoint to tutorial.bpel
You can connect to a running or completed process from within Process Developer for remote debugging. There are several options for remote debugging, and we will set a breakpoint in the process and then attach to the running process when the breakpoint is hit.
  1. Open
    tutorial.bpel
    in the Process Editor.
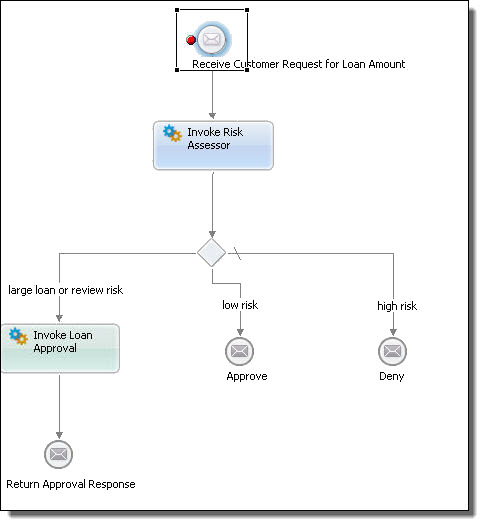
  2. Right-mouse click on the Receive activity and select Add Breakpoint. The Receive activity should look like the following example.
    Receive activity with breakpoint set
Step 2: Start the server
The server must be running in order to start remote debugging, so start the server now (if it is not already running) before setting up a debug configuration.
  1. If the server is already running, as described in Part 10 of the tutorial, you can skip to Step 3.
  2. Select the Servers view in the lower right of the workspace, and select Start the Server.
Step 3: Create a Configuration for Launching a Remote Debug Session
A remote debug configuration indicates where processes are running and how you want to attach to them.
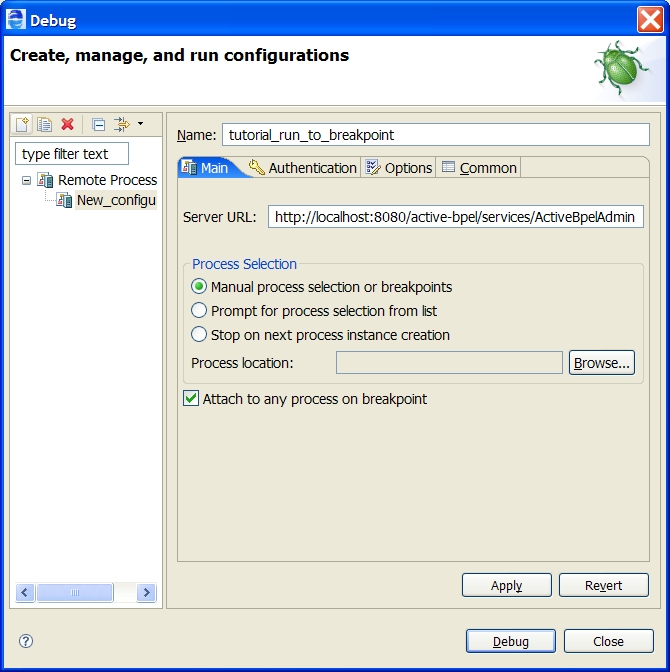
  1. From the Run menu, select Debug Configurations.
  2. In the
    Debug
    dialog, select Remote Process and then select the New Launch Configuration icon in the toolbar.
  3. In the Name field, type
    tutorial_run_to_breakpoint
    .
  4. In the Main tab, note that the default Server URL is displayed for deployed server processes.
  5. In the Process Selection panel, select Manual process selection or breakpoints. This selection indicates that you do not want to immediately debug a process, but rather will select a process manually.
  6. Enable the option Attach to any process on breakpoint to indicate that a process containing a breakpoint will be attached to, if not already attached, when a breakpoint is hit.
    Your
    Debug Create, manage, and run configurations
    dialog should look like the following example.
    Debug configuration dialog
  7. Select Debug to begin remote debugging for the current configuration.
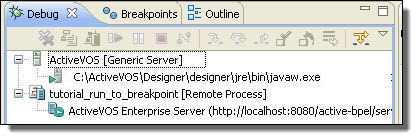
Your Debug view should look like the following example.
Debug view showing remote process
Step 4: Instantiate the Process
You can create an instance of the process by using the Process Central request form, as you did in Part 10 of the tutorial.
  1. In Process Central, fill in the form with Last Name of
    Jones
    and amount-Requested value of
    10000
    .
  2. Select Send Request.
Step 5: Begin Remote Debugging
  1. In Process Developer, open all variables in the Process Variables view and position the view next to the Process Editor canvas. Your Process Editor should look like the following example.
    Simulation highlights receive activity with breakpoint
  2. Notice that the running process is stopped on the Receive activity with the breakpoint, as we configured.
  3. In Debug view, click the Step Into icon on the toolbar. The debug highlighter moves to the Invoke Risk Assessor activity. The
    creditInformation
    variable displays the data submitted by the Process Central request.
  4. Click Step Into twice to terminate and disconnect the process automatically.
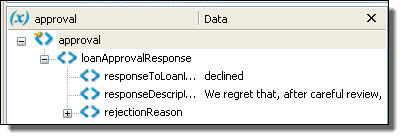
  5. Inspect the
    approval
    variable. Notice that Jones is not going to get a loan. The reply indicates a decline, as shown.
    approval variable with declined results
  6. Repeat the above steps by adding different
    Last Name
    and
    amountRequested
    values.
The LoanApproval and RiskAssessment services are built on the following logic:
5000 <loan amount <=20000
Jones is declined, all others approved
20000<loan amount<=50000
Only Smith is approved, all others declined
loan amount>50000
Everyone is declined
Last name: Approvefault
Loan approver faults
Last name: Assessfault
Loan assessor faults
Next Steps
Create a new orchestration project for Human Approval Completed. This process replaces the Invoke Loan Approval activity with a People activity, as shown in the illustration. The documentation that accompanies the Human Task (BPEL for People) sample describes how to deploy and run the sample. You can also review the Human Tasks help for details on building a People activity to add human workflow to your BPEL process.

0 COMMENTS

We’d like to hear from you!