Table of Contents

Search

  1. Preface
  2. Process Central
  3. Guides Overview
  4. Process Designer Tutorial
  5. For Administrators

Central and ActiveVOS Screenflow

Central and ActiveVOS Screenflow

Part 8: Adding a Jump State

Part 8: Adding a Jump State

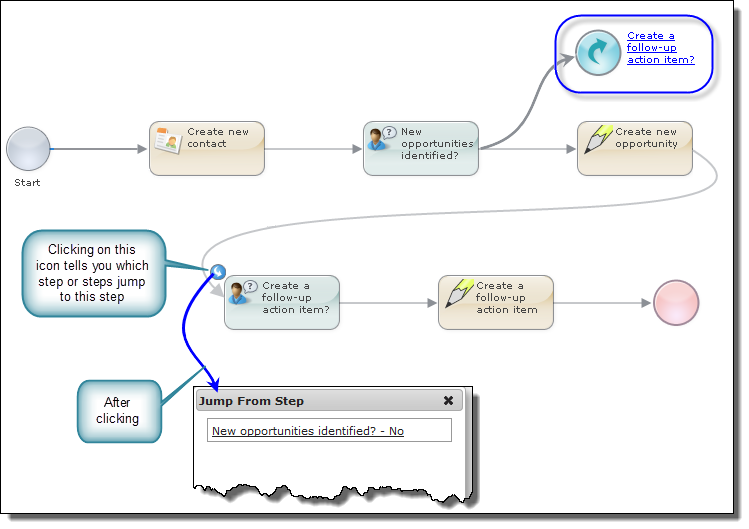
If you recall the diagram of the whole guide, there were places that jumped forward and others that jumped backward. As you will see, creating a jump step is very easy.
In the following figure, the step in the upper-right corner is a
Jump Step
. Notice the curved arrow icon.
This step will jump from New opportunities identified step to the Create a follow-up action item? screen step. Notice the small curved arrow icon pointing into this
Screen Step
. This lets you know that the step is the target of a jump set.
Here's how to add it:
  1. Click the untitled step that is ends the
    No
    branch emerging from the
    New opportunity identified
    screen step.
  2. Click on the untitled step.
  3. Action
    : Jump Step.
  4. To
    : Select
    Create a follow-up action item?
    from the picklist.
  5. Click
    OK
When users execute the
New Opportunities identified
screen step, they have two choices:
No
and
Yes
. If the user selects
No
, the next step that is displayed is
Create a follow-up action item?
Exercises

0 COMMENTS

We’d like to hear from you!