Secure Agent Quick Start for Windows

Secure Agent Quick Start for Windows

Step 1. Download and install the Secure Agent

Step 1. Download and install the Secure Agent

Check the system requirements, then download the installation program and install the Secure Agent.
Before you download and install the Secure Agent, verify that the following pre-requisites are met:
  • The machine uses a supported operating system. For the list of supported operating systems for the Secure Agent, see the Product Availability Matrix (PAM) for
    Informatica Intelligent Cloud Services
    on Informatica Network here.
  • The machine has at least 5 GB of free disk space.
  • The account you use to install the Secure Agent has access to all remote directories that contain flat source or target files.
  • No other Secure Agent is installed on the machine. If another Secure Agent is installed on the machine, you must uninstall it first.
  • If your organization uses a protective firewall, include the
    Informatica Intelligent Cloud Services
    domain name or IP address ranges in the list of approved domain names or IP addresses. You should also enable the port that the Secure Agent uses to connect to the internet, port 443 (HTTPS).
    For more information, see this Knowledge Base article on Informatica Network.
To download and install the agent:
  1. Open
    Administrator
    and select
    Runtime Environments
    .
  2. On the
    Runtime Environments
    page, click
    Download Secure Agent
    .
    The "Download Secure Agent" button appears in the upper right corner of the Runtime Environments page in Administrator.
  3. In the
    Download the Secure Agent
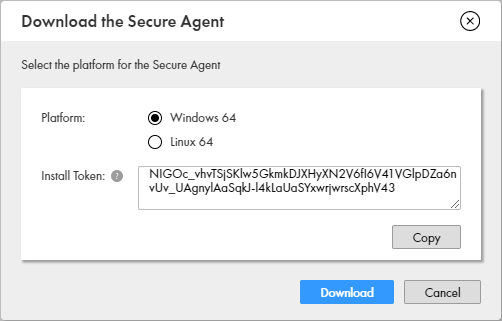
    dialog box, select the Windows 64-bit operating system platform and copy the install token.
    The "Download the Secure Agent" dialog box contains two options for the operating system platform: Windows 64 and Linux 64. It also displays an install token. Click the "Copy" button to copy the token.
  4. Click
    Download
    .
    The installation program is downloaded to your machine. The name of the installation program is
    agent64_install_ng_ext.exe
    .
  5. Run the installation program.
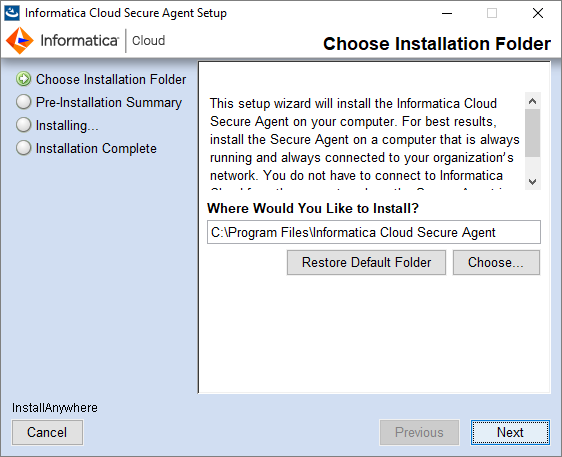
    The first page of the Secure Agent installation program prompts you to choose the installation folder.
    1. Specify the Secure Agent installation directory, and click
      Next
      .
    2. Click
      Install
      to install the agent.
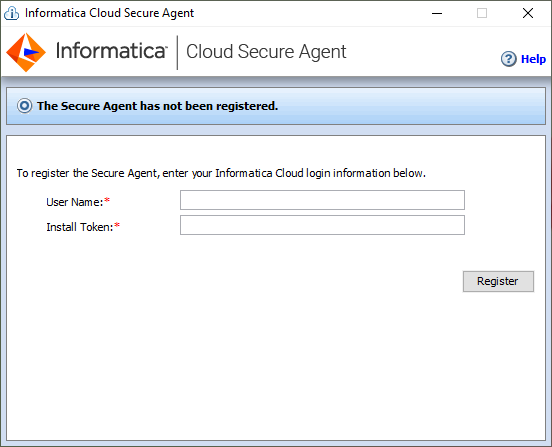
    When the installation finishes, the Secure Agent Manager opens and prompts you to register the agent.
    The Secure Agent Manager registration page contains the "User Name" and "Install Token" fields.
  6. If you did not copy the install token when you downloaded the agent, click
    Generate Install Token
    on the
    Runtime Environments
    page in
    Administrator
    , and copy the token.
  7. In the Secure Agent Manager, enter the following information, and then click
    Register
    :
    Option
    Description
    User Name
    User name that you use to access
    Informatica Intelligent Cloud Services
    .
    Install Token
    Token that you copied.
    The Secure Agent Manager displays the status of the Secure Agent. It takes a minute for all of the services to start.
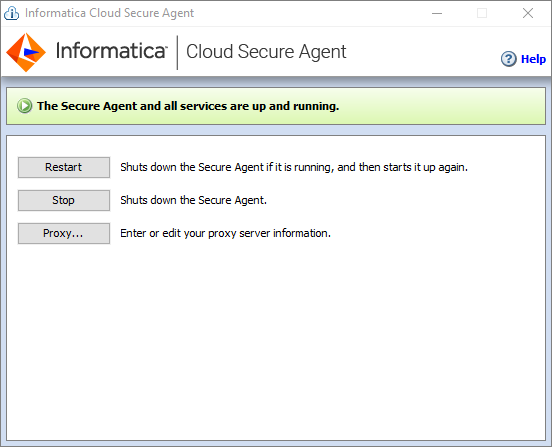
    When all of the services have started, the message, "The Secure Agent and all services are up and running," appears in the Secure Agent Manager.
    When the registration process completes, the Secure Agent Manager displays the message, "The Secure Agent and all services are up and running."
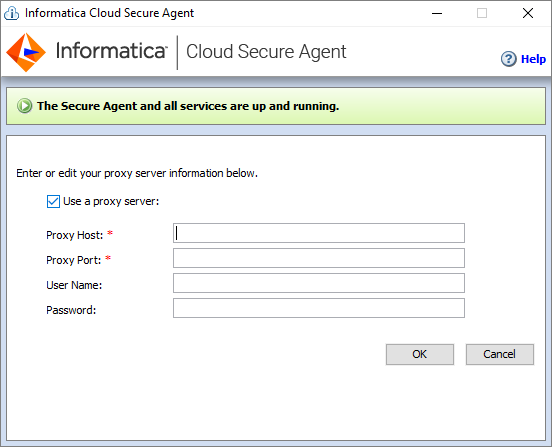
  8. If your organization uses an outgoing proxy server to connect to the internet, click
    Proxy
    .
    When you click "Proxy" in the Secure Agent Manager, the Secure Agent Manager displays a page where you can enter the proxy server information. Select the "Use a proxy server" option, and then enter the proxy host, proxy port, and optional user name and password.
    1. Select
      Use a proxy server
      .
    2. Enter the following information and click
      OK
      :
      Field
      Description
      Proxy Host
      Required. Host name of the outgoing proxy server that the Secure Agent uses.
      Proxy Port
      Required. Port number of the outgoing proxy server.
      User Name
      User name to connect to the outgoing proxy server.
      Password
      Password to connect to the outgoing proxy server.
    The Secure Agent Manager restarts the Secure Agent to apply the settings.
  9. Close the Secure Agent Manager.
    The Secure Agent Manager minimizes to the taskbar and continues to run as a service until stopped.

0 COMMENTS

We’d like to hear from you!