Configure a serverless runtime environment on Azure Native ISV Services

Configure a serverless runtime environment on Azure Native ISV Services

Step 2. Create an Informatica organization

Step 2. Create an Informatica organization

After you've subscribed to the Informatica single sign-on app and configured your subnet, you can create a new organization or link to an existing organization.
  1. From the Azure Portal home page, select
    Marketplace
    .
  2. Search for
    Informatica
    .
    You might see several plans with "Informatica" in their names.
  3. Select the plan named
    Informatica Intelligent Data Management Cloud - An Azure Native ISV Service
    .
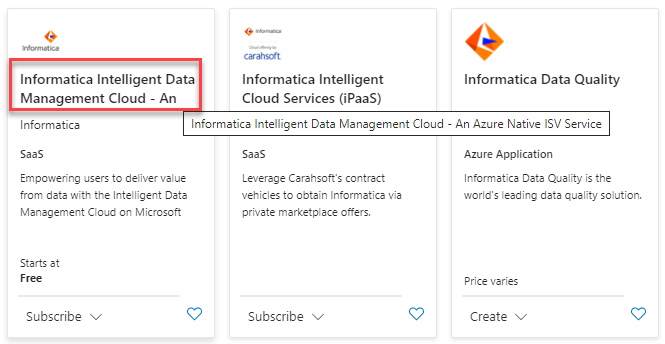
    If you are in tile or list view, the name is truncated. To confirm that you've selected the correct plan, hover over the name. The following image shows the correct plan:
  4. Select the plan specified in your contract, click
    Subscribe
    Yes, continue
    .
    The
    Create an Informatica organization
    page appears.
  5. Enter the following information on the
    Basics
    tab:
    Field
    Value
    Subscription
    Select the Azure subscription you want to use to create the Informatica organization.
    You must have an owner or contributor role for this subscription.
    Resource group
    Select a resource group or create a new one. You must have a contributor role to this resource group.
    A resource group is a container that holds related resources for an Azure solution.
    Resource Name
    Enter a name for the Azure resource.
    Region
    Select the region where the resource of type "Informatica organization" will be provisioned.
    Informatica Region
    Select the region that is closest to you. This determines the POD that you'll connect to.
    Organization
    Choose whether to create a new organization or link to an existing organization.
    If you link to an existing organization, you can choose either to continue with an existing Informatica billing or use the Azure Marketplace billing.
    You can only link to a parent organization that has a Production or Sandbox license type. You can't link to a sub-organization or if the license type is Trial. For more information, see
    Organization Administration
    .
    Organization name
    If you are linking to an existing organization, click
    Link to an existing Informatica organization
    and provide your login credentials. The Informatica organization created in the Azure portal automatically links to your existing organization.
    Plan
    The plan you selected earlier is displayed. If you decide to change it, click
    Change plan
    .
  6. Optionally, click
    Next: Tags
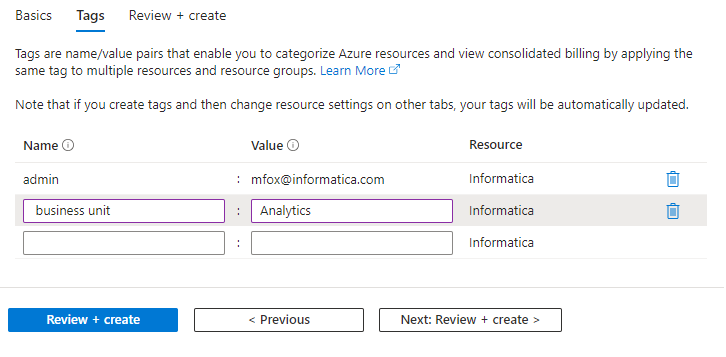
    to create tags to help you categorize Azure resources.
    The following are examples of tags:
    • Name: <name of admin>, Value: <email address>
    • Name: <business unit>, Value: <user's business unit>
  7. Click
    Next: Review + create
    .
    Review the information for accuracy and ensure that
    Validation passed
    displays at the top of the page.
  8. To begin the deployment process, click
    Create
    .
    The deployment is complete when you see
    Deployment succeeded
    .
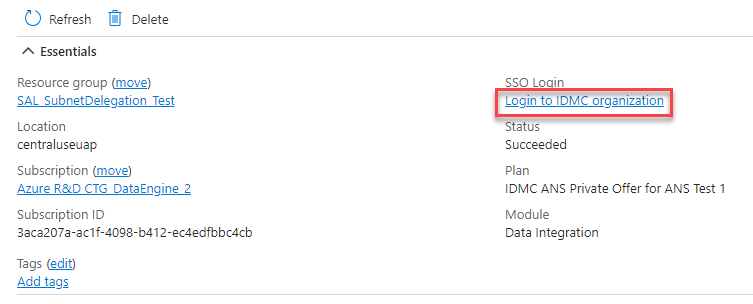
  9. To see the resource dashboard for your organization, click
    Go to resource
    .
  10. Click
    Login to IDMC organization
    on the resource dashboard.
    It is important to log in to
    Informatica Intelligent Cloud Services
    before you create a serverless runtime environment.
  11. Verify that your personal information is accurate and confirm that you agree to the subscription agreement.
  12. Click
    Confirm
    to log in to
    Informatica Intelligent Cloud Services
    .
    This step is necessary to add you as a user to the system.

0 COMMENTS

We’d like to hear from you!