In the Navigator, click Administration > Schedules. The Schedule screen appears.
Click New Schedule.
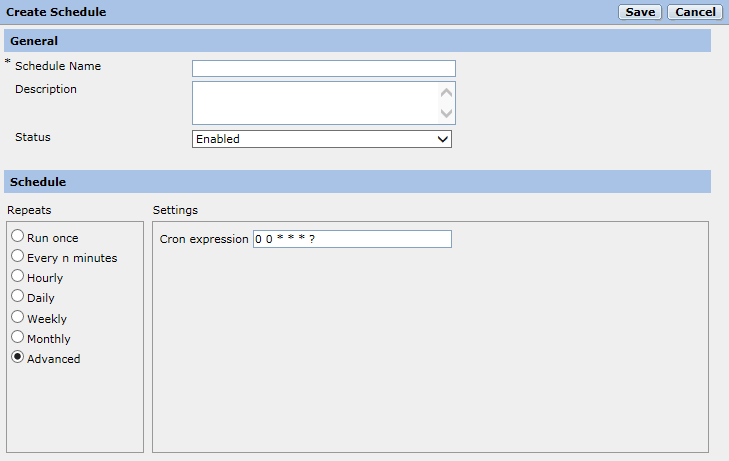
Enter the Schedule Name.
Optionally, enter Comments.
Select the Start Time hour and minutes from the drop-down lists or type them in.
Select the Recurrence of the schedule:
If the schedule is a one-time occurrence, check Run Once. Click the Calendar icon and select a date to run the schedule.
If the schedule is to run every X minutes, check Minutes and enter the run interval in minutes.
If the schedule is ro run every X hours, check Hours and enter the run interval in hours.
If the schedule is a daily one, check Daily.
If the schedule is a weekly one, check Weekly, and then check the desired day of the week.
If the schedule is a monthly one, check Monthly. If the schedule is to trigger on a given date each month, click Run on day and select the appropriate date. If the schedule is to trigger on a certain weekday each month, for example, the second Tuesday, select these options.
To define your schedule using a Cron expression, click the Advanced option and enter the Cron expression. Double check the expression very carefully before saving the schedule. An incorrect Cron expression can cause undesirable results.
B2B Data Exchange does not support schedules shorter than one minute. Schedules shorter than one minute are run once a minute.
Using the Status field, select the status of the schedule.