PowerExchange for Db2 Warehouse User Guide for PowerCenter

PowerExchange for Db2 Warehouse User Guide for PowerCenter

Configure ODBC Connectivity

Configure ODBC Connectivity

To establish an ODBC connection to connect to Db2 Warehouse on Windows, install the 32-bit IBM Data Server driver package on the machine where you install the PowerCenter Client.
After you install the driver, configure the Data Source Name (DSN) in the ODBC Data Source Administrator. Create an 32-bit ODBC data source for each Db2 Warehouse database that you want to access.
Perform the following steps to configure ODBC connectivity. For specific instructions, see IBM Data Server driver documentation.
  1. Click
    Start
    Control Panel
    .
  2. Click
    Administrative Tools
    .
  3. Click
    Data Sources (ODBC)
    .
    The
    ODBC Data Source Administrator
    dialog box appears.
  4. Click the
    System DSN
    tab.
    The
    System DSN
    tab appears.
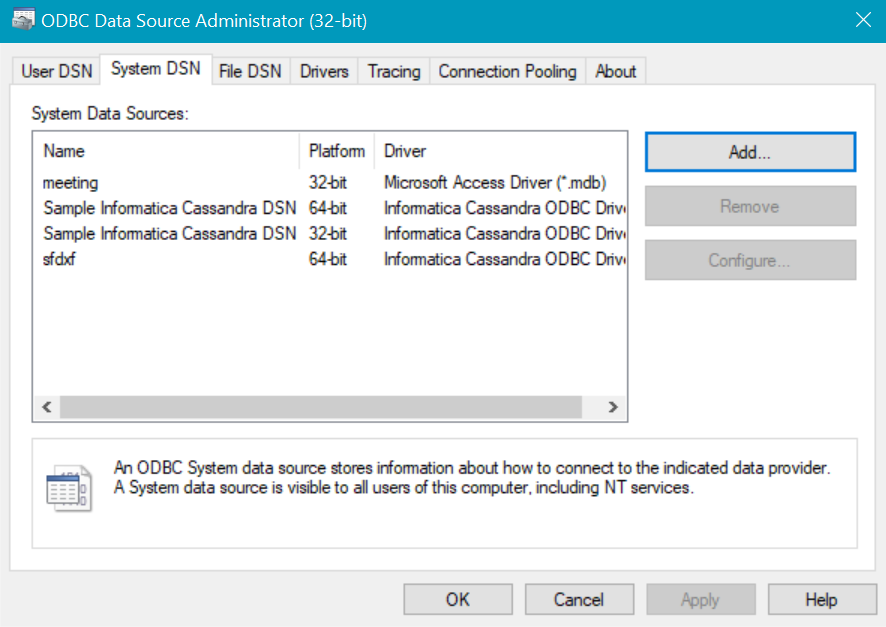
    The following image shows the System DSN tab on the ODBC Data Source Administrator (32-bit) dialog box:
    The image shows the System DSN tab on the ODBC Data Source Administrator (64-bit) dialog box.
  5. Click
    Add
    .
    The
    Create New Data Source
    dialog box appears.
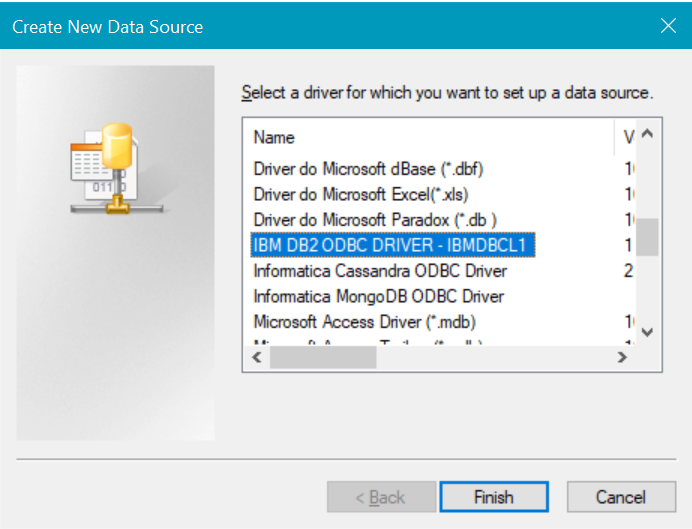
    The following image shows the Create New Data Source dialog box where you can select the IBM Data Server driver:
    The following image shows the IBM Data Server driver IBM DB2 ODBC driver available for your operating system
  6. Select
    IBM DB2 ODBC driver - IBMDBCL1
    to set up the data source.
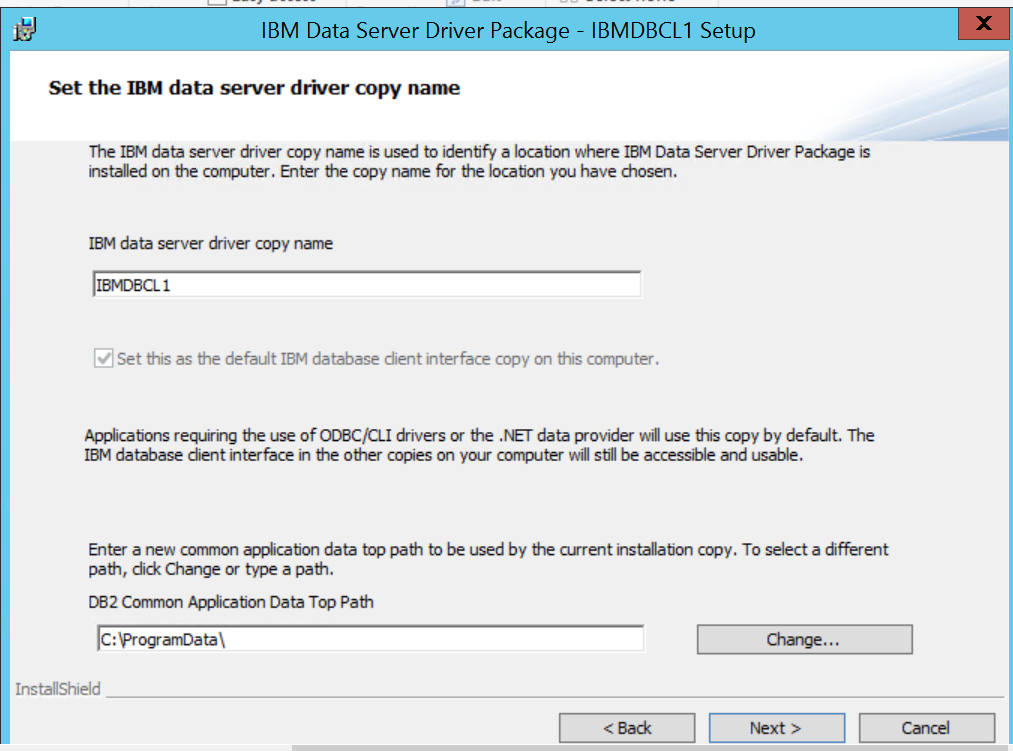
    IBMDBCL1
    is the default IBM data server driver copy name. You can configure the IBM data server driver copy name when you install the IBM Data Server driver package.
    The image shows
  7. Click
    Finish
    .
    The
    ODBC IBM DB2 driver - Add
    dialog box appears.
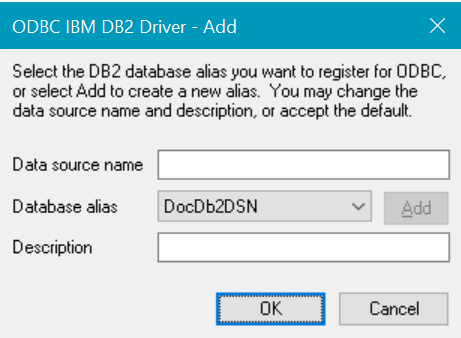
    The following image shows the connection properties in the
    ODBC IBM DB2 driver - Add
    dialog box: The following image shows the ODBC IBM Data Server driver - Add dialog box where you can create a data source.
  8. Enter a name for the new ODBC data source.
  9. Select a database alias for Db2 Warehouse or click
    Add
    to add a new database alias.
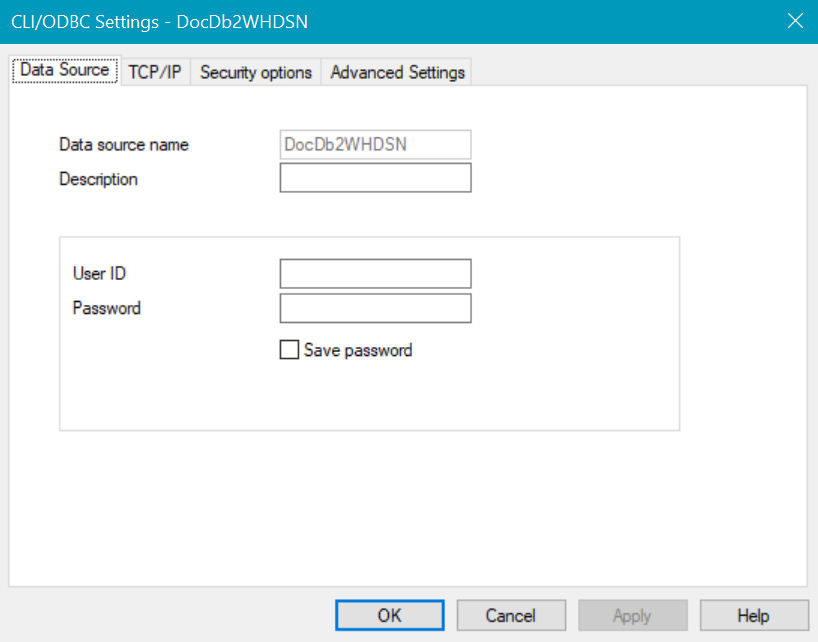
    The
    CLI/ODBC Settings
    dialog box appears.
    The following image shows the connection properties in the
    CLI/ODBC Settings
    dialog box: The following image shows the CLI/ODBC Settings dialog box.
  10. On the
    Data Source
    tab, specify the
    User ID
    and
    Password
    of the Db2 Warehouse database that you want to connect to.
  11. On the
    Advanced Settings
    tab, click
    Add
    .
    The
    Add CLI Parameter
    dialog box appears.
  12. Add the following CLI parameters and the values for each parameter:
    CLI Parameter Name
    Value
    Database
    Database on the Db2 Warehouse that you want to connect to.
    Hostname
    Host name or IP address of the Db2 Warehouse system that you want to connect to.
    Port
    Port number of the Db2 Warehouse system that you want to connect to.
  13. Click
    OK
    .
    To enable unicode metadata fetch in PowerCenter, specify the environment variable
    DB2CODEPAGE=1208
    on the machine where you install the PowerCenter Client.

0 COMMENTS

We’d like to hear from you!