MDM Registry Edition
- MDM Registry Edition 10.5
- All Products

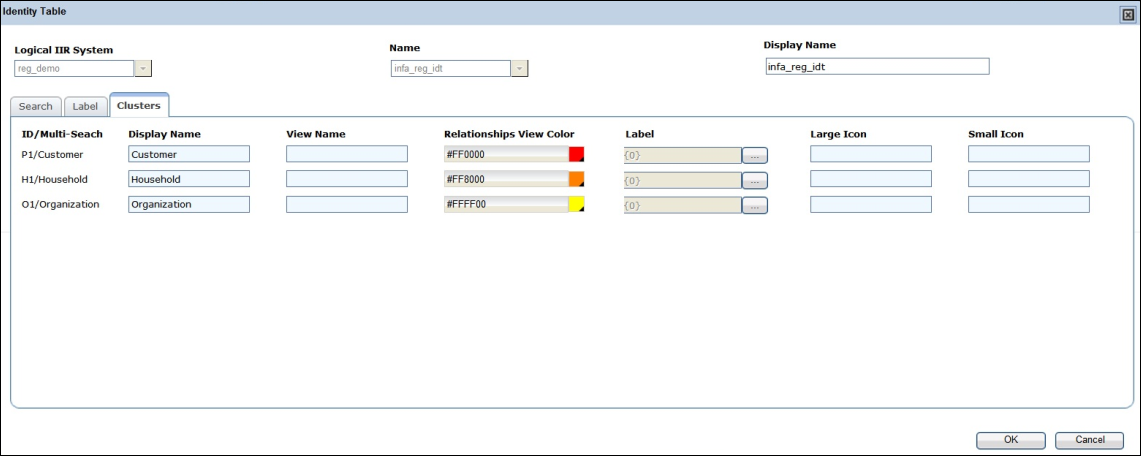
Attribute | Description |
|---|---|
Logical MDM-RE System | Select Logical MDM-RE System the IDT being created belongs to from a list of logical systems configured for this application Active only in Add New IDT mode. |
Name | Select MDM-RE Identity Table IDT being created represents. List of options depends on selection in Logical MDM-RE System drop down. Active only in Add New IDT mode. |
Display Name | Display name for the Identity Table, as it will appear on UI. Defaults to MDM-RE Identity Table's name |