Setting up SCIM with Azure Active Directory

Setting up SCIM with Azure Active Directory

Step 2. Set up SAML and enable SCIM in Informatica Intelligent Cloud Services

Step 2. Set up SAML and enable SCIM in
Informatica Intelligent Cloud Services

Set up SAML by uploading the metadata XML file that you generated in Azure AD. Then enable SCIM 2.0 and generate the token for the SCIM provisioning app.
  1. Log in to
    Informatica Intelligent Cloud Services
    as a user with the Admin role.
    If you are setting up SAML for a sub-organization, log in to the sub-organization as a native user with the Admin role. Do not log in to the parent organization and switch to the sub-organization from the parent organization.
  2. In Administrator, open the
    SAML Setup
    page.
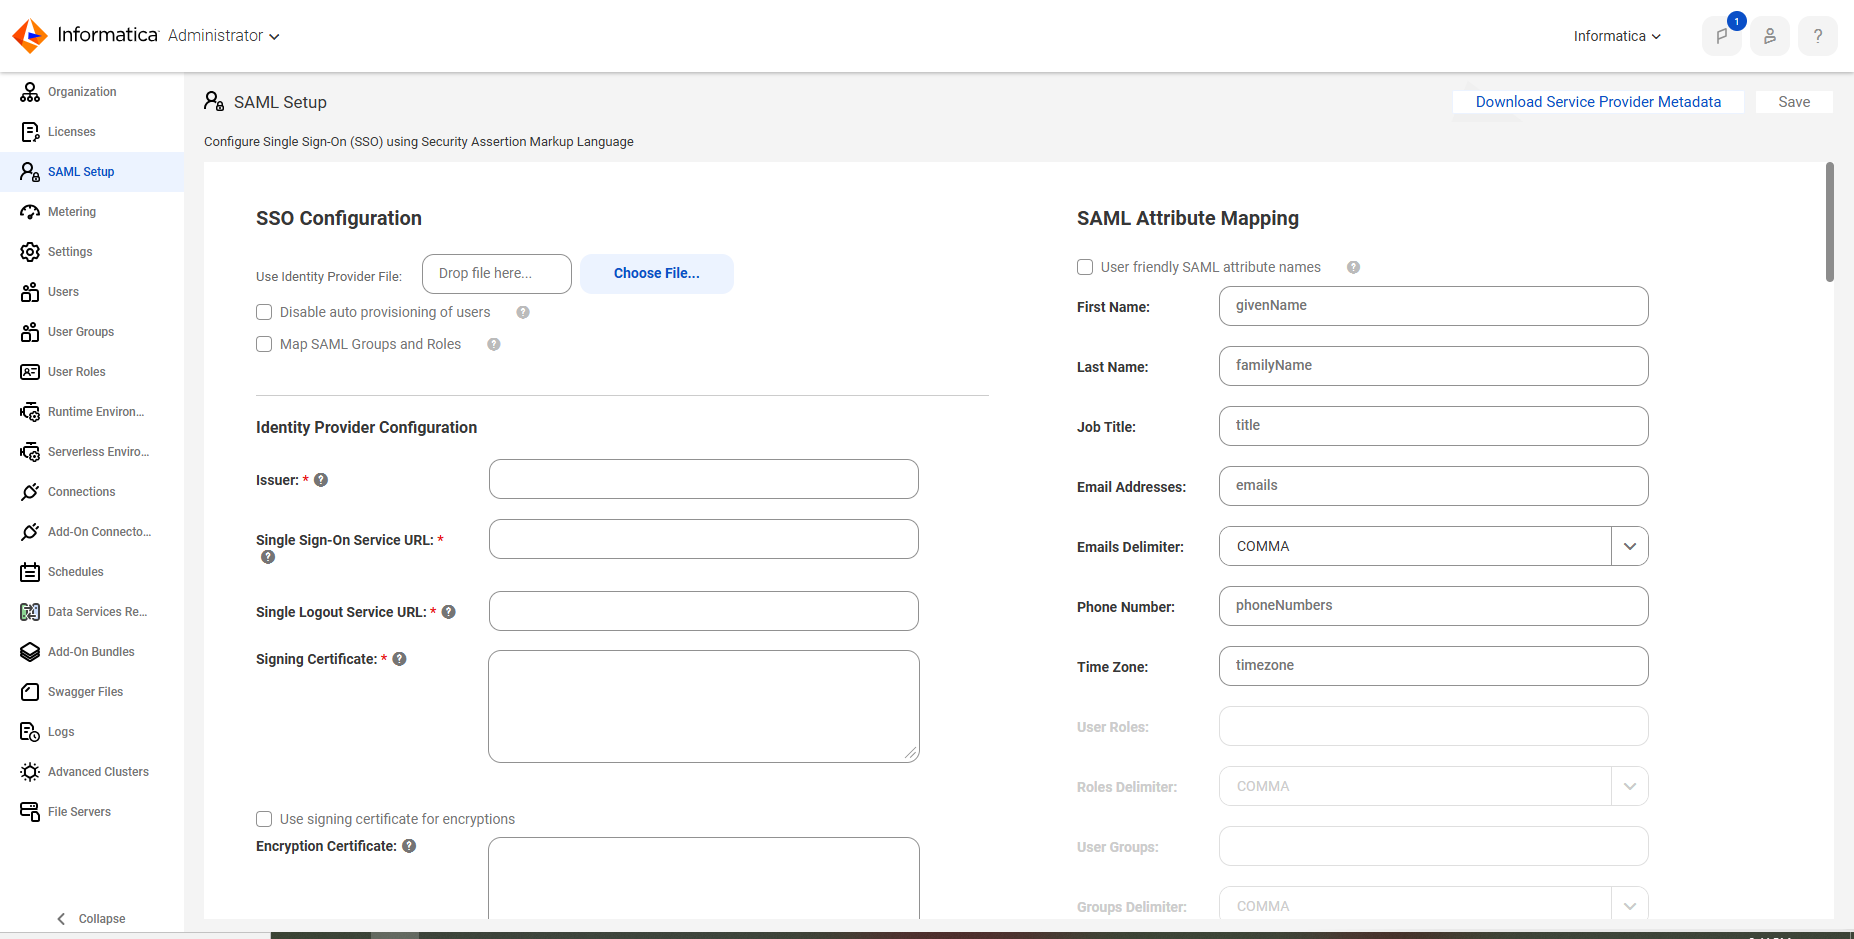
  3. In the SSO Configuration area, click
    Choose File
    and upload the metadata XML file to define the identity provider properties.
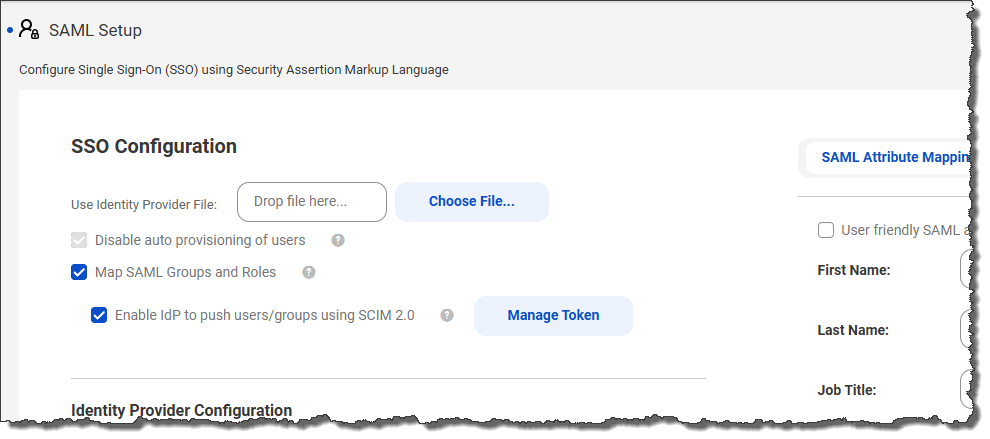
  4. Enable the
    Map SAML Groups and Roles
    option, and then enable the
    Enable IdP to push users/groups using SCIM 2.0
    option.
    When you enable the
    Enable IdP to push users/groups using SCIM 2.0
    option, auto-provisioning of users is disabled automatically because users are provisioned through the SCIM client.
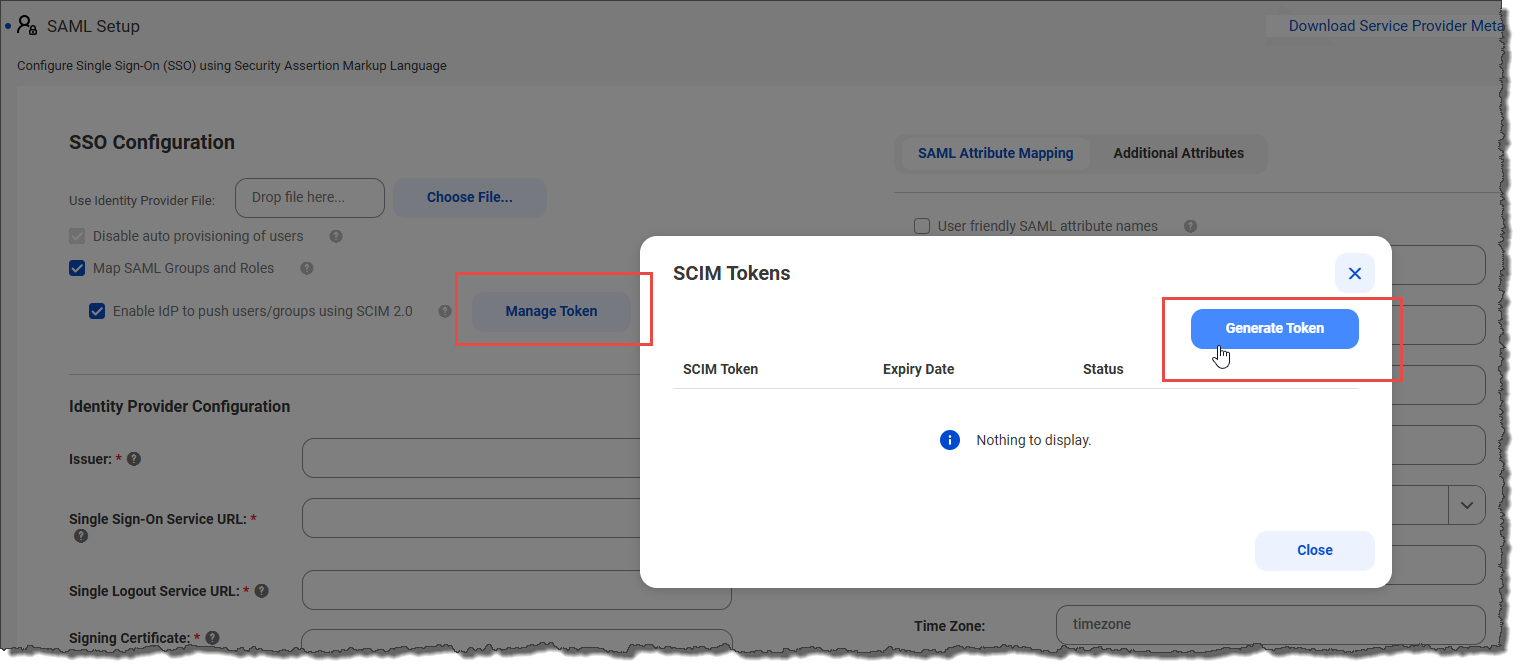
  5. Click
    Manage Token
    .
    The
    SCIM Tokens
    dialog box displays the SCIM tokens that have been created for your organization along with the expiration date and status of each token. If two tokens are listed, you’ll need to delete one before you can generate a new token.
  6. Click
    Generate Token
    and copy the token to the clipboard.
    You will need the SCIM token when you enable SCIM in the provisioning app.
    The SCIM token is valid for 180 days from the time of generation. When the token expires, you'll need to generate a new one, even for an existing connection.
    You can create two tokens on different days so that one token is always available. For example, you might want to generate a token on one day and a second token 90 days later.
    Informatica Intelligent Cloud Services
    notifies you when a token is about to expire.
  7. Click
    Save
    to save the configuration.
    You will map SAML roles and groups after you create the app roles and groups in Azure AD.

0 COMMENTS

We’d like to hear from you!
Karl Roembke - September 11, 2024

For step 5, I see the token is valid for 6 months. After that, will another token be required for an existing SCIM connection that has already been setup and working for 6 months? In other words, is the token like a password that expires after 6 months and must be reset?

Informatica Documentation Team - September 11, 2024

Hi Karl,

Thanks for reaching out! We're currently checking this with our development & QA teams and will get back to you.


Informatica Documentation Team - September 12, 2024

Hi again Karl,

We've confirmed with our QA team that the SCIM token is valid for 6 months. After that, yes, another token is required.

We'll clarify this in the documentation. Thanks for bringing this to our attention.