Table of Contents

Search

  1. Preface
  2. Introduction to Amazon S3 V2 Connector
  3. Connections for Amazon S3 V2
  4. Amazon S3 V2 sources and targets
  5. Mappings and mapping tasks with Amazon S3 V2
  6. Migrating a mapping
  7. Upgrading to Amazon S3 V2 Connector
  8. Data type reference
  9. Troubleshooting

Amazon S3 V2 Connector

Amazon S3 V2 Connector

Mapping in advanced mode example

Mapping in advanced mode example

You work for one of the largest community college that maintains millions of records in their ongoing student database. The college has more than 10,000 faculty members teaching at 45 campuses and 700 locations across the globe. The college has a very large IT infrastructure and about 15 TB of information gets downloaded on daily basis from the Internet.
To avoid performance, scalability, and high cost challenges, the college plans to port its entire data from its operational data stores to Amazon S3 within a short span of time. Create a mapping that runs in advanced mode to achieve faster performance when you read all the purchase records from Amazon S3 and write the records to an Amazon Redshift target.
  1. In Data Integration, click
    New
    Mappings
    Mapping
    .
  2. In the Mapping Designer, click
    Switch to Advanced
    .
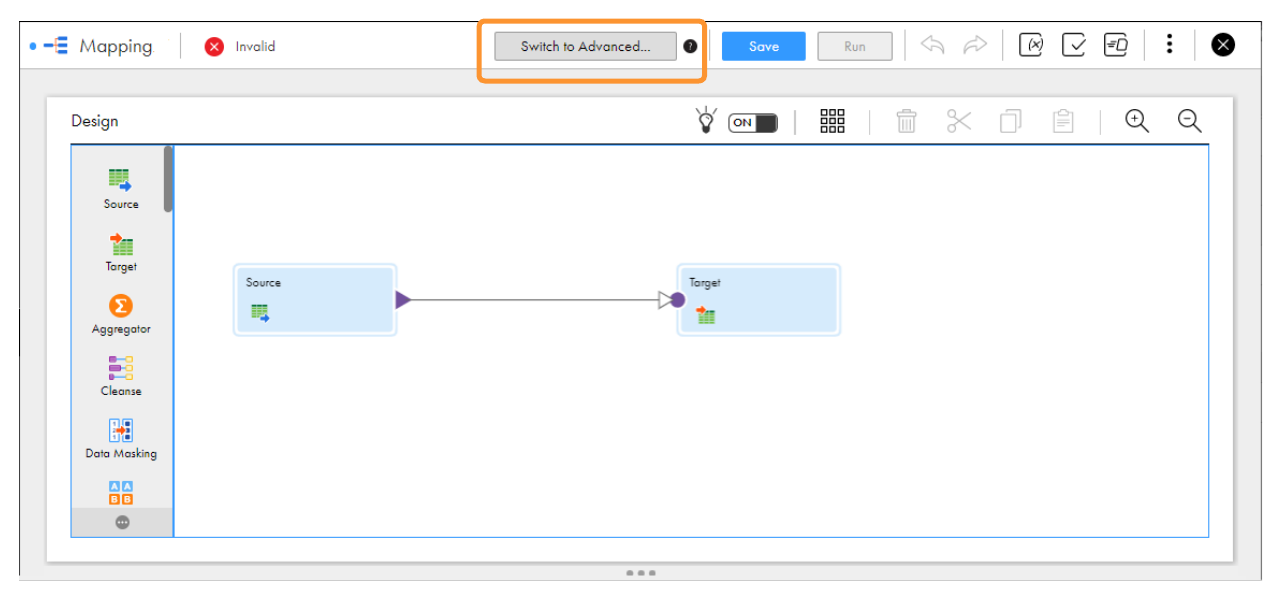
    The following image shows the
    Switch to Advanced
    button in the Mapping Designer.
    In the Mapping Designer, the header includes the Switch to Advanced button.
  3. In the
    Switch to Advanced
    dialog box, click
    Switch to Advanced
    .
    The Mapping Designer updates the mapping canvas to display the transformations and functions that are available in advanced mode.
  4. Enter a name, location, and description for the mapping.
  5. On the Source transformation, specify a name and description in the general properties.
  6. On the
    Source
    tab, perform the following steps to provide the source details to read data from the source:
    1. In the
      Connection
      field, select the required source connection.
    2. In the
      Source Type
      field, select the type of the source.
    3. In the
      Object
      field, select the required object.
    4. In the
      Advanced Properties
      section, provide the appropriate values.
  7. On the
    Fields
    tab, map the source fields to the target fields.
  8. On the Target transformation, specify a name and description in the general properties.
  9. On the
    Target
    tab, perform the following steps to provide the target details to write data to the Amazon S3 target:
    1. In the
      Connection
      field, select the Amazon S3 V2 target connection.
    2. In the
      Target Type
      field, select the type of the target.
    3. In the
      Object
      field, select the required object.
    4. In the
      Operation
      field, select the required operation.
    5. In the
      Advanced Properties
      section, provide appropriate values for the advanced target properties.
  10. Map the source and target.
  11. Click
    Save
    Run
    to validate the mapping.
    In Monitor, you can monitor the status of the logs after you run the task.

0 COMMENTS

We’d like to hear from you!