Obtaining credentials for service principal authentication
Obtaining credentials for service principal authentication
You can use service principal authentication to connect to Microsoft Azure Data Lake Storage Gen2 to stage files.
Register an application in the Azure Active Directory, generate a client secret, and then assign the Storage Blob Contributor role to the application.
Log in to the Azure portal.
Click
Azure Active Directory
.
In the
Manage
section, click
App registrations
.
Click
New registration
to create a new Azure Active Directory application.
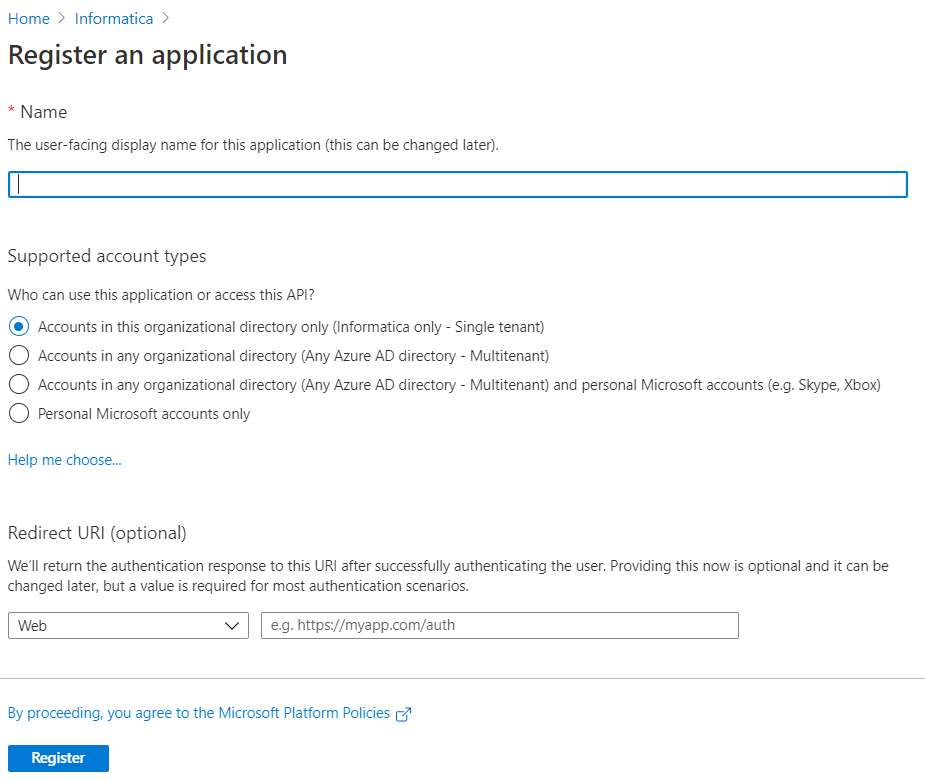
On the
Register an application
page, enter the details for the new application.
In the
Name
field, enter the application name.
In the
Redirect URI
section, select
Web
as the type of the application and enter the URL of the application.
Click
Register
.
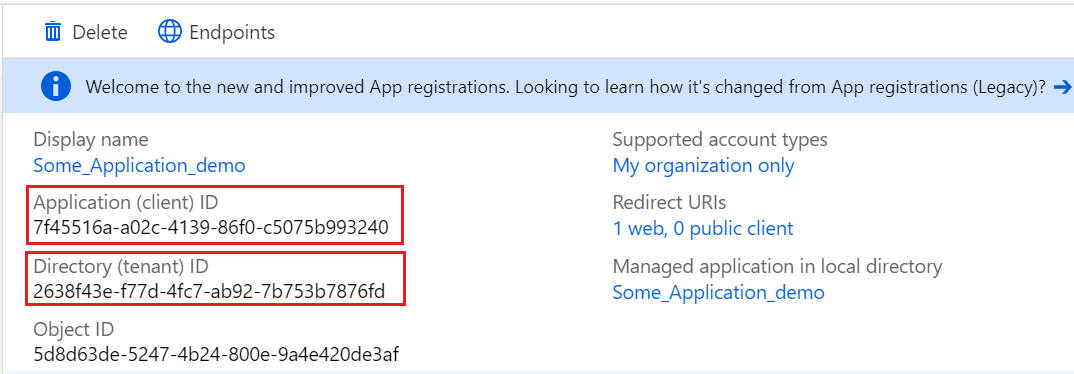
The details of the newly created Azure Active Directory application page are displayed.
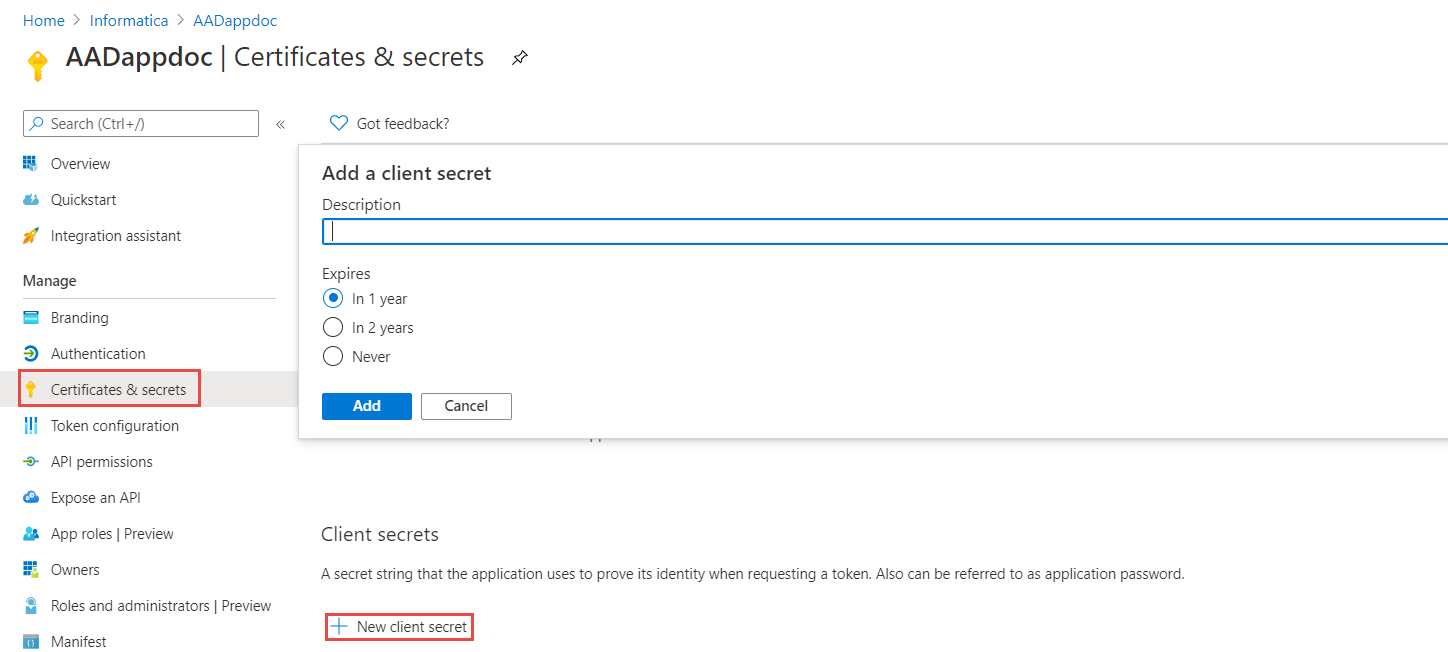
In the Manage section, click
Certificates & secrets
section.
Click
New client secret
.
In the
Add a client secret
page, perform the following steps:
Enter a name for the client secret in the
Description
field.
In the
Expires
field, you can select the duration of the key as
Never
(Recommended).
Click
Add
.
The value of the key is generated and displayed in the
Value
field.
You must copy the key value as you cannot retrieve the value after you leave the page. Ensure that the client secret does not contain special characters.
In the Manage section, click
Owners
.
Click
Add owner
.
In the
Search
field, search for the owner name or email address that you used to log in to the Azure portal.
Select the owner name or email address, and click
Select
.
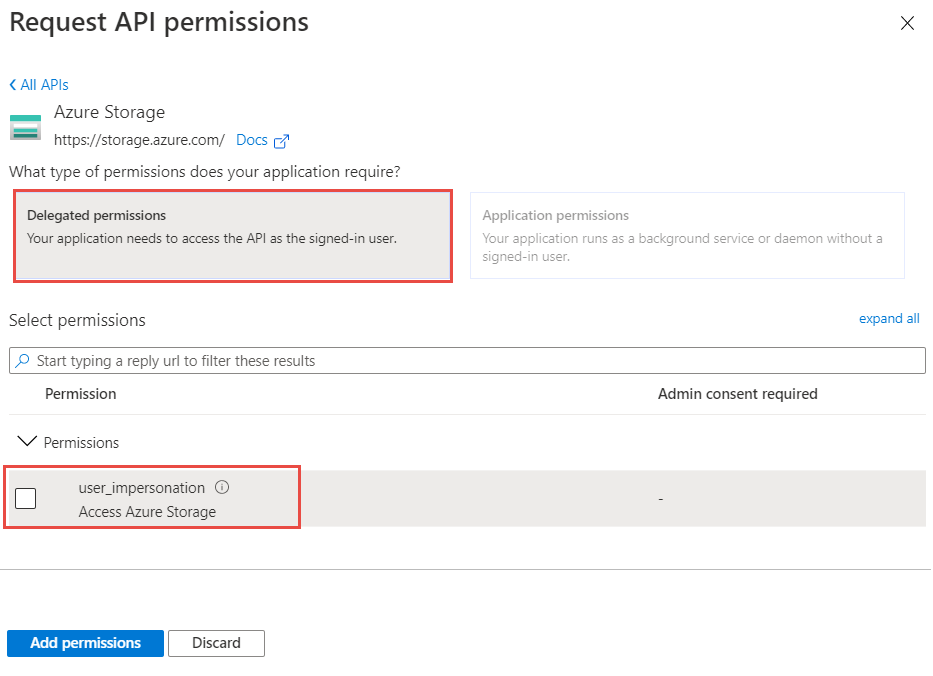
In the Manage section, click
API permissions
.
The configured permissions are displayed.
Click
Add a permission
.
The
Request API permissions
page appears.
In the Microsoft APIs section, click
Azure Storage
.
Select
Delegated permissions
as the type of permissions.
Select
Access Azure Storage
from the listed permissions.
Click
Add permissions
.
In the
Configured permissions
, select
Azure Active directory
and ensure that the
Sign in and read user profile
option is enabled in the
Delegated permissions
section.
If
Azure Active directory
is not listed under the
Configured permissions
, perform the following steps:
Click
Add a permission
.
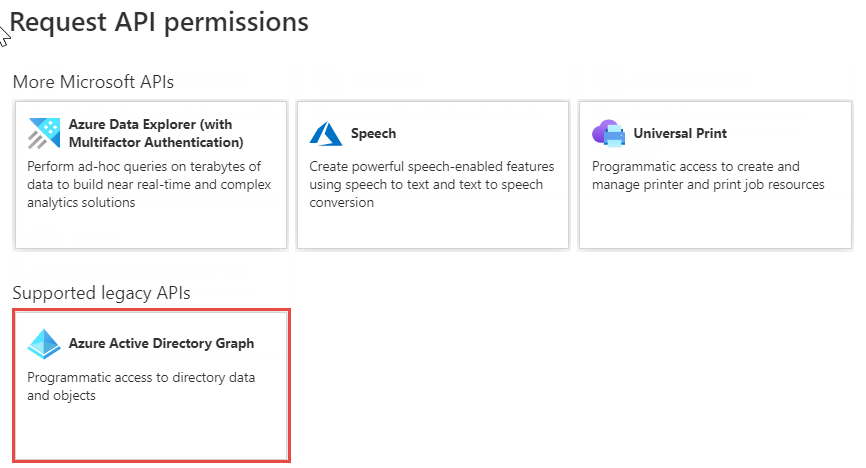
The
Request API permissions
page appears.
In the Microsoft APIs section, click
Azure Active Directory Graph
.
Select
Delegated permissions
as the type of permissions.
Select
Sign in and read user profile
from the listed permissions.
Go to the home page and in the Storage Account section, select the storage account that you created.
 ASK INFAPreview