Table of Contents

Search

  1. Preface
  2. Part 1: Introduction
  3. Part 2: Configuring Hub Console Tools
  4. Part 3: Building the Data Model
  5. Part 4: Configuring the Data Flow
  6. Part 5: Executing Informatica MDM Hub Processes
  7. Part 6: Configuring Application Access
  8. Appendix A: MDM Hub Properties
  9. Appendix B: Viewing Configuration Details
  10. Appendix C: Row-level Locking
  11. Appendix D: MDM Hub Logging
  12. Appendix E: Table Partitioning
  13. Appendix F: Collecting MDM Environment Information with the Product Usage Toolkit
  14. Appendix G: Glossary

Creating a Mapping

Creating a Mapping

Create a mapping between a landing table and a staging table.
  1. In the
    Model
    workbench, click
    Mappings
    .
  2. Acquire a write lock.
  3. Right-click in the mappings area and select
    Add Mapping
    .
    The Mappings tool displays the Mapping dialog box.
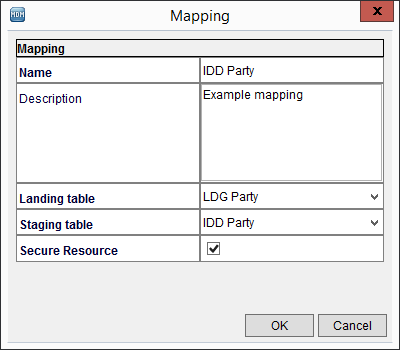
  4. Specify the mapping properties.
    Field
    Description
    Name
    Name of the mapping as it will be displayed in the
    Hub Console
    .
    Description
    Description of the mapping.
    Landing Table
    Select the landing table that will be the
    source
    of the mapping.
    Staging Table
    Select the staging table that will be the
    target
    of the mapping.
    Secure Resource
    Enable to make the mapping a secure resource, which allows you to control access to the mapping. After a mapping is designated as a secure resource, you can assign privileges to it in the Secure Resources tool.
    The following image shows a sample mapping:
    The sample mapping is called IDD Party. The mapping has a landing table called LDG Party and a staging table called IDD Party.
  5. Click
    OK
    .
  6. Click the
    Diagram
    tab.
    The Mappings tool displays the landing table and staging table on the workspace.
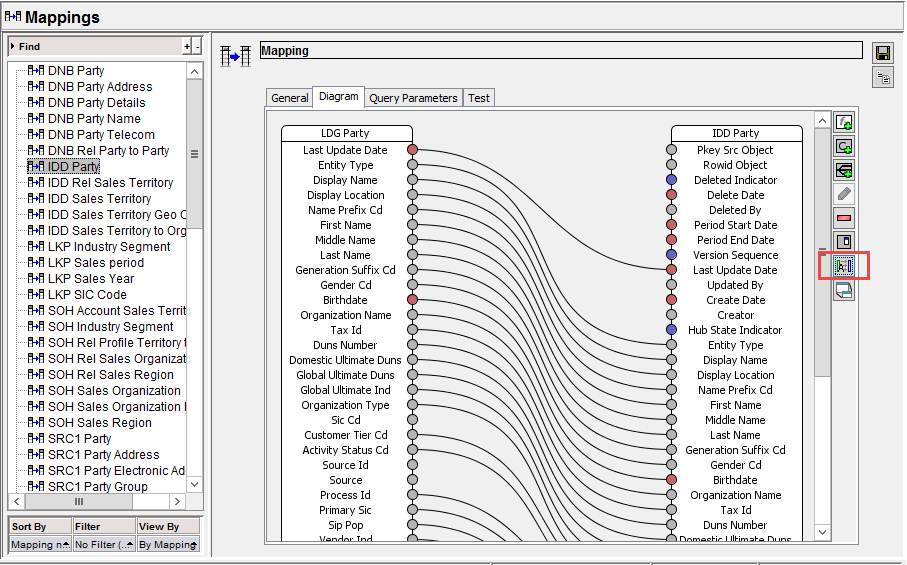
  7. To map columns with the same name from the landing table to the staging table, click the
    Auto mapping
    button.
    The following image shows the results of automapping on the sample mapping. You can change the connections:
    In the Diagram workspace, the columns with the same name are connected.
  8. Click
    Save
    .
    You have a basic mapping. Next, you map the primary key.

0 COMMENTS

We’d like to hear from you!