Informatica ActiveVOS
- Informatica ActiveVOS 9.2.4.6
- All Products


Field
| Action
|
|---|---|
-
| Click on the
Yes branch following the
Create a follow-up action item step
|
Step Type
| Select
Service Call from the picklist
|
Title
| Type "Create a follow-up action item"
|
Action
| Create > Create Account Task
|
Input tab
| Select it if it isn't selected
|
Description
| Set
Source to
Screen
|
Due Date
| Notice the two fields to the right
|
Add Input
| Click
Status within the picklist
|
Status
|
|
Add Input
| Click
Priority within the pickllst
|
Priority
|
|
Subject
|
Here's what the
Input tab should look like:
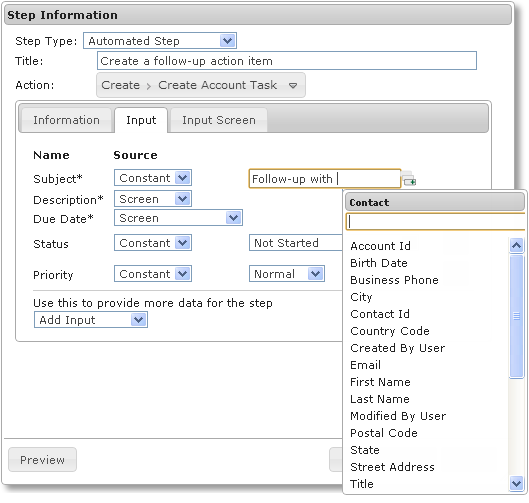
While a
Constant field is written directly into a record, it can also include the text of other fields.
|
Add two
Contact fields:
First Name and
Last Name . You will need to use your End key to see what you're doing when you insert the second field. Here's what the top of the
Input tab should look like:

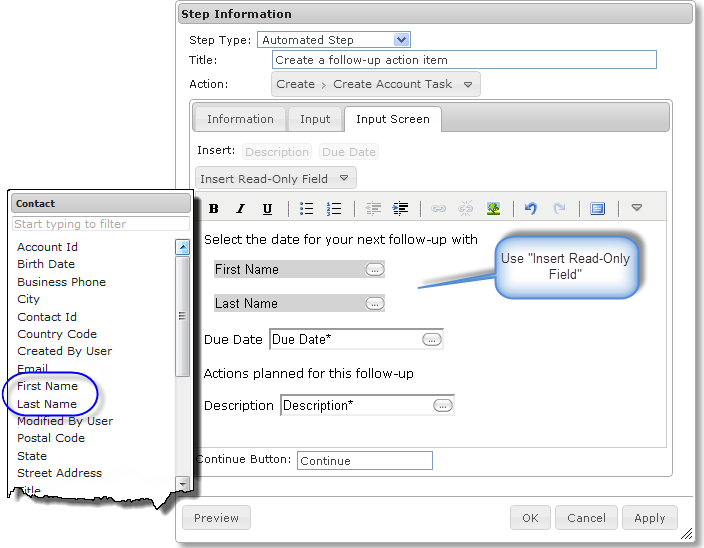
| |
Select the
Input Screen tab, and make the canvas look as follows:

|