Administrator
- Administrator H2L
- All Products
 ASK INFAPreview

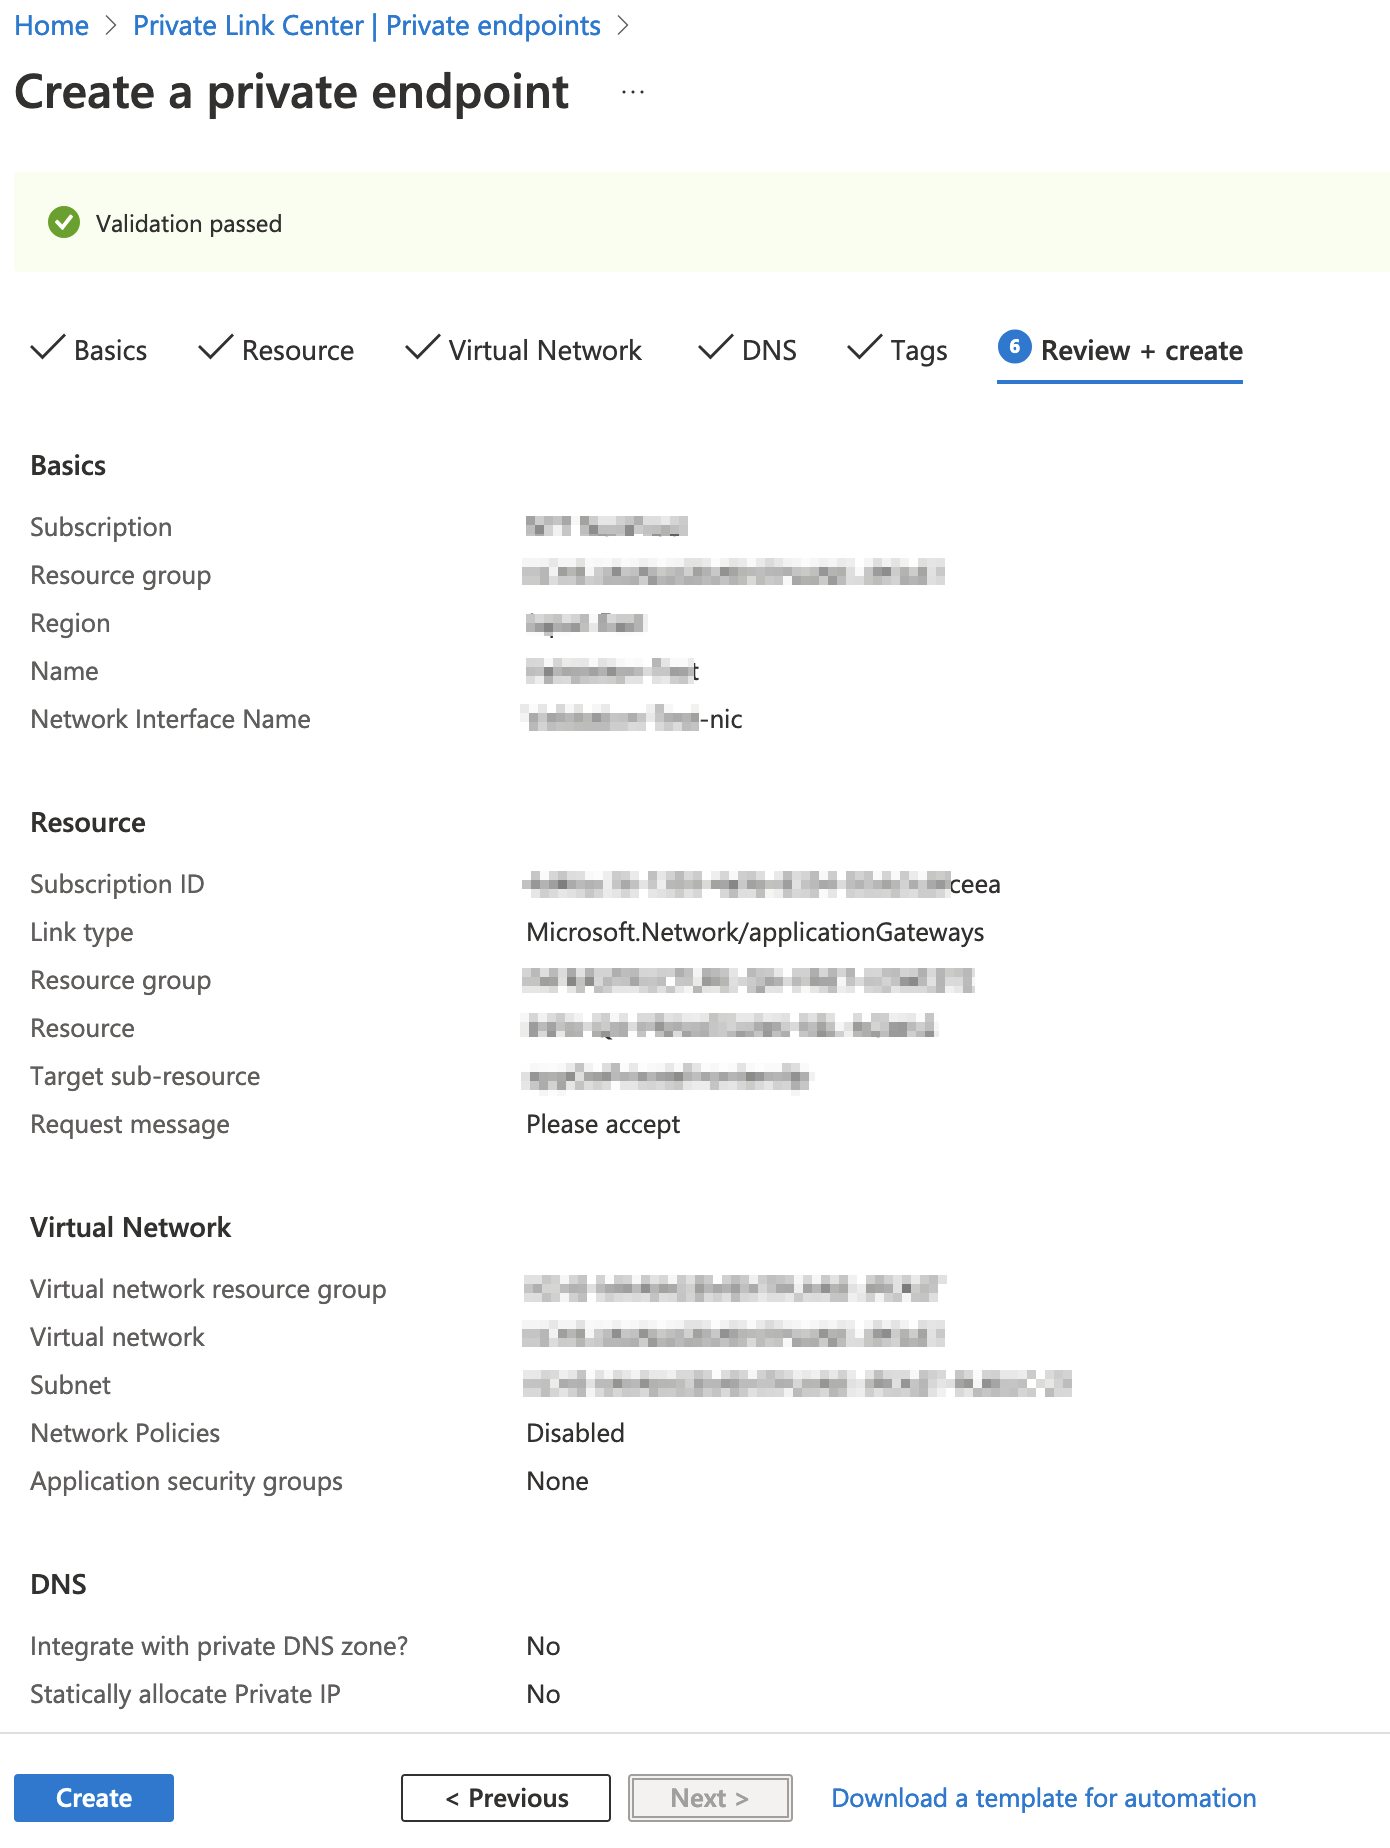
Property
| Value
|
|---|---|
Subscription
| Select your subscription.
|
Resource group
| Select the resource group.
This is the same resource group that you selected when you created the VNet.
|
Name
| Enter a name for the private endpoint.
|
Network interface name
| Enter a network interface name.
|
Region
| Select the region where your VNet is located.
|

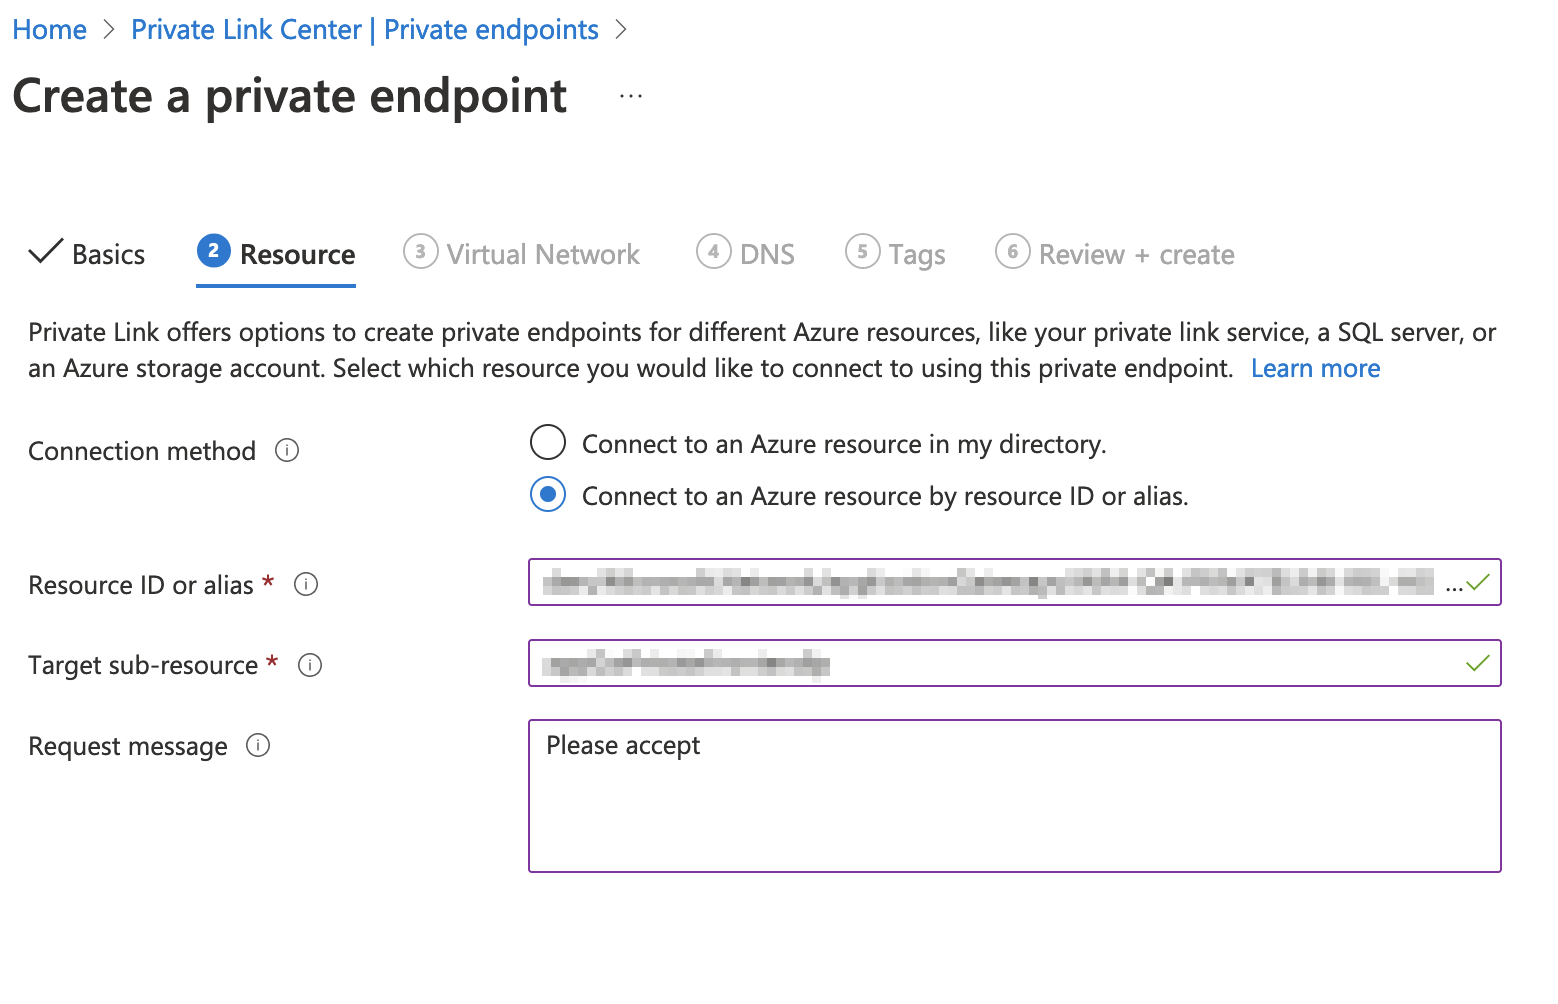
Property
| Value
|
|---|---|
Connection method
| Select
Connect to an Azure resource by resource ID or alias .
|
Resource ID or alias
| Enter the resource ID that you received from Informatica.
|
Target sub-resource
| Enter the target sub-resource that you received from Informatica.
|
Request message
| Enter a message like, "We'd like to use this endpoint to connect to IICS through Azure Private Link." Include your customer name and organization ID in the message.
|
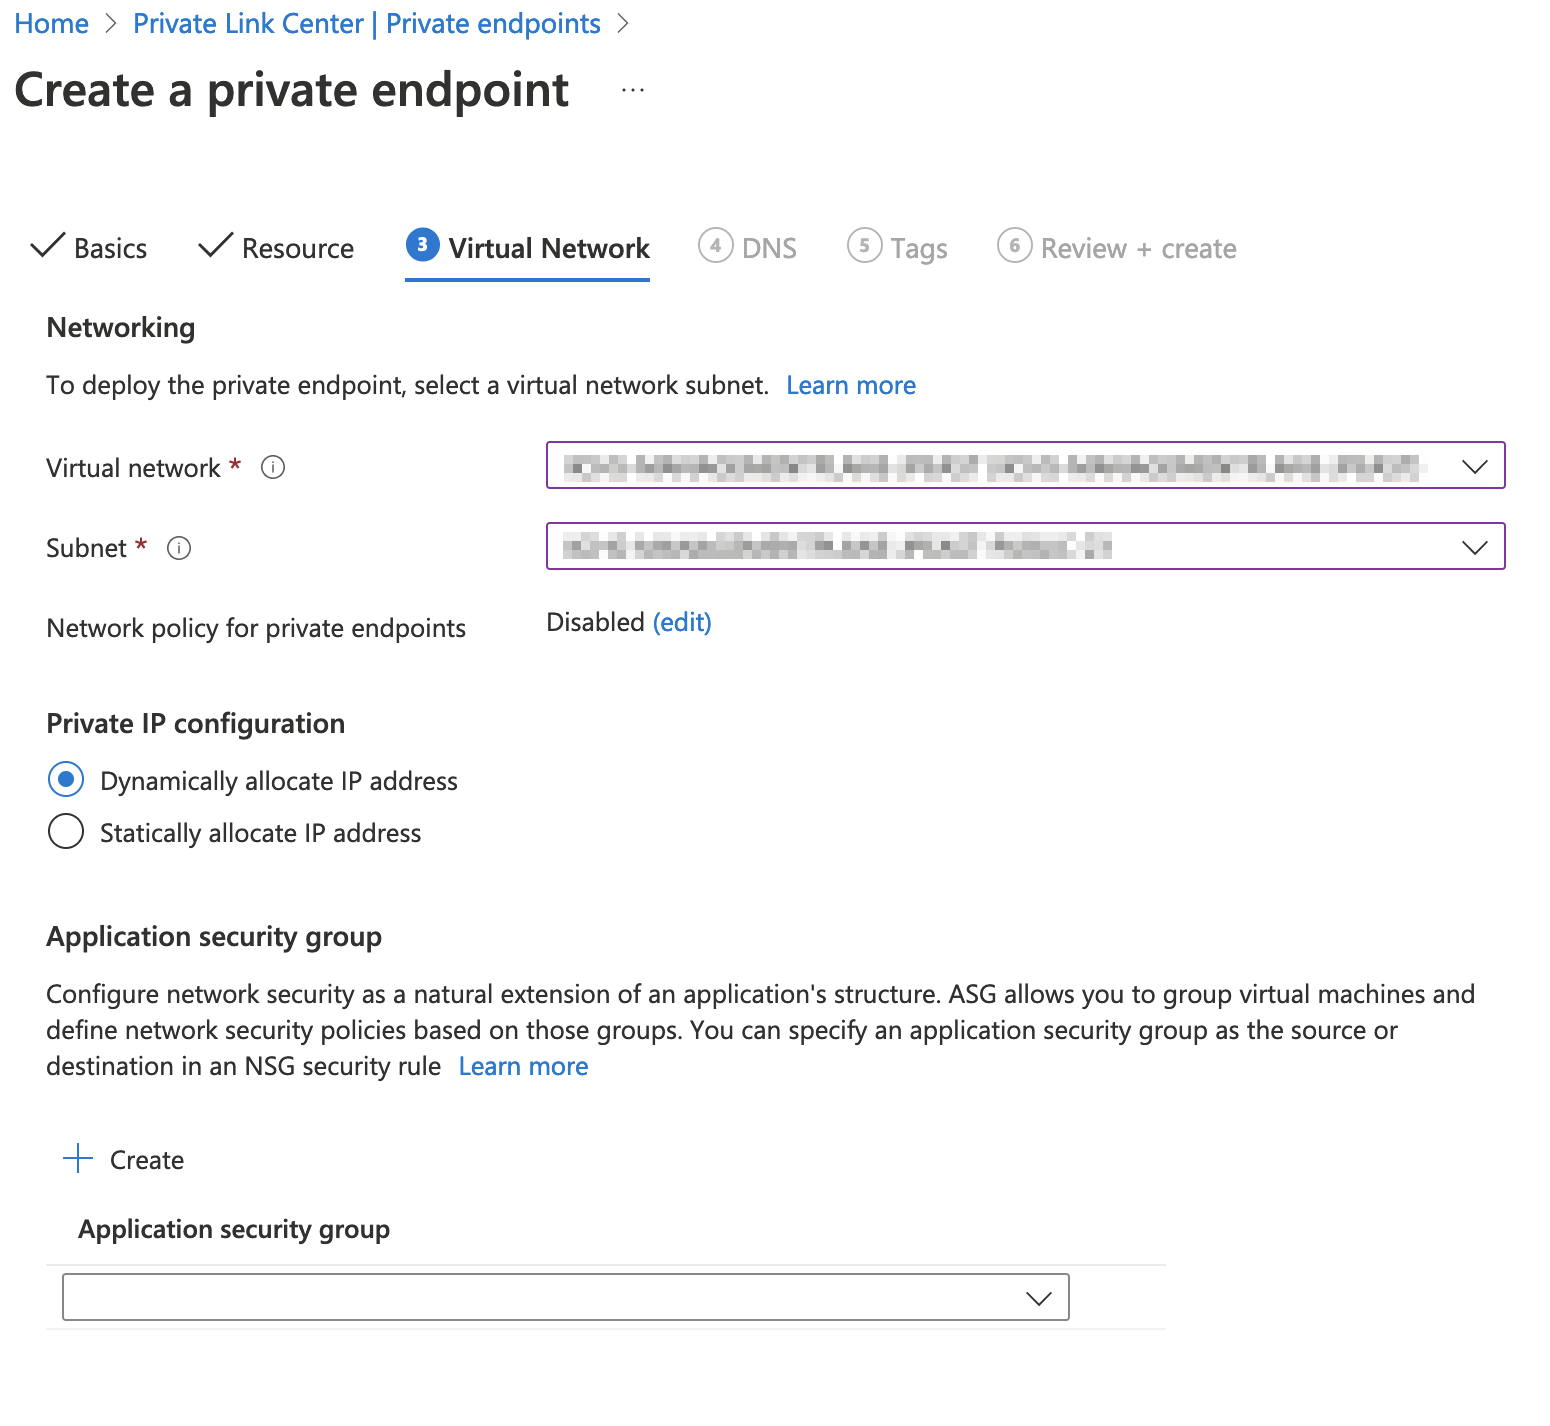
Property
| Value
|
|---|---|
Virtual network
| Select your VNet.
|
Subnet
| Select your subnet.
|
Network policy for private endpoints
| Accept the default value ( Disabled ).
|
Private IP configuration
| Select
Dynamically allocate IP address .
|