Administrator
- Administrator H2L
- All Products
 ASK INFAPreview

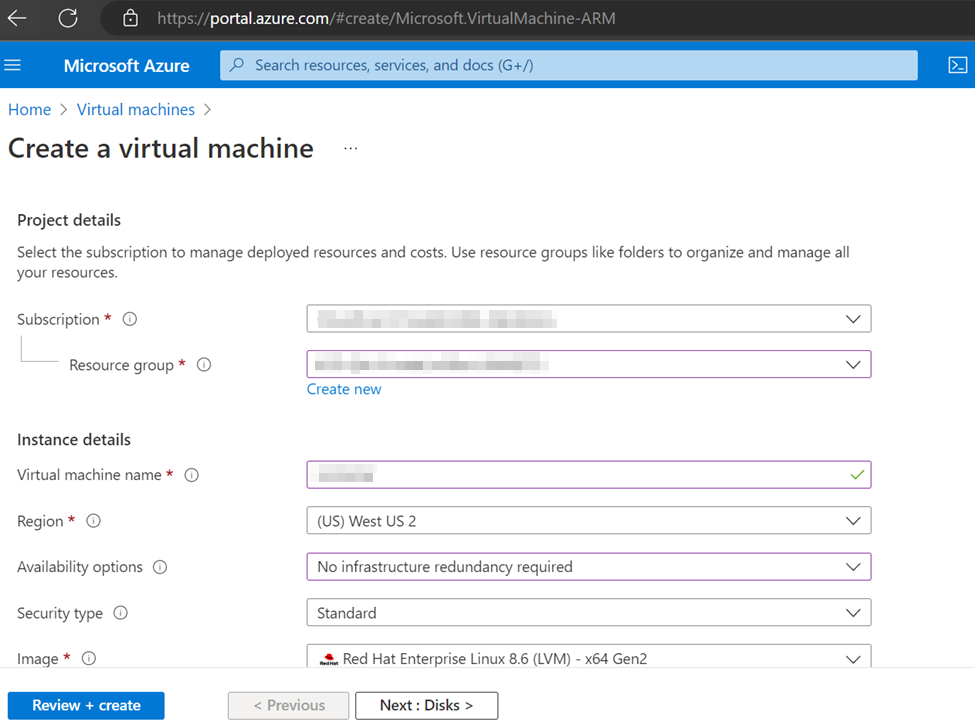
Property
| Value
|
|---|---|
Subscription
| Select your subscription.
|
Resource group
| Select the resource group.
This is the same resource group that you selected when you created the VNet.
|
Virtual machine name
| Enter a name for the VM.
|
Region
| Select the region where your VNet is located.
|
Availability options
| Select
No infrastructure redundancy required .
|
Security type
| Select the security type you plan to use or accept the default value.
|
Image
| Select the appropriate image type.
You can create a Linux or Windows machine.
|
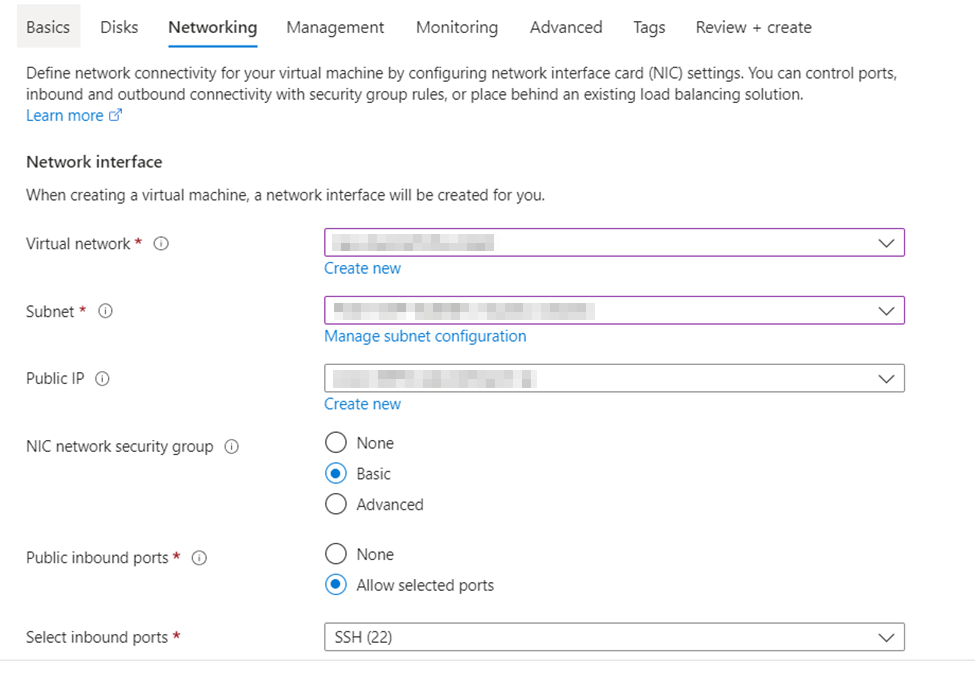
Property
| Value
|
|---|---|
Virtual network
| Select the VNet that you used to when creating the private endpoint.
|
Subnet
| Select the subnet inside the virtual network that you used when creating the private endpoint.
|