Table of Contents

Search

  1. Preface
  2. Product Overview
  3. Before You Begin
  4. Tutorial Lesson 1
  5. Tutorial Lesson 2
  6. Tutorial Lesson 3
  7. Tutorial Lesson 4
  8. Tutorial Lesson 5
  9. Tutorial Lesson 6
  10. Appendix A: Naming Conventions
  11. Appendix B: Glossary

Getting Started

Getting Started

Editing the XML Definition

Editing the XML Definition

The Designer represents an XML hierarchy in an XML definition as a set of views. Each view represents a subset of the XML hierarchy. A view consists of columns and rows. Columns represent elements and attributes, and rows represent occurrences of elements. You use the XML Editor to edit the XML views.
In this lesson, you use the
XML Editor
to pivot the three occurrences of SALARY into three columns in an XML group. You do this because the multiple-occurring element SALARY represents three types of salary: a base salary, a commission, and a bonus that appear in the XML file as three instances of the SALARY element.
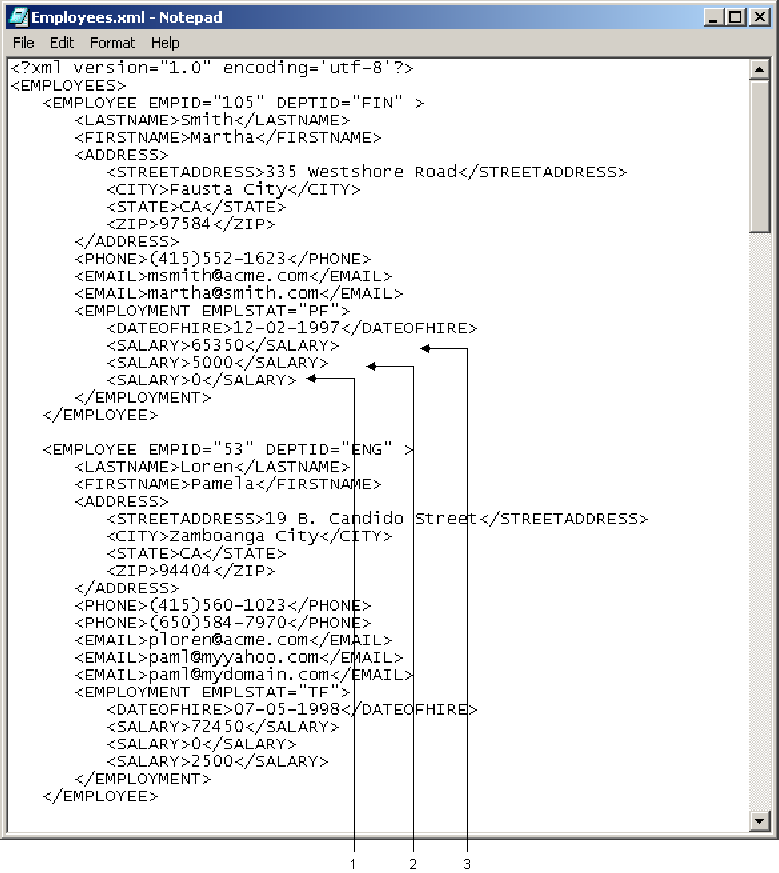
The following image shows contents of Employees.xml in the editor Notepad:
The figure shows the three types of SALARY element: Bonus, Commission, and Base.
  1. Bonus
  2. Commission
  3. Base salary
To work with these three instances separately, you pivot them to create three separate columns in the XML definition.
You create a custom XML view with columns from several groups. You then pivot the occurrence of SALARY to create the columns, BASESALARY, COMMISSION, and BONUS.
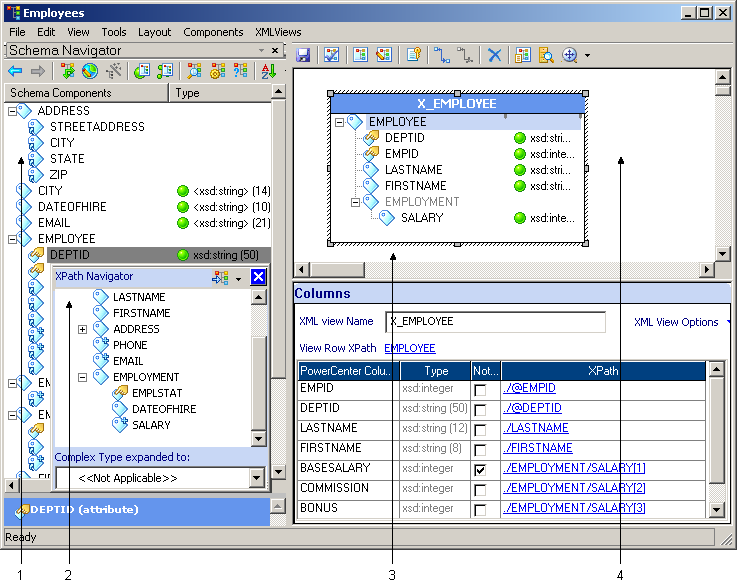
The following image shows the
XML Editor
:
The XML Editor includes the Navigator, XPath Navigator, XML View, and XML Workspace areas.
  1. Navigator
  2. XPath Navigator
  3. XML View
  4. XML Workspace
  1. Double-click the XML definition or right-click the XML definition and select
    Edit XML Definition
    to open the
    XML Editor
    .
  2. Click
    XMLViews
    Create XML View
    to create an XML view.
  3. From the EMPLOYEE group, select DEPTID and right-click it.
  4. Choose
    Show XPath Navigator
    .
  5. Expand the EMPLOYMENT group so that the SALARY column appears.
  6. From the
    XPath Navigator
    , select the following elements and attributes and drag them into the view:
    • DEPTID
    • EMPID
    • LASTNAME
    • FIRSTNAME
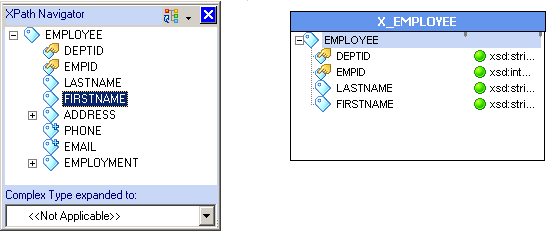
    The following image shows the
    XPath Navigator
    and X_EMPLOYEE view:
    The figure shows the XPath Navigator and the generated X_EMPLOYEE view.
    The XML Editor names the view X_EMPLOYEE.
    The
    XML Wizard
    can transpose the order of the DEPTID and EMPID attributes when it imports them. If this occurs, you can add the columns in the order they appear in the
    Schema Navigator
    or
    XPath Navigator
    . Transposing the order of attributes does not affect data consistency.
  7. Click the
    Mode
    button on the
    XPath Navigator
    and choose
    Advanced Mode
    .
  8. Select the SALARY column and drag it into the XML view.
    The
    XPath Navigator
    must include the EMPLOYEE column at the top when you drag SALARY to the XML view.
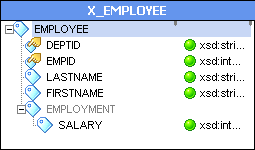
    The following image shows the resulting view that includes the elements and attributes shown in the XML view:
    The elements in the EMPLOYEE column include DEPTID, EMPID, LASTNAME, FIRSTNAME, and the SALARY element at the bottom.
  9. Drag the SALARY column into the XML view two more times to create three pivoted columns.
    Although the columns appear in the column window, the view shows one instance of SALARY.
    The wizard adds three columns in the column view and names them SALARY, SALARY0, and SALARY1.
    The following image shows three columns SALARY, SALARY0, and SALARY1 in the columns view:
    ""
  10. Rename the columns.
    The following table describes the information to modify the name and pivot properties:
    Column Name
    New Column Name
    Not Null
    Pivot Occurrence
    SALARY
    BASESALARY
    Yes
    1
    SALARY0
    COMMISSION
    -
    2
    SALARY1
    BONUS
    -
    3
    To update the pivot occurrence, click the Xpath of the column you want to edit. The
    Specify query predicate for Xpath
    window appears. Select the column name and change the pivot occurrence.
  11. Click
    File
    Apply Changes
    to save the changes to the view.
  12. Click
    File
    Exit
    to close the XML Editor.
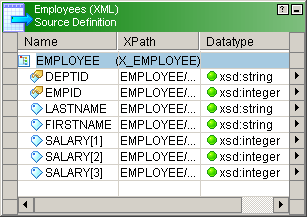
    The following image shows the source definition that appears in the Source Analyzer, with all of the listed EMPLOYEE attributes and elements:
    ""
    The pivoted SALARY columns do not display the names you entered in the Columns window. However, when you drag the ports to another transformation, the edited column names appear in the transformation.
  13. Click
    Repository
    Save
    to save the changes to the XML definition.

0 COMMENTS

We’d like to hear from you!