Table of Contents

Search

  1. Preface
  2. Upgrade Overview
  3. Before You Upgrade the Domain on Linux
  4. Before You Upgrade the Domain on UNIX
  5. Before You Upgrade the Domain on Windows
  6. Prepare for the Upgrade
  7. Upgrade the Domain
  8. Upgrade the Domain with Changes to Node Configuration
  9. Before You Upgrade the Application Services
  10. Application Service Upgrade
  11. Informatica Client Upgrade
  12. After You Upgrade
  13. Upgrade Checklist

Upgrading from Version 10.1 (10.4.1)

Upgrading from Version 10.1 (10.4.1)

Upgrading in Graphical Mode

Upgrading in Graphical Mode

When you upgrade in graphical mode, you can change the node configuration to upgrade the domain to a different machine or to a different domain configuration repository database. You can upgrade the domain in graphical mode on Windows.
To upgrade the domain on the same machine and on the same domain configuration repository database, see Upgrading in Graphical Mode.
On Windows, if you encounter problems when you run the install.bat file from the root directory, run the following file:
<Informatica installation directory>/server/install.exe
  1. Log in to the machine with the same user account that you used to install the previous version.
  2. Stop all processes that access the directory and subdirectories of the Informatica product to upgrade, including command prompts and tail logs.
  3. Go to the root of the directory for the installation files and run install.bat as administrator.
    To run the file as administrator, right-click the install.bat file and select
    Run as administrator
    .
    On Windows, if you encounter problems when you run the install.bat file from the root directory, run the following file:
    <Informatica installation directory>/server/install.exe
    If you do not run the installer as administrator, the Windows system administrator might encounter issues when accessing files in the Informatica installation directory.
    The
    Informatica 10.4.1
    page appears.
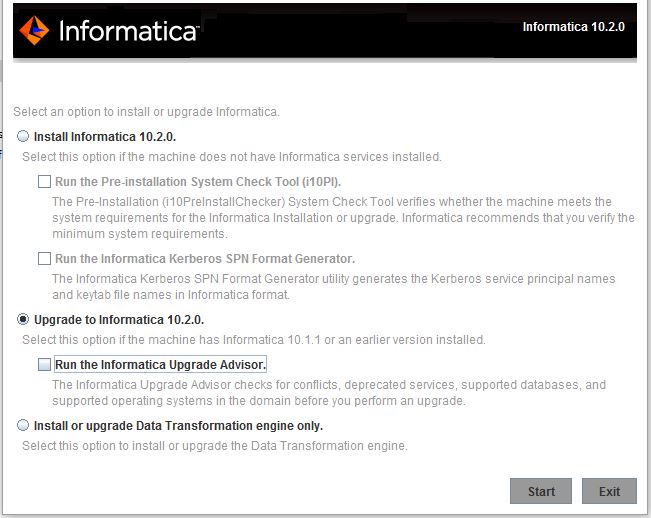
  4. Select
    Upgrade to Informatica 10.2
    .
    This image describes the Informatica upgrade versions available. 
				Informatica provides utilities to facilitate the Informatica services installation process. You can run the following utility before you upgrade Informatica services:
    Pre-Installation (i10Pi) System Check Tool.
    Verifies whether the machine on which you are installing Informatica services meets the system requirements for installation. For more information about running the Pre-Installation (i10Pi) System Check Tool, see GUID-41DD6761-B1F3-4021-824D-545DBE1796A0.
    Informatica Upgrade Advisor.
    Validates the services and checks for obsolete services in the domain before you perform an upgrade. Fore more information about the Informatica Upgrade Advisor, see Run the Informatica Upgrade Advisor.
  5. Click
    Start
    .
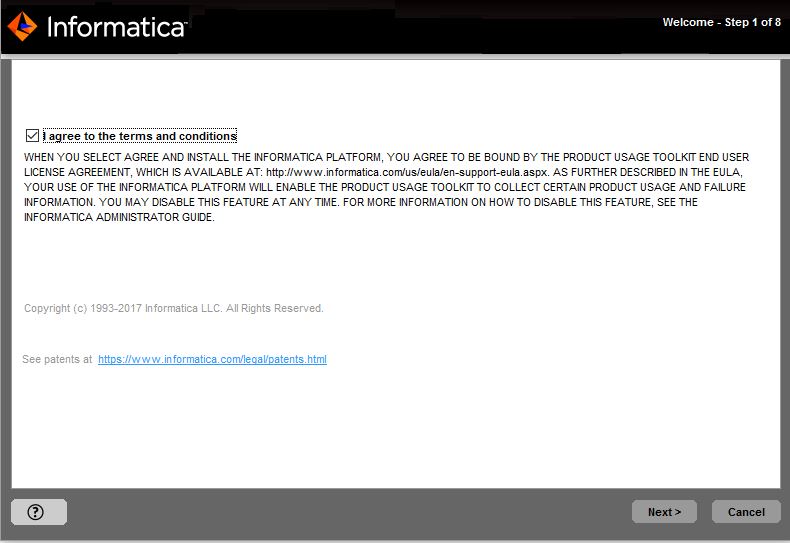
  6. Read the terms and conditions of Informatica product usage toolkit and select
    I agree to the terms and conditions
    . This image describes the Informatica terms and conditions.
    Informatica DiscoveryIQ is a product usage tool that sends routine reports on data usage and system statistics to Informatica. Informatica DiscoveryIQ uploads data to Informatica 15 minutes after you install and configure Informatica domain. Thereafter, the domain sends the data every 30 days. You can choose to disable usage statistics from the Administrator tool.
  7. The
    Upgrade Prerequisties
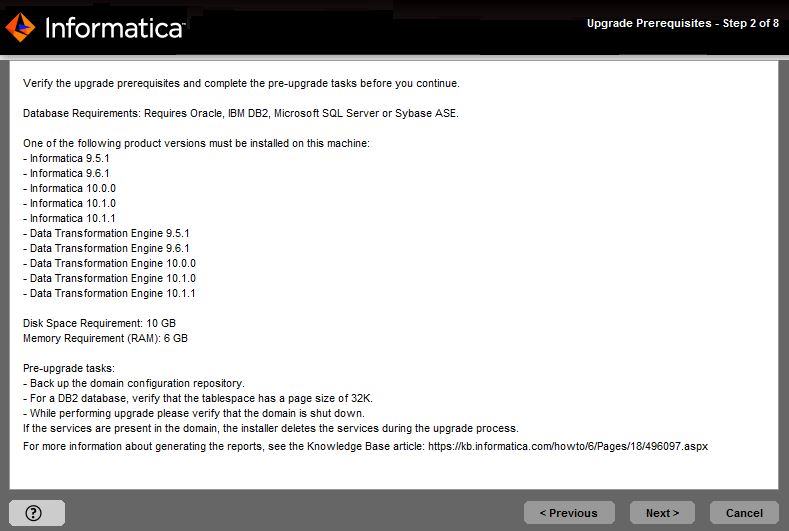
    page appears. This image describes the prerequisites before you perform an upgrade.
    Verify the requirements before you continue the upgrade.
  8. Click
    Next
    .
    The
    Upgrade Directory
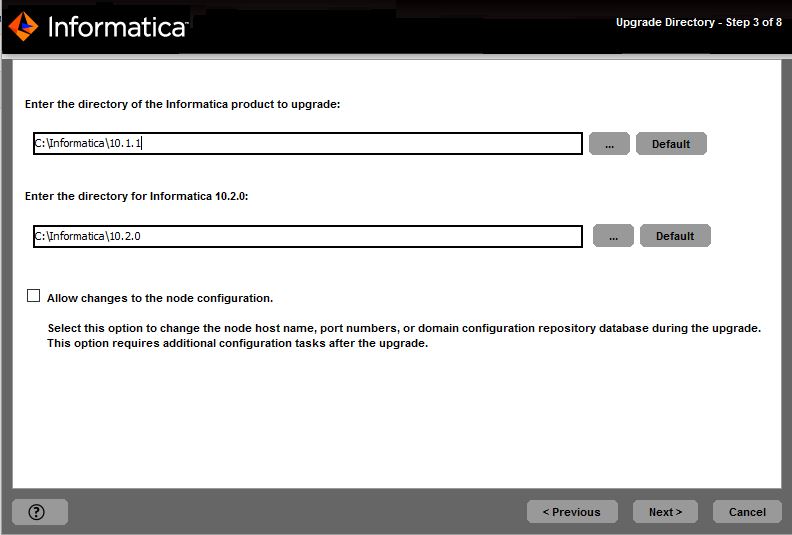
    page appears. This image describes about the upgrade directory.
  9. Enter the directory of the Informatica version you want to upgrade and the directory in which you want to install Informatica 10.2.
    The following table describes the directories that you must specify:
    Directory
    Description
    Directory of the Informatica product to upgrade
    Directory that contains the version of Informatica services that you want to upgrade.
    Directory for Informatica 10.4.1
    Directory in which to install Informatica 10.4.1.
    Enter the absolute path for the installation directory. The directory cannot be the same as the directory that contains the previous version of Informatica services.The directory names in the path must not contain spaces or the following special characters: @|* $ # ! % ( ) { } [ ] , ; '
    Informatica recommends using alphanumeric characters in the installation directory path. If you use a special character such as á or €, unexpected results might occur at run time.
    On Windows, the installation directory must be on the current machine.
  10. Select
    Allow changes to the node host name and port numbers
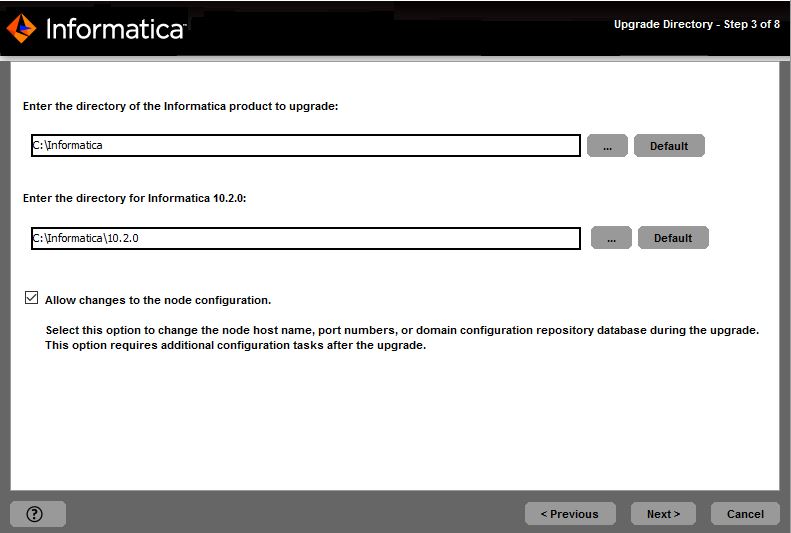
    . This image describes about the upgrade directory and also about the the option to change the node host names, port numbers or domain configuration repository database.
    Use this option to change the configuration of the Informatica installation that you upgrade. If you are upgrading to a different machine, change the node configuration to match the configuration of the new machine. If you are upgrading to a different domain configuration repository database, change the node configuration to match the configuration of the new database.
  11. Click
    Next
    .
    The
    Domain Security - Encryption Key
    page appears.
  12. Enter the directory for the encryption key for the informatica domain.
    Informatica uses an encryption key to secure sensitive data, such as passwords, that are stored in the Informatica domain. When you upgrade, you must enter the directory in which to store the encryption key on the node that you are upgrading.
    All nodes in an Informatica domain use the same keyword and encryption key. You must keep the name of the domain, the keyword for the encryption key, and the encryption key file in a secure location. The encryption key is required when you change the encryption key of the domain or move a repository to another domain.
    Property
    Description
    Encryption key directory
    Directory in which to store the encryption key for the domain. By default, the encryption key is created in the following directory:
    <Informatica installation directory>/isp/config/keys
    .
  13. Enter the user name and password for the informatica domain.
  14. Click
    Next
    .
    The
    Pre-Installation Summary
    page appears.
  15. Review the upgrade information, and click
    Install
    to continue.
    The upgrade wizard installs the Informatica server files to the Informatica 10.2 installation directory.
    The upgrade wizard displays a warning to shut down the Informatica domain before you continue the upgrade.
  16. Click
    OK
    .
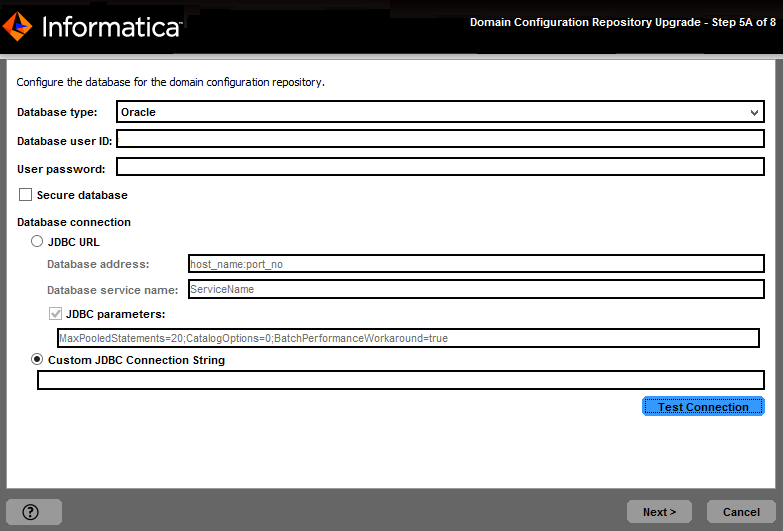
  17. If you are upgrading a gateway node, enter the database and user account information for the domain configuration repository on the
    Domain Configuration Repository Upgrade
    page.
    This image describes about the domain repository configuration.
    If you are upgrading a worker node, the upgrade wizard does not display the domain configuration repository information. You cannot modify the database connection information. Skip to step 21.
    Enter the following database and user account :
    Property
    Description
    Database type
    Database for the domain configuration repository. Select Oracle, IBM DB2, Microsoft SQL Server, PostgreSQL, or Sybase ASE.
    Database user ID
    Database user account for the domain configuration repository.
    User password
    Password for the database user account.
    Tablespace
    Available for IBM DB2. Name of the tablespace in which to create the tables. Specify a tablespace that meets the pageSize requirement of 32768 bytes.
    In a single partition database, if this option is not selected, the installer creates the tables in the default tablespace.
    In a multipartition database, select this option and specify the name of the tablespace that resides in the catalog partition of the database.
    Schema name
    Available for Microsoft SQL Server or PostgreSQL. Name of the schema that will contain domain configuration tables. If not selected, the installer creates the tables in the default schema.
    Trusted connection
    Available for Microsoft SQL Server. Indicates whether to connect to Microsoft SQL Server through a trusted connection. Trusted authentication uses the security credentials of the current user to make the connection to Microsoft SQL Server. If not selected, the installer uses Microsoft SQL Server authentication.
  18. Enter the JDBC connection information.
    • To enter the connection information using the JDBC URL information, select
      JDBC URL
      and specify the JDBC URL properties.
      The following table describes the JDBC URL properties that you must specify:
      Property
      Description
      Database address
      Host name and port number for the database in the format
      host_name:port
      .
      Database service name
      Service or database name:
      • Oracle: Enter the service name.
      • Microsoft SQL Server: Enter the database name.
      • IBM DB2: Enter the service name.
      • Sybase ASE: Enter the database name.
      • PostgreSQL: Enter the database name.
      JDBC parameters
      Optional parameters to include in the database connection string. Use the parameters to optimize database operations for the database. Verify that the parameter string is valid. The installer does not validate the parameter string before it adds the string to the JDBC URL. If not selected, the installer creates the JDBC URL string without additional parameters.
    • To enter the connection information using a custom JDBC connection string, select
      Custom JDBC connection string
      and type the connection string.
      Use the following syntax in the JDBC connection string:
      IBM DB2
      jdbc:Informatica:db2://<host name>:<port number>;DatabaseName=
      Oracle
      jdbc:Informatica:oracle://<host name>:<port number>;ServiceName=
      Use the following connection string to connect to the Oracle database through the Oracle Connection Manager:
      jdbc:Informatica:oracle:TNSNamesFile=<fully qualified path to the tnsnames.ora file>;TNSServerName=<TNS name>;
      Microsoft SQL Server
      jdbc:Informatica:sqlserver://<host name>:<port number>;SelectMethod=cursor;DatabaseName=
      Microsoft Azure SQL Database
      jdbc:Informatica:sqlserver://<host name>:<port number>;SelectMethod=cursor;DatabaseName=<database name>;SnapshotSerializable=true;EncryptionMethod=SSL;HostNameInCertificate=*.database.windows.net;ValidateServerCertificate=false
      PostgreSQL
      jdbc:Informatica:postgresql://<host name>:<port number>;DatabaseName=
      Sybase
      jdbc:Informatica:sybase://<host name>:<port number>;DatabaseName=
      Verify that the connection string contains all the connection parameters required by your database system.
  19. Click
    Test Connection
    to verify that you can connect to the database, and then click
    OK
    to continue.
  20. Click
    Next
    .
    The
    Domain and Node Configuration
    page appears.
  21. Modify the node host name and port number to match the configuration of the new version of Informatica.
    The following table describes the domain and node properties that you can specify:
    Property
    Description
    Domain name
    Name of the domain. The default domain name is Domain_<MachineName>. The name must not exceed 128 characters and must be 7-bit ASCII only. It cannot contain a space or any of the following characters: ` % * + ; " ? , < > \ /
    Node name
    Name of the node that you are upgrading.
    Node host name
    Host name of the machine that hosts the node for the new version of Informatica. If the machine has a single network name, use the default host name. If the machine has multiple network names, you can modify the default host name to use an alternate network name. Optionally, you can use the IP address.
    Note: Do not use localhost. The host name must explicitly identify the machine.
    Node port number
    Port number for the node you are upgrading. The default port number for the node is 6005.
    Gateway node host name
    Host name of the machine that hosts the gateway node for the domain.
    Available if you upgrade a worker node.
    Gateway node port number
    Port number of the gateway node.
    Available if you upgrade a worker node.
  22. Enter the custom keystore file password and location if you are securing the Informatica Administrator with a custom keystore file and you are upgrading to a different gateway node configuration.
    The following table describes the properties for the Informatica Administrator custom keystore:
    Property
    Description
    Custom Keystore Password
    Plain text password for the custom keystore file.
    Custom Keystore File
    Path and file name of the custom keystore file. If you leave this field blank, the installer looks for the keystore file in the following directory:
    <Informatica installation directory>\tomcat\conf\
  23. Click
    Next
    .
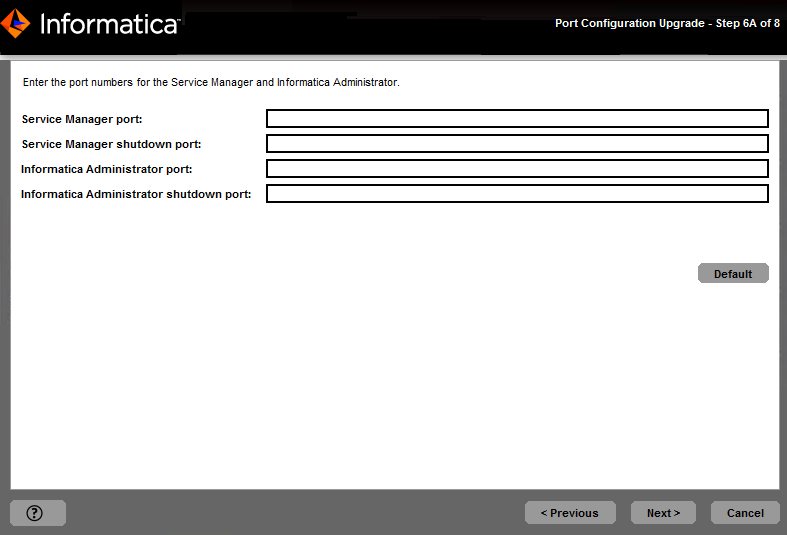
    The
    Port Configuration Upgrade
    page appears.
  24. Enter the new port numbers or use the default port numbers.
    The following table describes the ports that you can specify:
    Port
    Description
    Service Manager port
    Port number used by the Service Manager in the node. Client applications and the Informatica command line programs use this port to communicate to the services in the domain.
    Service Manager Shutdown port
    Port number that controls server shutdown for the domain Service Manager. The Service Manager listens for shutdown commands on this port.
    Informatica Administrator port
    Port number used by the Administrator tool.
    Available if you upgrade a gateway node.
    Informatica Administrator shutdown port
    Port number used by the Administrator tool to listen for shut down commands.
    Available if you upgrade a gateway node.
  25. Click
    Next
    .
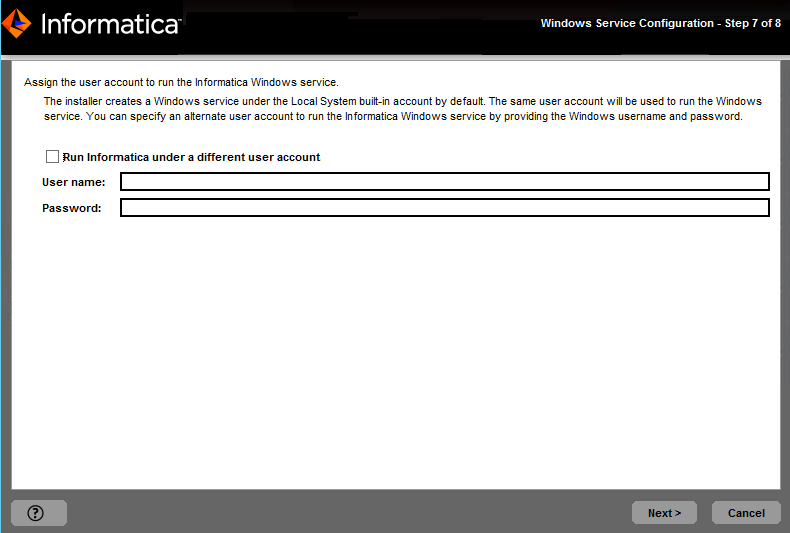
    The
    Windows Service Configuration
    page appears.
    On Windows, the upgrade wizard creates a service to start Informatica. By default, the service runs under the same user account as the account used for installation. You can run the Windows service under a different user account.
  26. Select whether to run the Windows service under a different user account.
    Enter the following user account information:
    Property
    Description
    Run Informatica under a different user account
    Indicates whether to run the Windows service under a different user account.
    User name
    User account with which to run the Informatica Windows service.
    Use the following format:
    <domain name>\<user account>
    This user account must have the Act as operating system permission.
    Password
    Password for the user account with which to run the Informatica Windows service.
  27. Click
    Next
    .
    The
    Post-Installation Summary
    page appears.
  28. Click
    Done
    to complete the installation procedure and exit the installer.
Review the
upgrade.log
file to get more information about the tasks performed by the upgrade wizard and to view the configuration of installed components.

0 COMMENTS

We’d like to hear from you!