Setting up SCIM with Okta

Setting up SCIM with Okta

Step 1. Create a provisioning app in Okta

Step 1. Create a provisioning app in Okta

Create an app in Okta to provision users and groups in
Informatica Intelligent Cloud Services
.
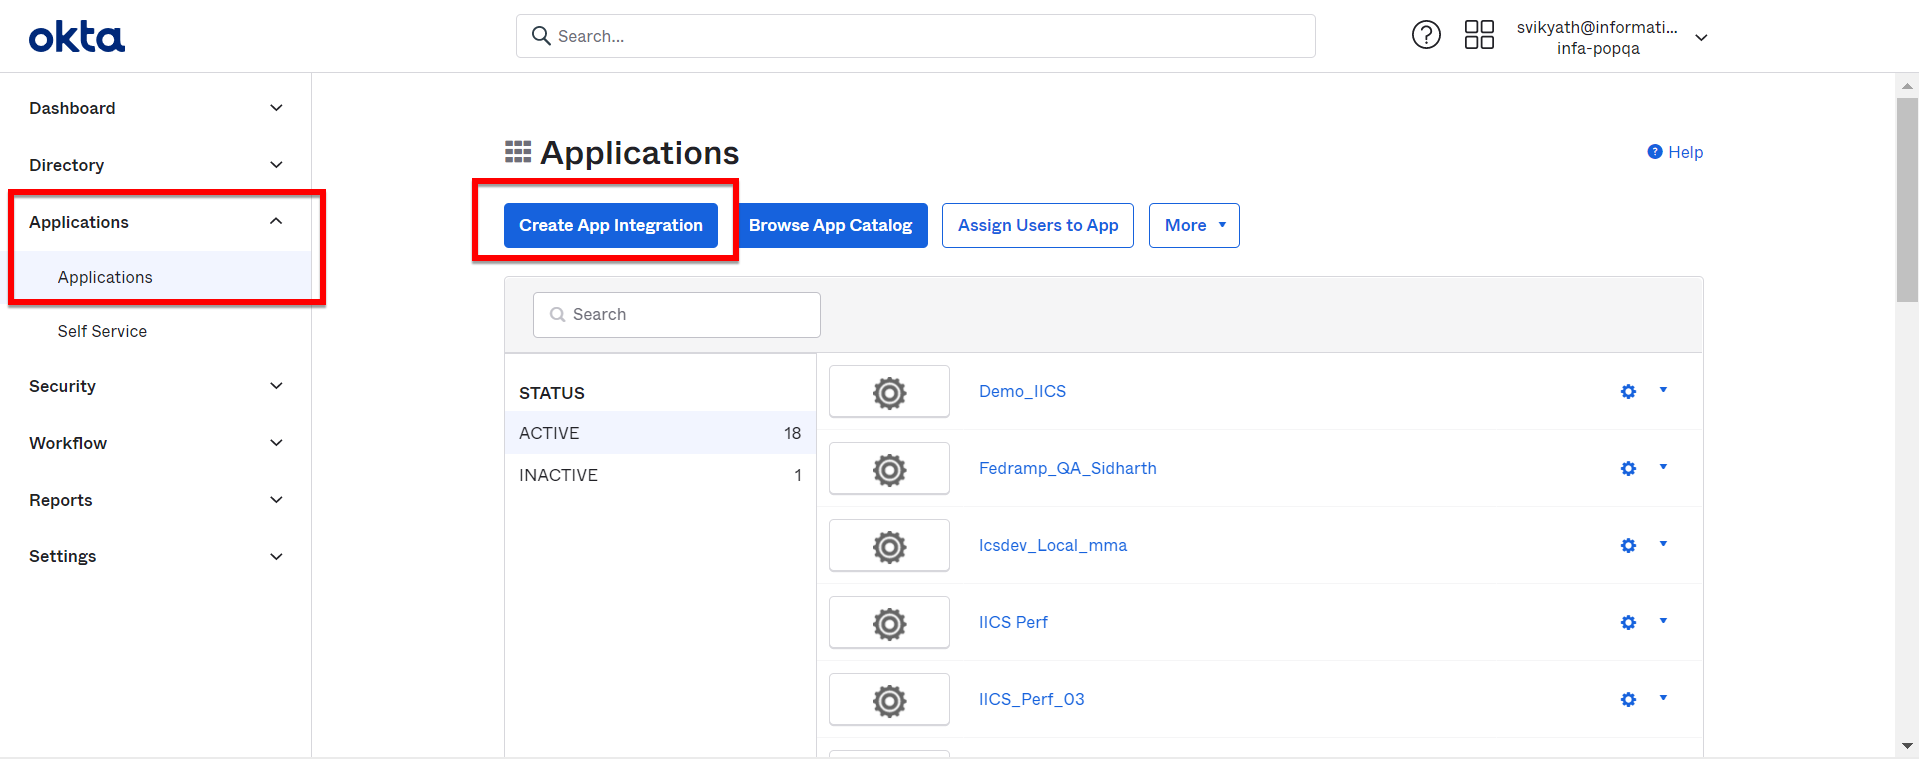
  1. Log in to Okta as an administrator.
  2. On the left panel, select
    Applications
    Applications
    , and click
    Create App Integration
    .
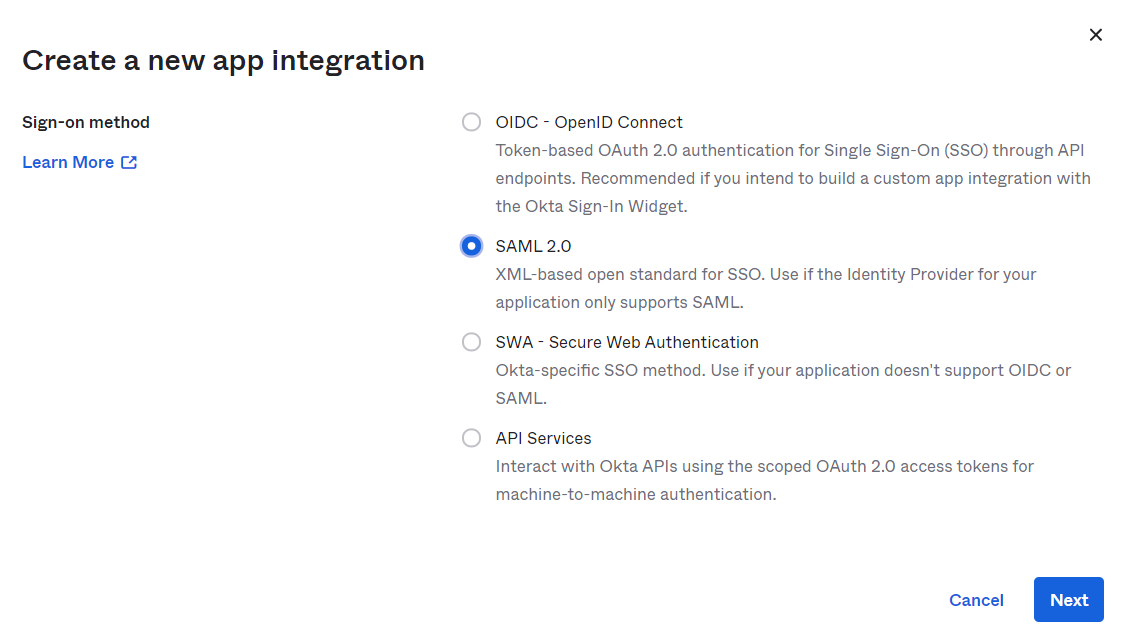
  3. In the
    Create a new app integration
    window, select
    SAML 2.0
    and click
    Next
    .
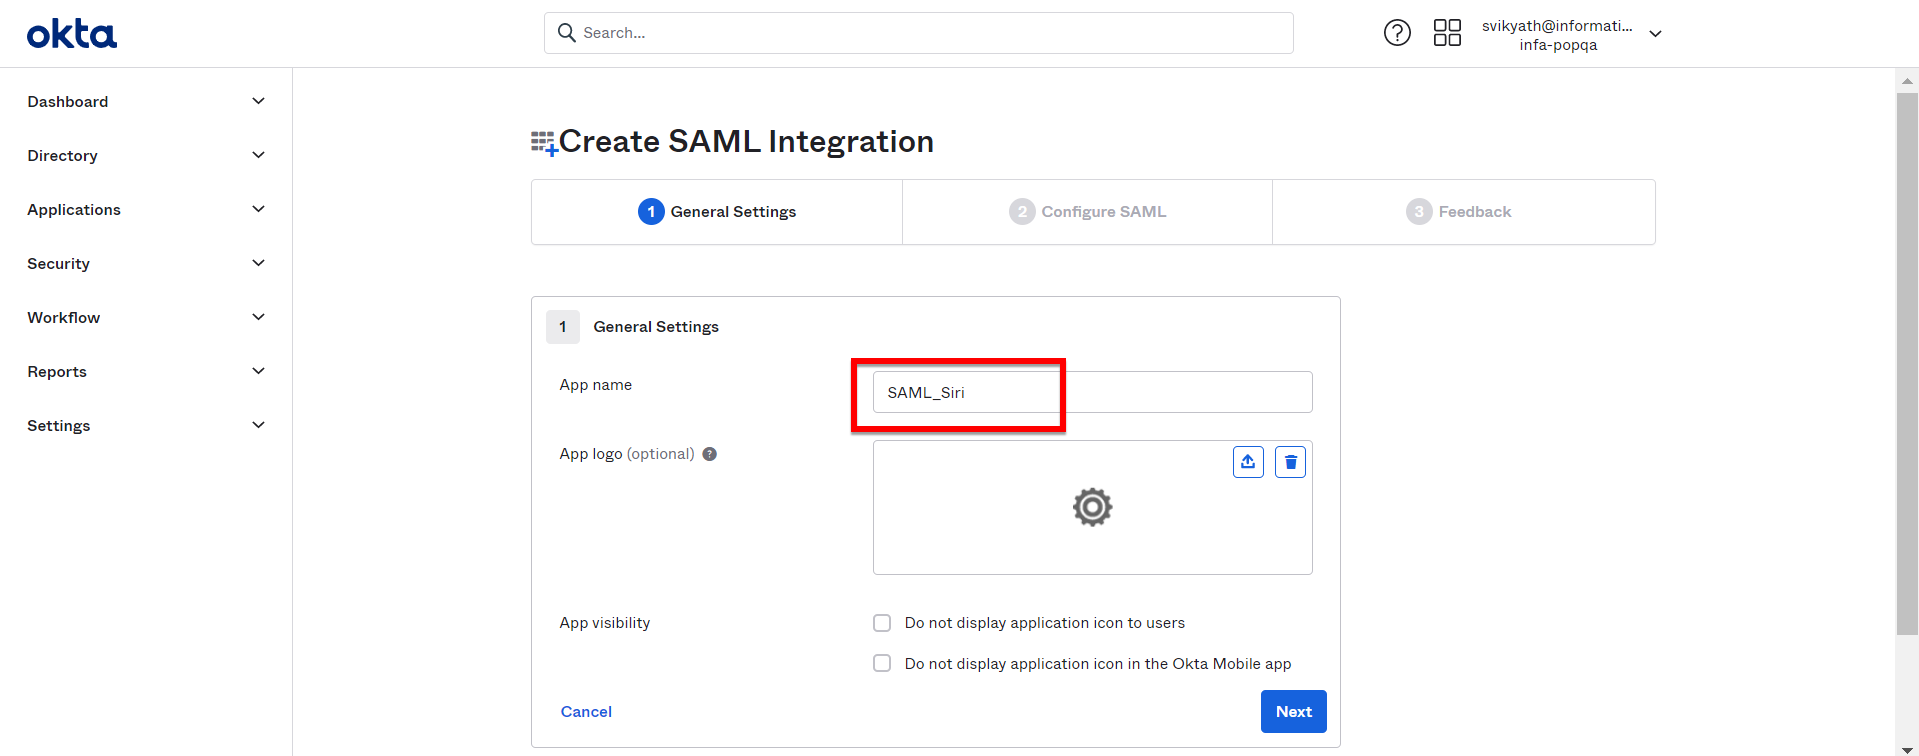
  4. On the
    General Settings
    tab, enter an app name and click
    Next
    .
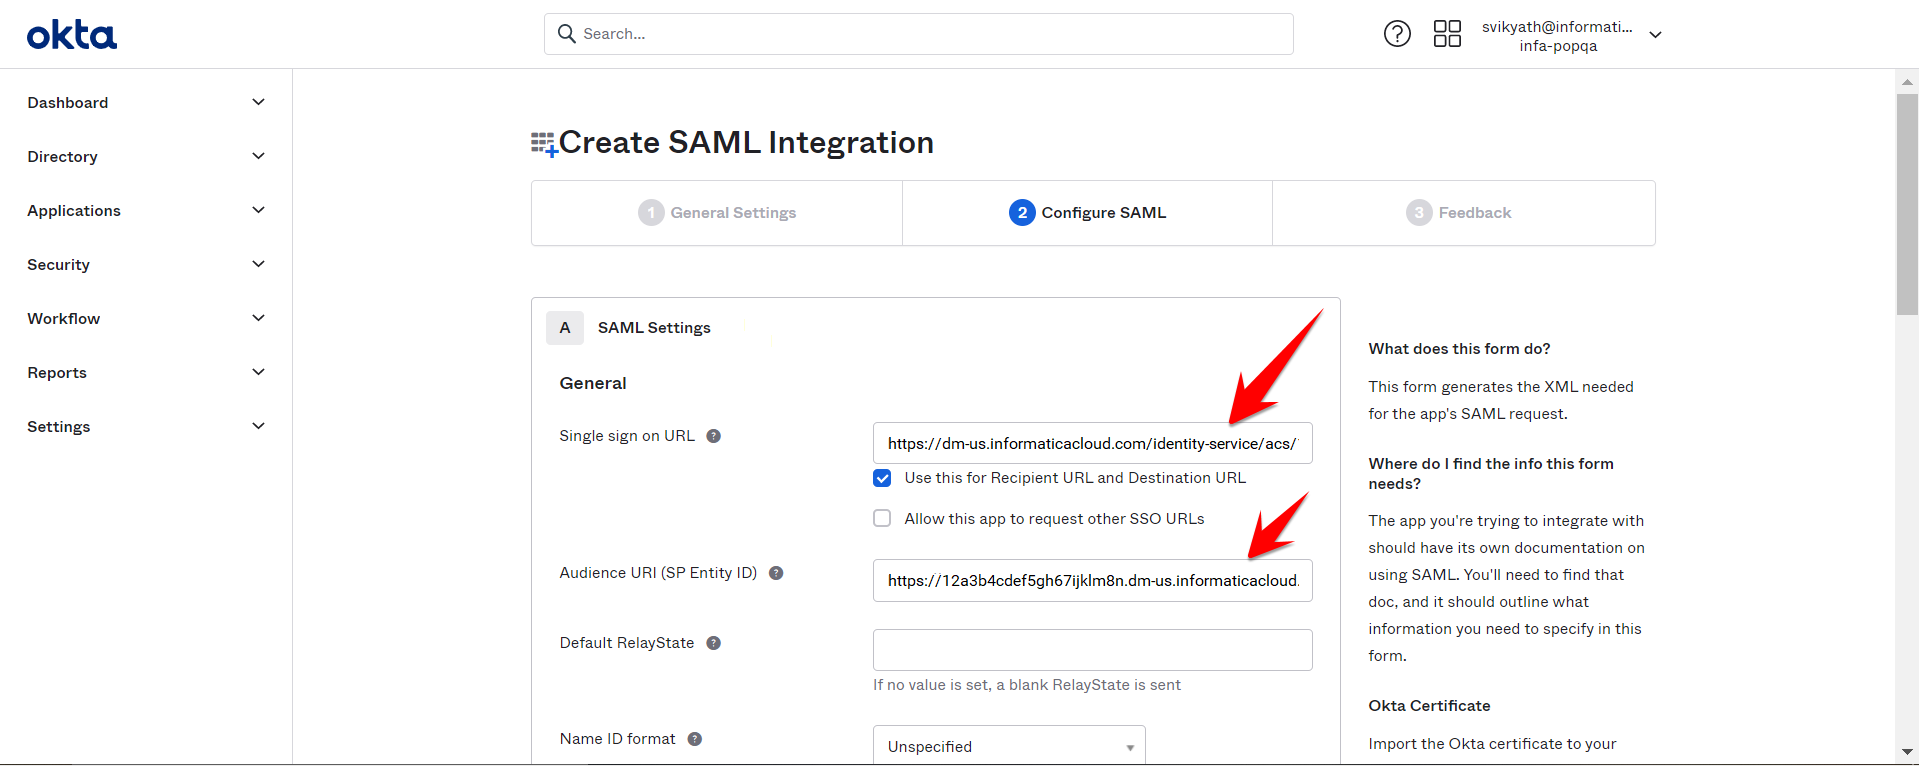
  5. On the
    Configure SAML Settings
    tab, configure the
    Single sign on URL
    and
    Audience URI
    .
    Setting
    Value
    Single sign on URL
    <IICS base URL>/identity-service/acs/<organization ID>
    For example,
    https://dm-us.informaticacloud.com/identity-service/acs/12a3b4cdef5gh67ijklm8n
    Audience URI (SP Entity ID)
    https://<organization ID>.<hostname>
    For example,
    https://12a3b4cdef5gh67ijklm8n.dm-us.informaticacloud.com
    Accept the default values for
    Name ID format
    ,
    Application username
    , and
    Update application username
    .
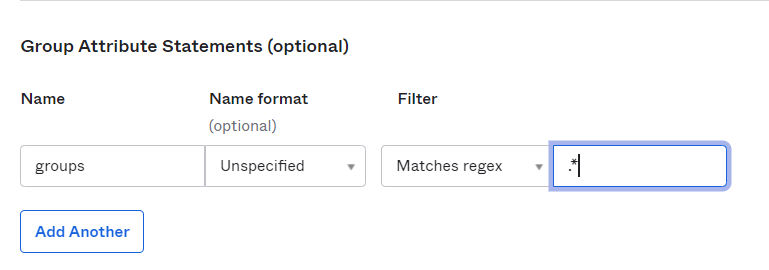
  6. In the
    Group Attribute Statements
    section, enter the SAML attributes to send all groups that are associated with the user in the SAML token during sign on.
    Configure the following statement:
    • Name:
      groups
    • Name format:
      Unspecified
    • Value:
      Matches regex .*
  7. Optionally, configure other attributes such as firstName and lastName.
  8. Click
    Next
    .
  9. On the
    Feedback
    tab, click
    Finish
    .
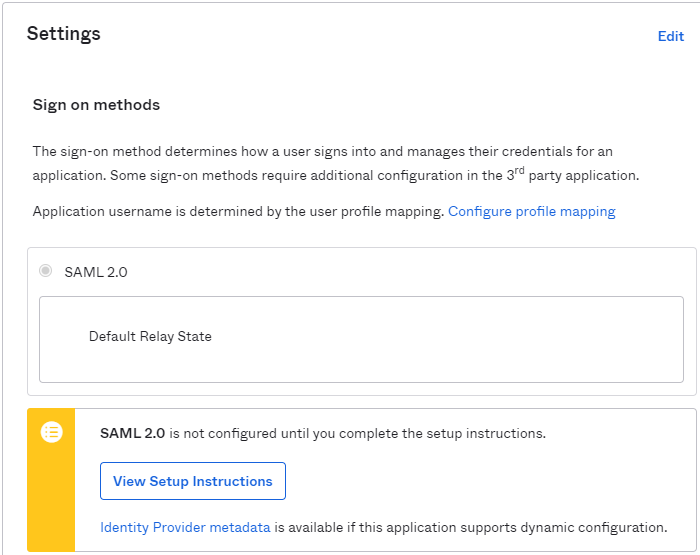
  10. When the app is created, open the
    Settings
    tab, click the
    Identity Provider metadata
    link, and save the identity provider metadata to an XML file.
    You will use this file to set up SAML in
    Informatica Intelligent Cloud Services
    .

0 COMMENTS

We’d like to hear from you!