Setting up SCIM with Okta

Setting up SCIM with Okta

Step 4. Map SCIM attributes in the provisioning app

Step 4. Map SCIM attributes in the provisioning app

When you create the provisioning app in Okta, most attribute mappings are already correct. However, some attributes might need to be added or changed. Map attributes in the Profile Editor.
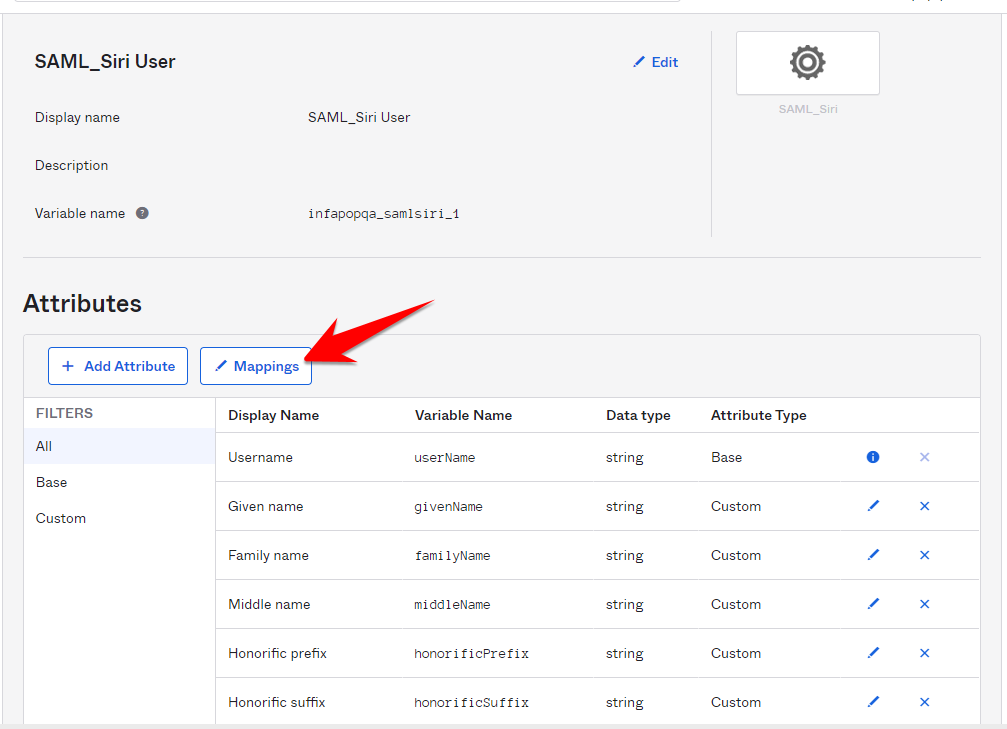
  1. In Okta, go to
    Directory
    Profile Editor
    .
  2. Select the app that you created.
  3. In the
    Attributes
    area, click
    Mappings
    .
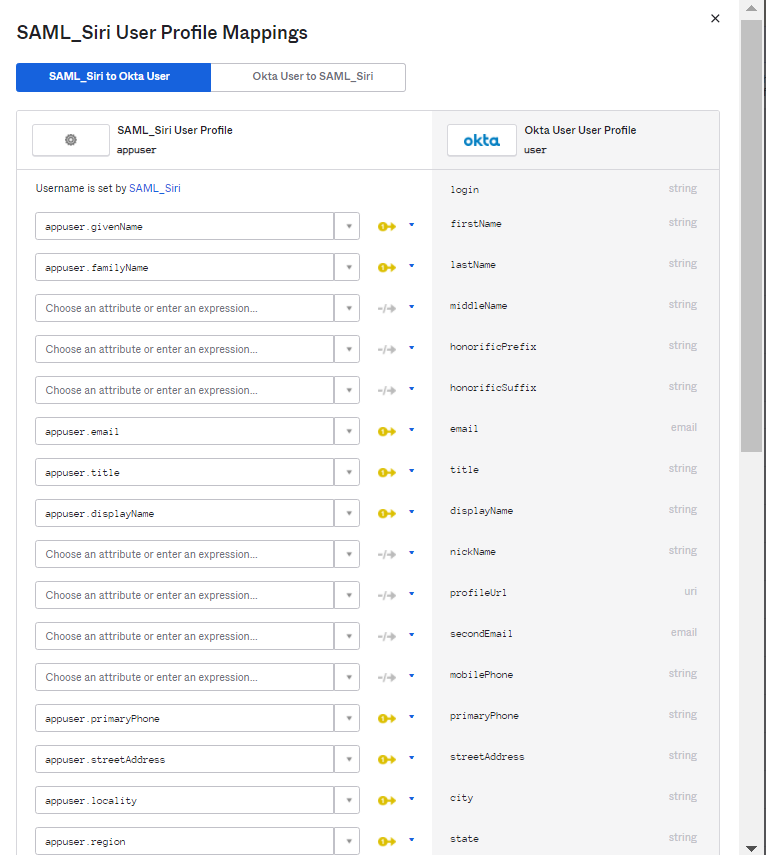
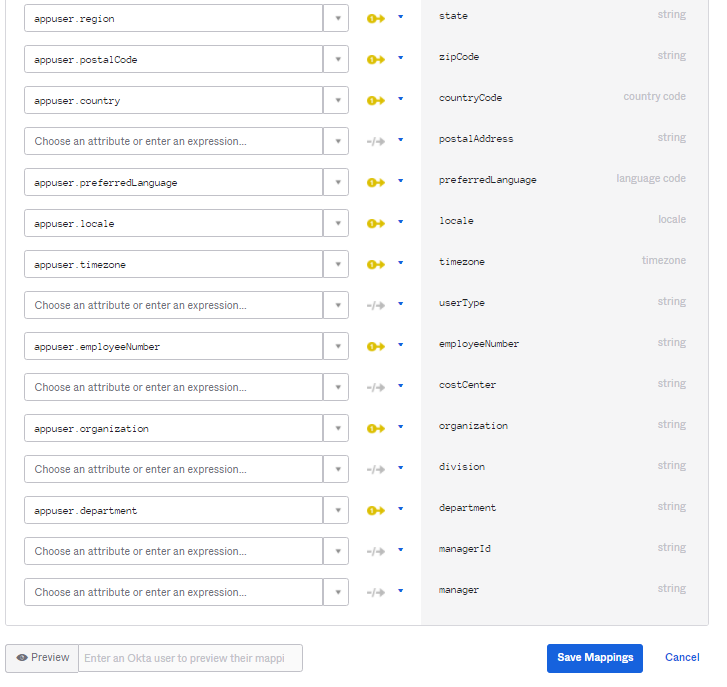
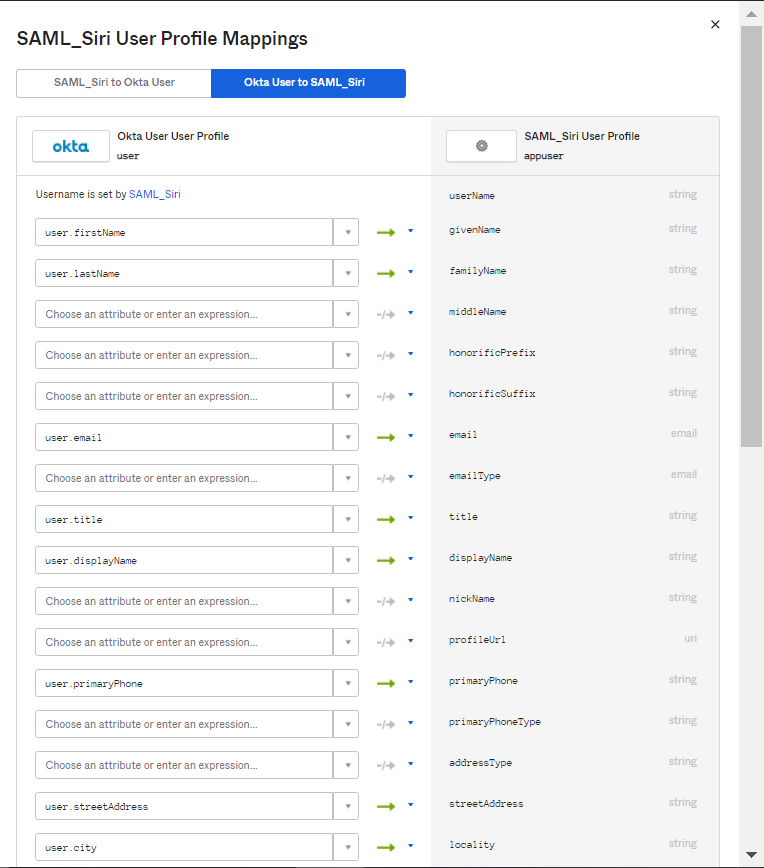
  4. Verify that the following attributes are mapped for each user:
    • id
    • externalId
    • username
    • displayName
    • title
    • preferredLanguage
    • locale
    • timezone
    • active
    • addresses[type eq "work"].streetAddress
    • addresses[type eq "work"].locality
    • addresses[type eq "work"].region
    • addresses[type eq "work"].postalCode
    • addresses[type eq "work"].country
    • employeeNumber
    • organization
    • department
    • emails[type eq "work"]
    • givenName
    • familyName
    • phoneNumbers[type eq "work"]
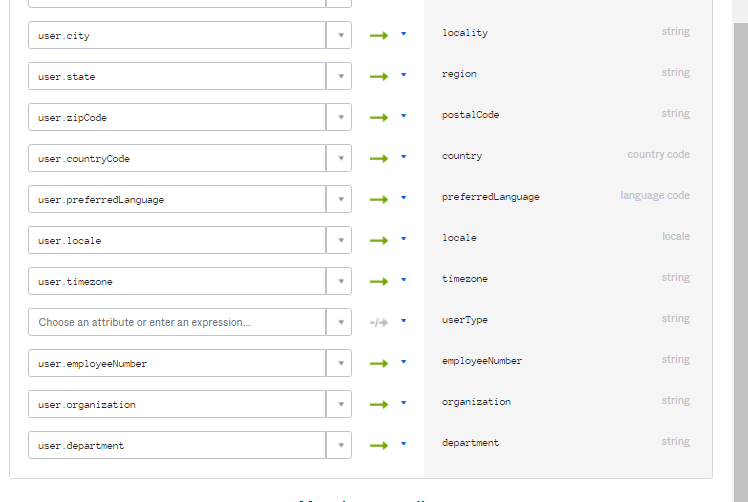
    The attribute mapping should look like the following images. You need to map the attributes on the
    SAML to Okta User
    and
    Okta User to SAML
    tabs.
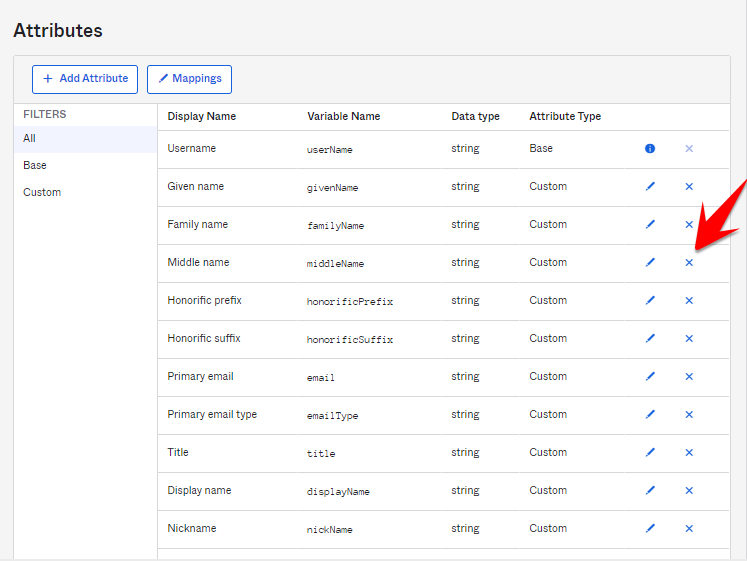
  5. To delete an attribute, close the editing pane and click the "X" icon.
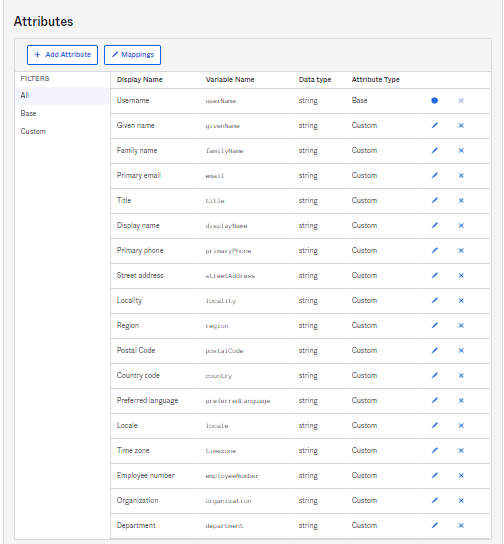
The final list of attributes should look like the following image:

0 COMMENTS

We’d like to hear from you!
Vien Doan - June 07, 2024

Step 4 mentions "Roles" being one of the attributes to be mapped, but it is not depicted in any of the screenshots posted after. 

Informatica Documentation Team - June 07, 2024

Hi Vien Doan,

Thanks for reaching out! We're currently investigating your query and will get back to you.


Informatica Documentation Team - June 11, 2024

Hi Vien Doan,

We've confirmed with our development department that the "roles" attribute does not need to be mapped. We'll update the article ASAP. 

Thank you so much for bringing this to our attention!