Setting up SCIM with Okta

Setting up SCIM with Okta

Step 3. Integrate the Okta provisioning app with Informatica Intelligent Cloud Services

Step 3. Integrate the Okta provisioning app with Informatica Intelligent Cloud Services

To integrate the provisioning app with
Informatica Intelligent Cloud Services
, configure the provisioning mode, the integration settings, and the provisioning to app settings.
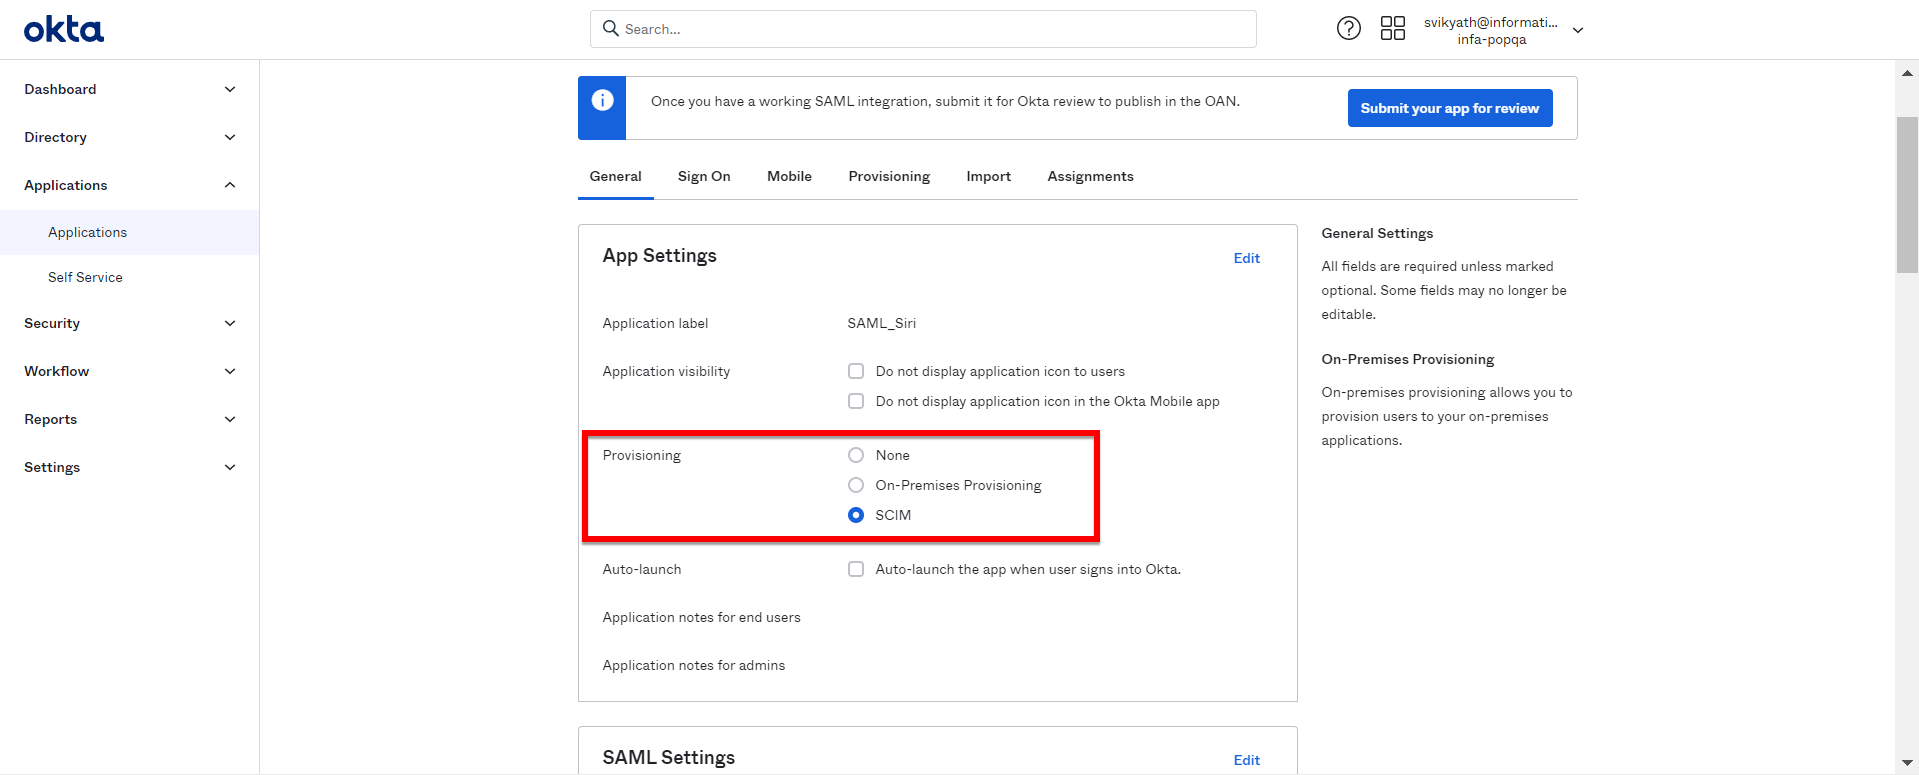
  1. In Okta, open the app you created.
  2. On the
    General
    tab, in the
    App Settings
    area, set the provisioning to
    SCIM
    .
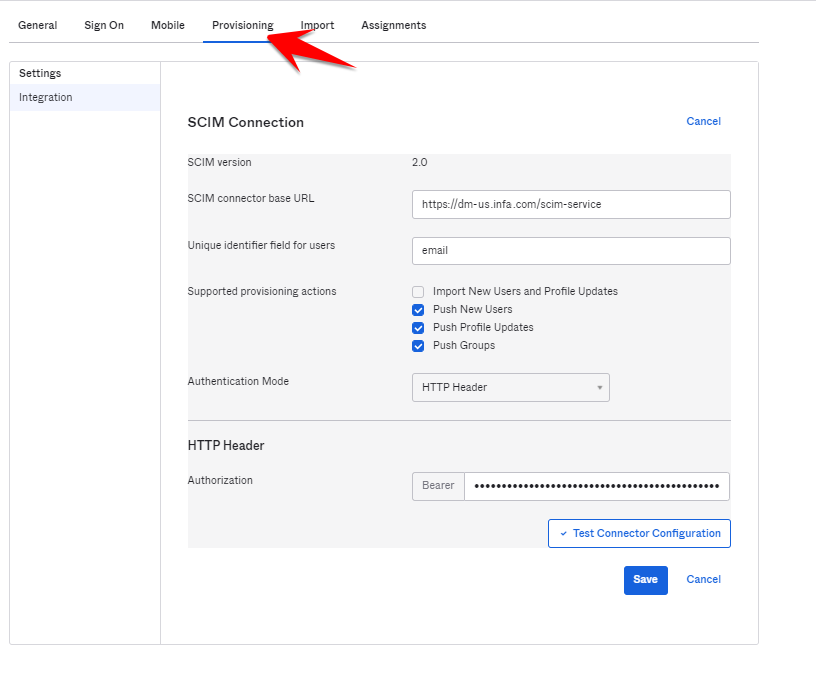
  3. On the
    Provisioning
    tab, select
    Settings
    Integration
    , and configure the SCIM connection settings.
    Setting
    Value
    SCIM connector base URL
    Enter the tenant URL. For example:
    https://dm-us.informaticacloud.com/scim-service
    Unique identifier field for users
    Enter
    email
    .
    Supported provisioning actions
    Enable
    Push New Users
    ,
    Push Profile Updates
    , and
    Push Groups
    .
    Authentication Mode
    Select
    HTTP Header
    .
    Bearer Token
    Copy the token you generated when you enabled SCIM in
    Informatica Intelligent Cloud Services
    .
  4. Click
    Test Connector Configuration
    to test the configuration, and then click
    Close
    .
  5. Click
    Save
    .
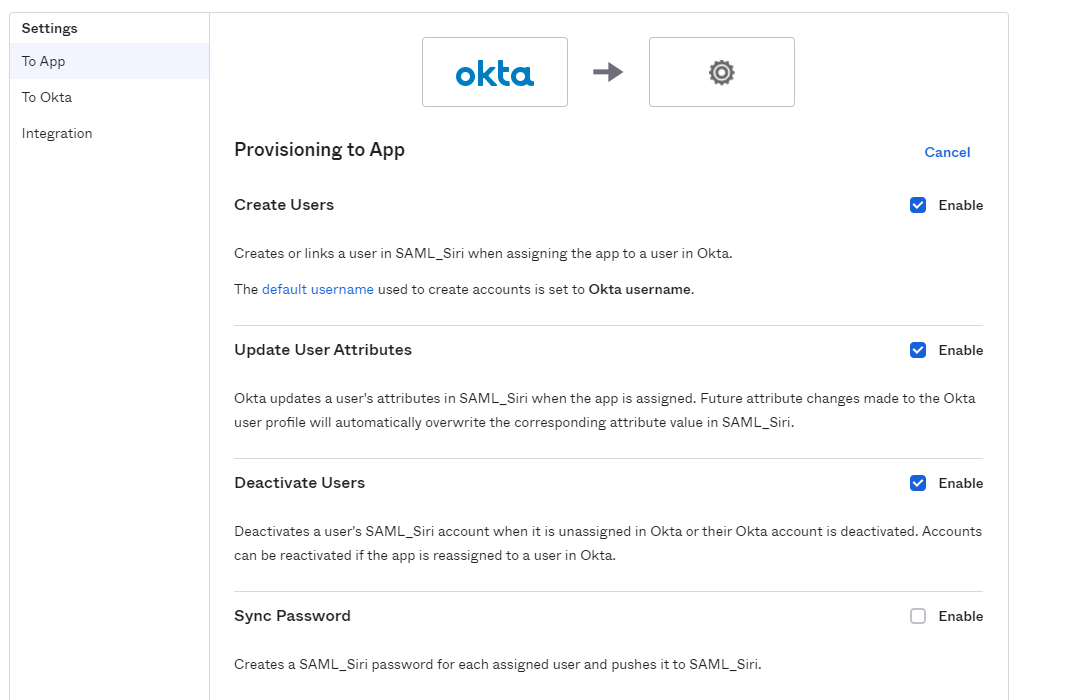
  6. On the
    Provisioning
    tab, select
    Settings
    To App
    .
  7. In the
    Provisioning to App
    settings, enable provisioning for
    Create Users
    ,
    Update User Attributes
    , and
    Deactivate Users
    .
  8. Click
    Save
    .

0 COMMENTS

We’d like to hear from you!