Table of Contents

Search

  1. Preface
  2. Product Overview
  3. Before You Begin
  4. Tutorial Lesson 1
  5. Tutorial Lesson 2
  6. Tutorial Lesson 3
  7. Tutorial Lesson 4
  8. Tutorial Lesson 5
  9. Tutorial Lesson 6
  10. Appendix A: Naming Conventions
  11. Appendix B: Glossary

Getting Started

Getting Started

Defining a Link Condition

Defining a Link Condition

After you create links between tasks, you can specify conditions for each link to determine the order of execution in the workflow. If you do not specify conditions for each link, the Integration Service executes the next task in the workflow by default.
If the link condition evaluates to True, the Integration Service runs the next task in the workflow. The Integration Service does not run the next task in the workflow if the link condition evaluates to False. You can also use pre-defined or user-defined workflow variables in the link condition.
You can use the -- or // comment indicators with the
Expression Editor
to add comments. Use comments to describe the expression.
You can view results of link evaluation during workflow runs in the workflow log.
In the following steps, you create a link condition before the Session task and use the built-in workflow variable WORKFLOWSTARTTIME. You define the link condition so the Integration Service runs the session if the workflow start time is before the date you specify.
  1. Double-click the link from the Start task to the Session task.
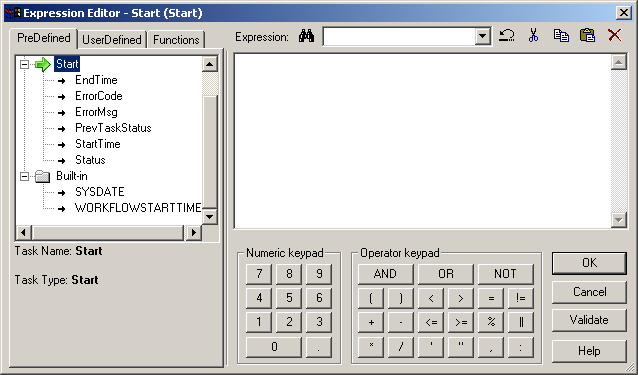
    The following image shows the
    Expression Editor
    that appears:
    ""
  2. Expand the Built-in node on the
    PreDefined
    tab.
    The Workflow Manager displays the two built-in workflow variables, SYSDATE and WORKFLOWSTARTTIME.
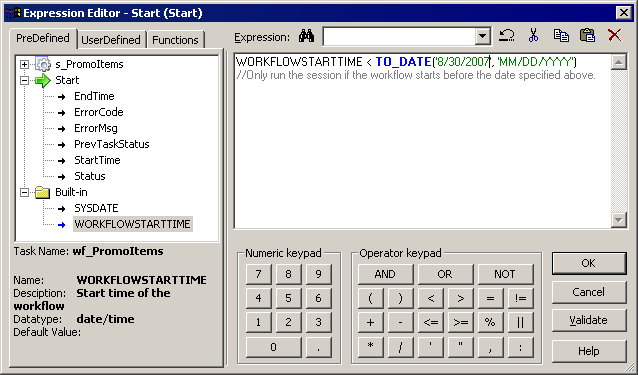
  3. Enter the following expression in the expression window. Enter a date later than today’s date:
    WORKFLOWSTARTTIME < TO_DATE('8/30/2007','MM/DD/YYYY')
    You can double-click the built-in workflow variable on the
    PreDefined
    tab and double-click the TO_DATE function on the
    Functions
    tab to enter the expression.
  4. Press Enter to create a new line in the Expression.
    Add a comment by typing the following text:
    // Only run the session if the workflow starts before the date specified above.
    The following image shows the contents of the
    PreDefined
    tab:
    The comment appears in the Expression window.
  5. Click
    Validate
    to validate the expression.
    The Workflow Manager displays a message in the
    Output
    window.
  6. Click
    OK
    .
    After you specify the link condition in the
    Expression Editor
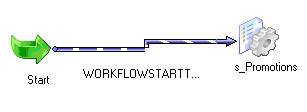
    , the Workflow Manager validates the link condition and displays it next to the link in the workflow.
    The following image displays the link condition next to the link in the workflow:
    The Start task is followed by the specified WORKFLOWSTARTTIME link condition in the workflow.
  7. Click
    Repository
    Save
    to save the workflow in the repository.
Next, you run and monitor the workflow.

0 COMMENTS

We’d like to hear from you!