Table of Contents

Search

  1. Preface
  2. PowerExchange Installation and Upgrade Overview
  3. Installation Planning
  4. Upgrade Planning
  5. Installing and Upgrading PowerExchange on IBM i
  6. Installing and Upgrading PowerExchange on Linux and UNIX
  7. Installing and Upgrading PowerExchange on Windows
  8. Installing and Upgrading PowerExchange on z/OS
  9. Appendix A: Upgrade Considerations
  10. Appendix B: PowerExchange Environment
  11. Appendix C: Manual Installation on IBM i

Installation and Upgrade Guide

Installation and Upgrade Guide

Step 3. Run the z/OS Installation Assistant for a Full Installation

Step 3. Run the z/OS Installation Assistant for a Full Installation

To perform a full installation of PowerExchange, you must run the z/OS Installation Assistant wizard on a 64-bit Windows system.
If you do not have an existing INSTPARM file from a previous installation, the z/OS Installation Assistant initially creates an INSTPARM file that contains only the default values. The z/OS Installation Assistant updates this InstParm file with your entries. As you progress through the z/OS Installation Assistant pages, you can save your entries to the InstParm file by clicking
Save
on any page.
The z/OS Installation Assistant also creates a corresponding INPARM
nn
file in an XRunlib directory on the Windows system, where
nn
is a two-digit number from 00 to 99. Each time you run the z/OS Installation Assistant, it creates another INPARM
nn
file with an
nn
value that is incremented by 1. After
nn
reaches 99, the z/OS Installation Assistant starts over at 00, creating INPARM00. When you complete the z/OS Installation Assistant, the INPARM
nn
file is transferred to the RUNLIB library on the z/OS system.
Retain the customized InstParm file so that you can use it to upgrade PowerExchange or apply hotfixes later.
On some z/OS Installation Assistant pages, you can click
Advanced Parms
to define advanced parameters or click
Restore Defaults
to restore the default values. However, if you define advanced parameters, you cannot use the
Restore Defaults
button to restore the default values later.
You must run the z/OS Installation Assistant on a 64-bit Windows system. If you attempt to run the wizard on a 32-bit system, the installation fails.
  1. In the temporary directory to which you extracted the z/OS installation files (the "pwx_mvs" directory in the preceding topic), right-click
    MVS_Install.exe
    and select
    Run as administrator
    .
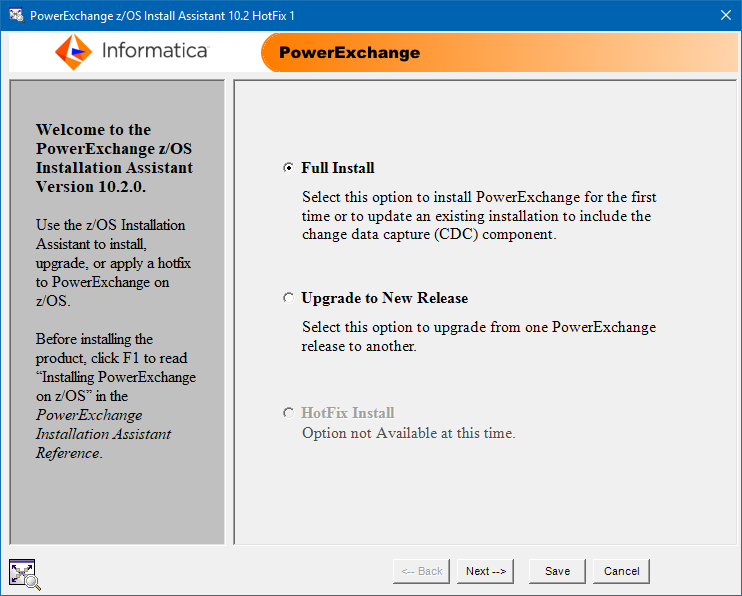
    The z/OS Installation Assistant starts:
    On the PowerExchange z/OS Installation Assistant welcome page, select Full Install.
  2. Select
    Full Install
    , and click
    Next
    .
  3. If you are performing a new installation and an InstParm file does not yet exist, a message indicates that the file will be created with default values. Click
    OK
    to create the InstParm file on the Windows system.
  4. On the
    Full Install
    page, click
    Next
    .
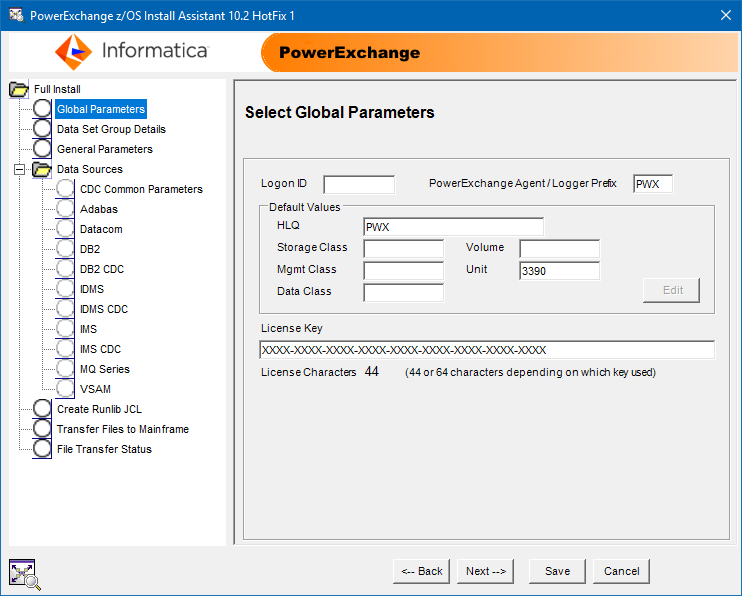
    The
    Select Global Parameters
    page appears:
    On the Select Global Parameters page, enter global parameters.
  5. Enter the default data set high-level qualifier and default storage settings.
    Then, click
    Next
    .
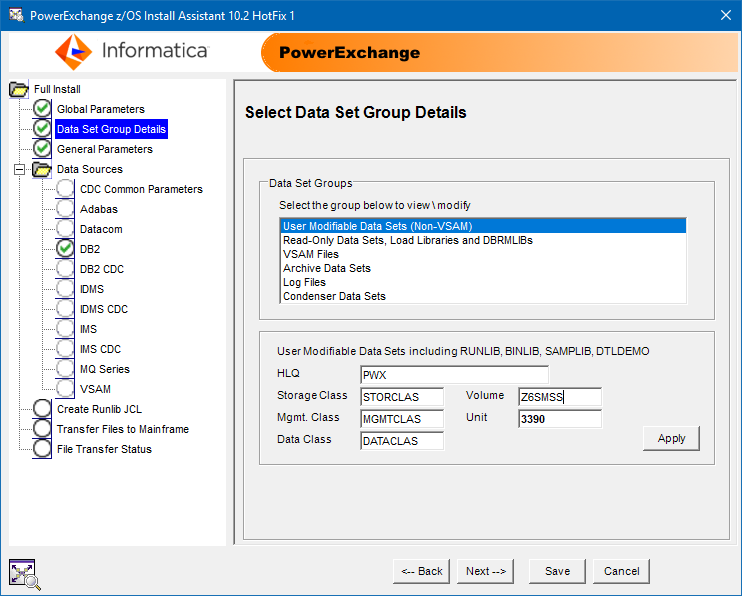
    The
    Select Data Set Group Details
    page appears and is populated with the information that you entered:
    On the Select Data Set Group Details page, enter group details for each data set group that you select.
  6. Enter the high-level qualifier (HLQ), volume, unit, and storage management subsystem (SMS) information for each data set group.
    For more information, see Select Data Set Group Details Page.
    Then, click
    Next
    .
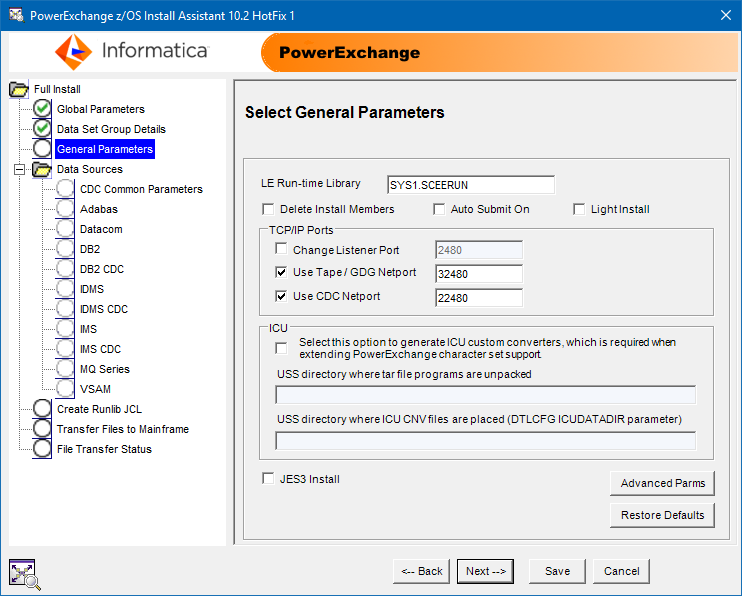
    The
    Select General Parameters
    page appears:
    On the Select General Parameters page, enter general parameters.
  7. Enter the general parameters.
    For more information, see General Parameters Page.
    Then, click
    Next
    .
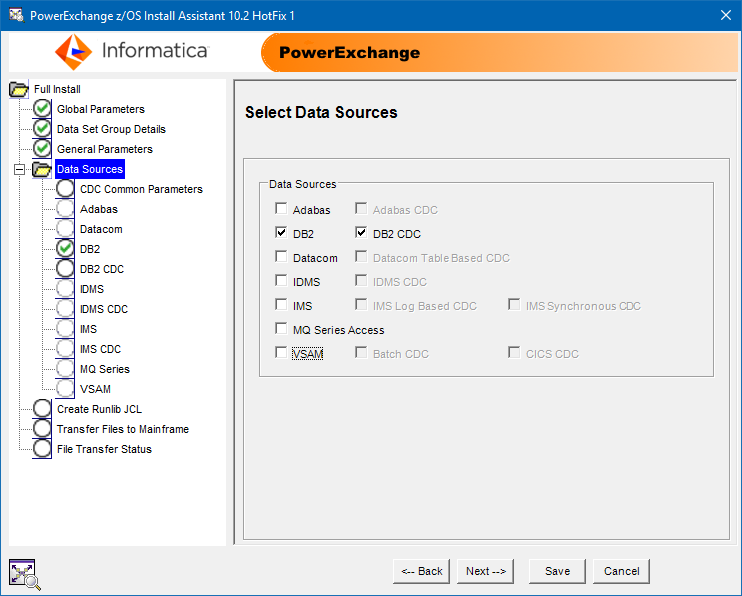
    The
    Select Data Sources
    page appears:
    On the Select Data Sources page, select the data sources for bulk data movement and change data capture.
  8. Select one or more data sources for bulk data movement and CDC operations.
    To select a CDC data source, first select the data source type for bulk data movement to the left.
    For more information, see Data Sources Page.
    Then, click
    Next
    .
    If you selected a CDC data source, the
    Select CDC Common Parameters
    page appears.
  9. Enter common parameters for CDC operations.
    For more information, see CDC Common Parameters Page.
    Then, click
    Next
    .
  10. Enter parameter settings for each data source that you selected on the
    Data Sources
    page.
    The following table lists the parameters page for each data source type:
    Page
    Reference
    Adabas Parameters
    Datacom Parameters
    DB2 Parameters
    DB2 CDC Parameters
    IDMS Parameters
    IDMS CDC Parameters
    IMS Parameters
    IMS CDC Parameters
    MQ Series Parameters
    VSAM Parameters
    If you selected multiple data source types, click
    Next
    to proceed to the next page.
    When you click
    Next
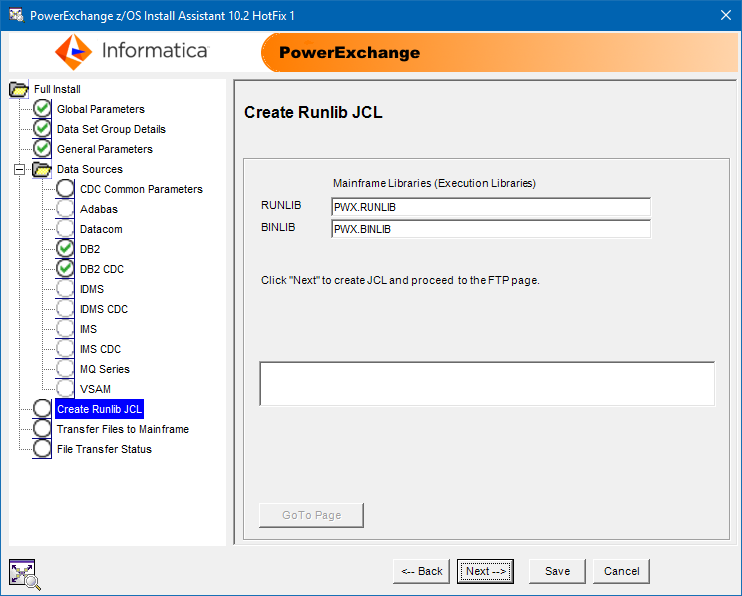
    on the last parameters page, the
    Create Runlib JCL
    page appears:
    On the Create RUNLIB JCL Page, enter information about the BINLIB and RUNLIB libraries.
  11. Enter information about the RUNLIB and BINLIB libraries.
    For more information, see Create Runlib JCL Page.
    Then, click
    Next
    .
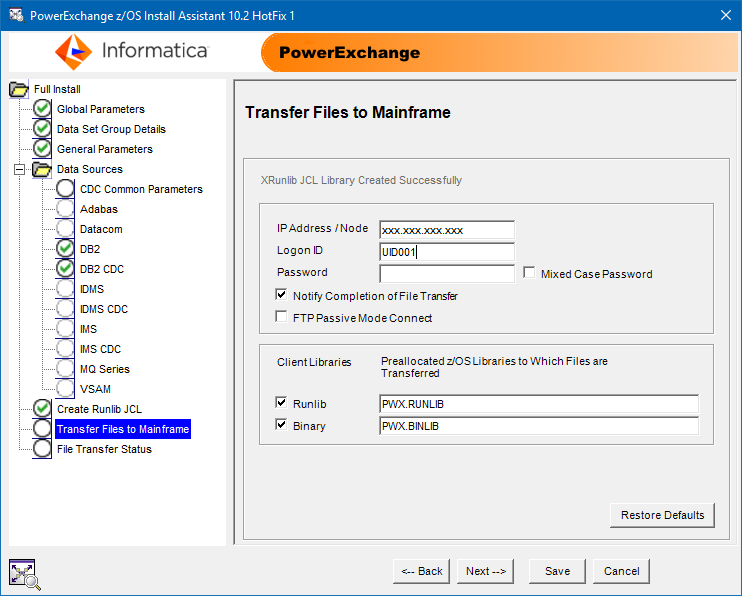
    The
    Transfer Files to Mainframe
    page appears:
    On the Transfer Files to Mainframe page, enter information about the z/OS system to which to transfer files.
    Also, the z/OS Installation Assistant creates the XRunlib folder. This folder contains the files from the runlib folder. The z/OS Installation Assistant customizes these files with the values that you entered.
  12. On the
    Transfer Files to Mainframe
    page, enter information about the z/OS system to which to transfer files.
    For more information, see Transfer Files to Mainframe Page.
    Then, click
    Next
    .
    The
    View File Transfer Status
    page displays the status of the file transfer operation. For more information, see View File Transfer Status Page.
  13. After the file transfer completes, click
    OK
    .
    If the file transfer fails for any reason, you can use FTP locally to manually transfer the files to members in the pre-allocated BINLIB and RUNLIB data sets on z/OS. See Manually Transferring Installer-Generated Files to the BINLIB and RUNLIB Members on z/OS.
  14. Click
    Finish
    .
    The z/OS Installation Assistant saves your installation entries to the InstParm file in the root installation directory on Windows if you have not already done so. The z/OS Installation Assistant also creates a corresponding INPARM
    nn
    file in the XRunlib directory on Windows and uses FTP to transfer this file to the RUNLIB library on z/OS. The INPARM
    nn
    member in the RUNLIB that has the largest
    nn
    value is the most recent version of the member.

0 COMMENTS

We’d like to hear from you!