Table of Contents

Search

  1. Preface
  2. Introduction
  3. Configuring the Data Director Application
  4. Establishing a Root Node
  5. Defining the Business Entity Model
  6. Configuring Business Entity Properties
  7. Configuring Reference Entity Properties
  8. Transforming Business Entities and Views
  9. Managing Many-to-Many Relationships
  10. Configuring Search
  11. Configuring Workflow Tasks and Triggers
  12. Configuring Security and Data Filters for Business Entities
  13. Integrating Data as a Service
  14. Configuring External Calls
  15. Designing the Data Director User Interface
  16. Localizing Data Director
  17. Provisioning Tool Frequently Asked Questions

Localizing Lookup Tables

Localizing Lookup Tables

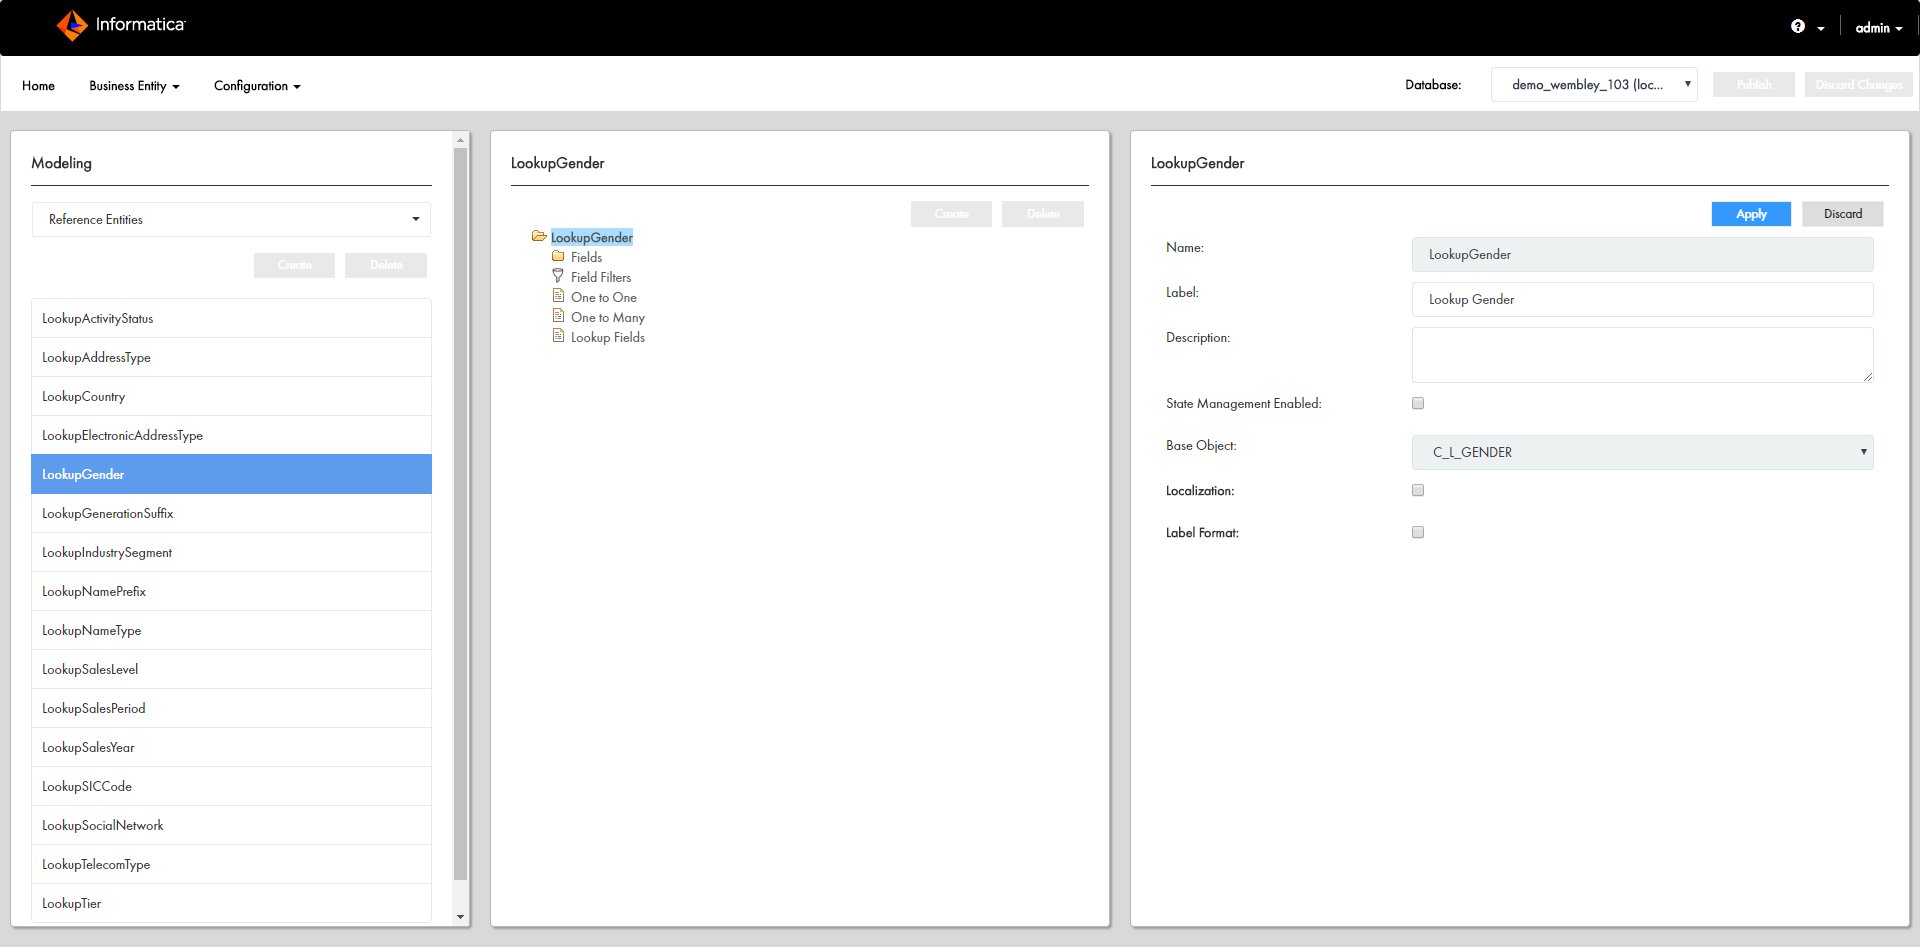
All lookup tables support localization. To localize lookup tables, you must map the lookup table to the corresponding lookup localization table. For example, to localize a list of gender codes, map the LookupGender lookup table to the LookupGender lookup localization table.
  1. In the Provisioning tool, click
    Business Entity
    Modelling.
    The
    Modelling
    page appears.
  2. From the
    Modeling
    panel, select
    Reference Entities
    , and select a lookup entity reference to localize.
    For this example, select
    LookupGender.
  3. In the properties panel, select
    C_L_GENDER
    from the
    Base Object
    list.
  4. Select the
    Localization
    checkbox.
    Additional database properties and values appear based on your database table setup. The following table contains example column names from the C_LOOKUP_GENDER_LCL base object tables:
    Properties
    Values
    Base Object
    C_LOOKUP_GENDER_LCL
    Key Column
    GENDER_CODE
    Country Column
    COUNTRY_CODE
    Language Column
    LANGUAGE_CODE
    Value Column
    LOCALIZED_STRING
    When you localize lookup tables, do not configure the same table column as key and value columns. The lookup key value column displays the localized value.
  5. Click
    Apply
    to localize the LookupGender entity.
  6. Click
    Publish.
  7. Review the changes and click
    Confirm.

0 COMMENTS

We’d like to hear from you!