Table of Contents

Search

  1. Preface
  2. Fast Clone Overview
  3. Configuring and Using the Fast Clone Server
  4. Creating Cloning Configuration Files in the Fast Clone Console
  5. Unloading Data from the Source Database
  6. Loading Data to a Target
  7. Remote Configuration Management
  8. Fast Clone Command Line Interface
  9. Troubleshooting
  10. Fast Clone Configuration File Parameters
  11. Glossary

User Guide

User Guide

Specifying a Custom Format for a Source Column

Specifying a Custom Format for a Source Column

You can customize the date and timestamp formats that Fast Clone uses to unload data from source DATE and TIMESTAMP columns. You can also change the precision for NUMBER columns, add padding, and replace null values with another value.
  1. On the
    Source Columns
    tab, select a table for which to customize the column format.
    All of the table columns appear in the
    Table Columns
    area.
  2. Click a source column row for which to customize formatting, and then click the button in the
    Custom Formatting
    column.
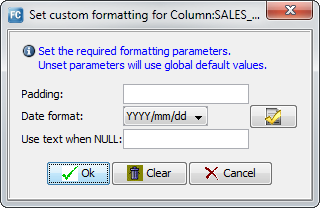
    The
    Set custom formatting for Column:'column_name'
    dialog box appears, as shown in the following image:
    The fields that appear in this dialog box vary depending on the column datatype.
  3. If the selected column is a DATE or TIMESTAMP column, optionally define a custom date or timestamp format that overrides the format that is specified on the
    Runtime Settings
    tab >
    Format Settings
    view. To define a custom date or timestamp format, complete the following steps:
    1. Click the button next to the
      Date format
      or
      Timestamp format
      field.
      Alternatively, on the menu bar, click
      Data
      Manage Custom Formats
      and select
      Custom Date Formats
      or
      Custom Timestamp Formats
      .
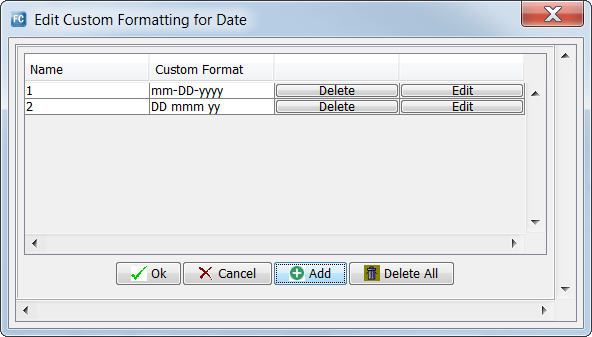
      The
      Edit Custom Formatting for Date
      or
      Edit Custom Formatting for Timestamp
      dialog box appears, as shown in the following image:
    2. Click
      Add
      to add a custom date or timestamp format.
      To edit a previously defined format, click
      Edit
      on the custom format row. To delete previously defined format, click
      Delete
      on the custom format row.
    3. Enter a custom date or timestamp format and click
      Save
      .
      The
      Set custom formatting for Column:'column_name'
      dialog box appears. To use the new custom format, select it in the
      Date format
      or
      Timestamp format
      field. These values override formats that you defined on the
      Runtime Settings
      tab >
      Format Settings
      view.
  4. Enter other custom format settings for the selected column.
    The following table describes the other fields that might be available depending on the column datatype:
    Field
    Description
    Padding
    The amount of padding to use for the column data.
    Number precision
    The precision to use for numeric data. This field is available only for columns with the NUMBER datatype.
    This precision overrides the precision that you defined in the
    Truncate numeric precision integer
    field on the
    Runtime Settings
    tab >
    Format Settings
    view.
    Use text when NULL
    A value that replaces null values in the column.
    If you specify this value, to generate valid output files, you must clear the
    Suppress trailing null columns
    option on the
    Runtime Settings
    tab >
    Format Settings
    view.
    To remove all custom format settings, click
    Clear
    .
  5. Click
    OK
    .

0 COMMENTS

We’d like to hear from you!