. Select a variable if no input preparation is desired via an assign activity. Select an existing process variable or select New Variable. The variable must be of the operation's input message type, or, if the operation requires only one part, the variable's type can be the element type of the one part.
XPaths
. Select XPaths if you want to use a table to map from data within existing variables or a literal to the contents of the input message. The table uses XPath expressions that allow you to select nodes from a variable to assign to the input variable as well as compute values (strings, numbers, or Boolean values) from the content of variable. See
Adding XPaths
below.
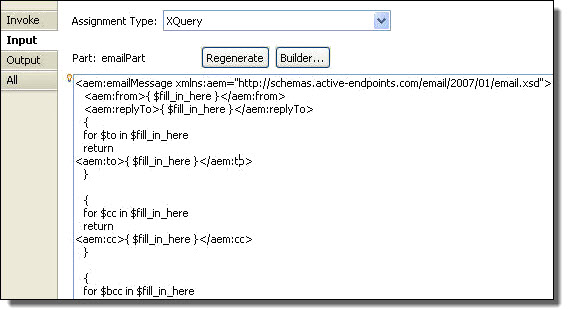
XQuery
. Select XQuery if you want to fill each input message part with a single query written in the XQuery expression language. This language allows you to create a query that looks like an XML document, but where pieces of the document are constructed using a superset of the XPath expression syntax. It supplements XPath with a SQL-like "FLWOR expression" (FOR, LET, WHERE, ORDER BY, and RETURN) for performing joins. See
If you want to use Javascript to prepare some or all of an input message, create an assign activity instead of using the Input tab. Each copy operation in an assign can use a different expression language.
Adding XPaths
In the table, select
Add
to populate the b
column.
In the To Path column, select the child node of the part, if needed.
In the E/L column, select the From type: Expression or Literal.
In the From column, select the
Dialog (...) Button
at the end of the table cell. For a literal, select
Generate
and notice that the literal XML document is generated for you based on the type needed for the chosen To Part and To Path. To add an expression, fill in the Expression text box. For a shortcut, see
Using Content Assist.
, select a variable that can have attachments that you want to copy to or from. Note that you must copy all attachments. If you want only some attachments, you can add an Assign activity before the activity. See
Adding an Attachment for details.
 ASK INFAPreview